Red Velvet Cheesecake Layer Recipe
Introduction
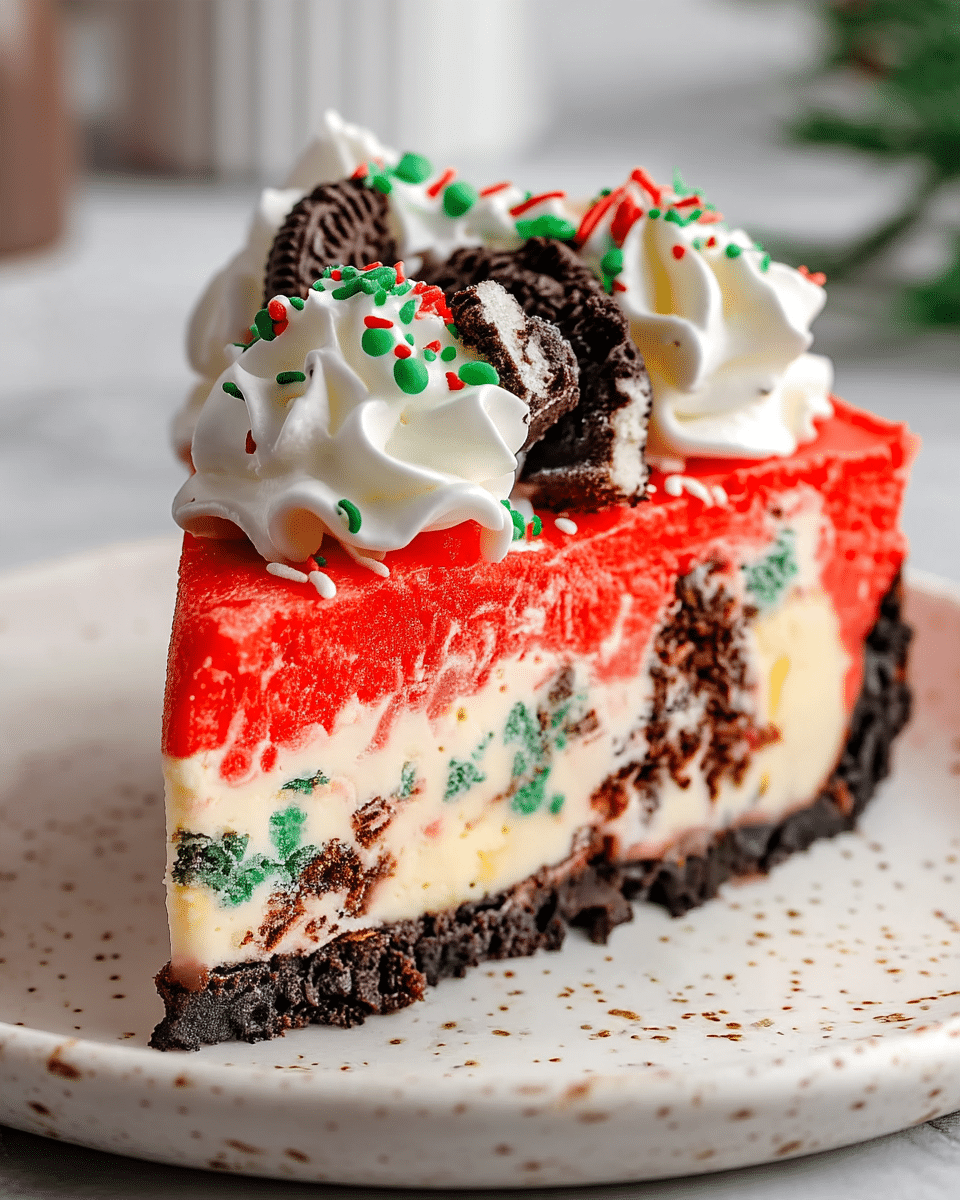
Indulge in the decadent fusion of classic red velvet cake and creamy cheesecake with this Red Velvet Cheesecake Layer. This dessert combines moist layers of vibrant red cake with a rich, smooth cheesecake filling, perfect for special occasions or treating yourself anytime.
Ingredients
- 2 1/4 cups all-purpose flour
- 1 1/2 teaspoons baking soda
- Pinch of salt
- 1 cup buttermilk
- 2 large eggs, room temperature
- 1 tablespoon distilled white vinegar
- 1 teaspoon vanilla extract
- 2 tablespoons unsweetened cocoa powder
- 2 tablespoons red food coloring
- 12 tablespoons unsalted butter, softened
- 1 1/2 cups granulated sugar
- 1 1/2 teaspoons unflavored gelatin
- 1 1/2 cups heavy cream
- 6 ounces white chocolate, chopped
- 1 pound full-fat cream cheese, softened
- 1/2 cup granulated sugar
- 1 tablespoon lemon juice
- 8 tablespoons unsalted butter, softened
- 2 cups powdered sugar
- 8 ounces full-fat cream cheese, softened and cut into 4 pieces
- 3/4 teaspoon vanilla extract
- Pinch of salt
Instructions
- Step 1: Preheat oven to 350°F. Line two 9-inch round cake pans with parchment paper and grease and flour them or use a nonstick cooking spray containing flour.
- Step 2: In a bowl, whisk together the flour, baking soda, and salt until combined.
- Step 3: In a separate liquid measuring cup, whisk together the buttermilk, eggs, white vinegar, and vanilla extract.
- Step 4: In a small bowl, mix together the cocoa powder and red food coloring until it forms a smooth paste.
- Step 5: Using a stand mixer with the paddle attachment, beat the softened butter and granulated sugar on medium-high speed until pale and fluffy, about 3–4 minutes.
- Step 6: Lower the mixer speed to low and add the flour mixture in thirds, alternating with the buttermilk mixture. Scrape the bowl as needed. Add the cocoa paste and beat on medium for about 30 seconds, then gently fold by hand to avoid overmixing.
- Step 7: Divide the batter evenly between the prepared pans and smooth the tops with a rubber spatula. Bake for 25 minutes, rotating pans halfway through. A toothpick inserted in the center should come out clean.
- Step 8: Cool cakes in pans on a wire rack for 10 minutes, then remove from pans and cool completely, about 2 hours.
- Step 9: Level the tops of the cakes with a serrated knife. Crumble the leveled cake tops into small crumbs and reserve for decoration.
- Step 10: Sprinkle gelatin over ½ cup heavy cream in a small saucepan and let sit for 5 minutes. Heat over low until edges bubble. Add white chocolate and stir until melted and smooth. Cool for 15 minutes.
- Step 11: Whip the remaining 1 cup heavy cream on medium-high speed until stiff peaks form. Set aside.
- Step 12: In a clean bowl with the paddle attachment, beat 1 pound cream cheese and ½ cup granulated sugar on medium-high speed for 3 minutes until light and fluffy, scraping sides occasionally.
- Step 13: Reduce mixer speed to medium-low. Add lemon juice and the cooled white chocolate-gelatin mixture, mixing until combined.
- Step 14: Gently fold the whipped cream into the cream cheese mixture with a rubber spatula until smooth and fully incorporated.
- Step 15: Place one cake round (cut side up) in a parchment-lined 9-inch springform pan. Spread the cheesecake filling evenly over it and smooth the top. Top with the second cake round, cut side down. Cover with plastic wrap and refrigerate until firm, about 6 hours.
- Step 16: For the frosting, beat 8 tablespoons softened butter and powdered sugar on medium-high speed until fluffy, about 2 minutes. Add the 8 ounces softened cream cheese one piece at a time, beating until smooth. Beat in vanilla extract and a pinch of salt.
- Step 17: Run a thin knife around the edge of the cheesecake to loosen it from the springform pan. Remove the pan and place the cake on a serving plate.
- Step 18: Reserve about ½ cup of the frosting. Use the rest to apply a thin crumb coat over the cake’s sides and top. Freeze for 30 minutes to set the crumb coat.
- Step 19: Apply the remaining frosting evenly over the cake. Press the reserved cake crumbs gently onto the sides for decoration.
Tips & Variations
- Use full-fat cream cheese and heavy cream for the richest texture and flavor.
- For a more intense red color, add an extra tablespoon of red food coloring.
- Chill the cake thoroughly before frosting to make spreading easier and cleaner.
- Substitute white chocolate with cream cheese for a more traditional cheesecake flavor in the filling.
Storage
Store the cake covered in the refrigerator for up to 4 days. Keep it in an airtight container or wrapped with plastic wrap to prevent drying. When ready to serve, let sit at room temperature for 20–30 minutes to soften slightly. Leftover cake can be frozen for up to 1 month; thaw overnight in the refrigerator before serving.
How to Serve
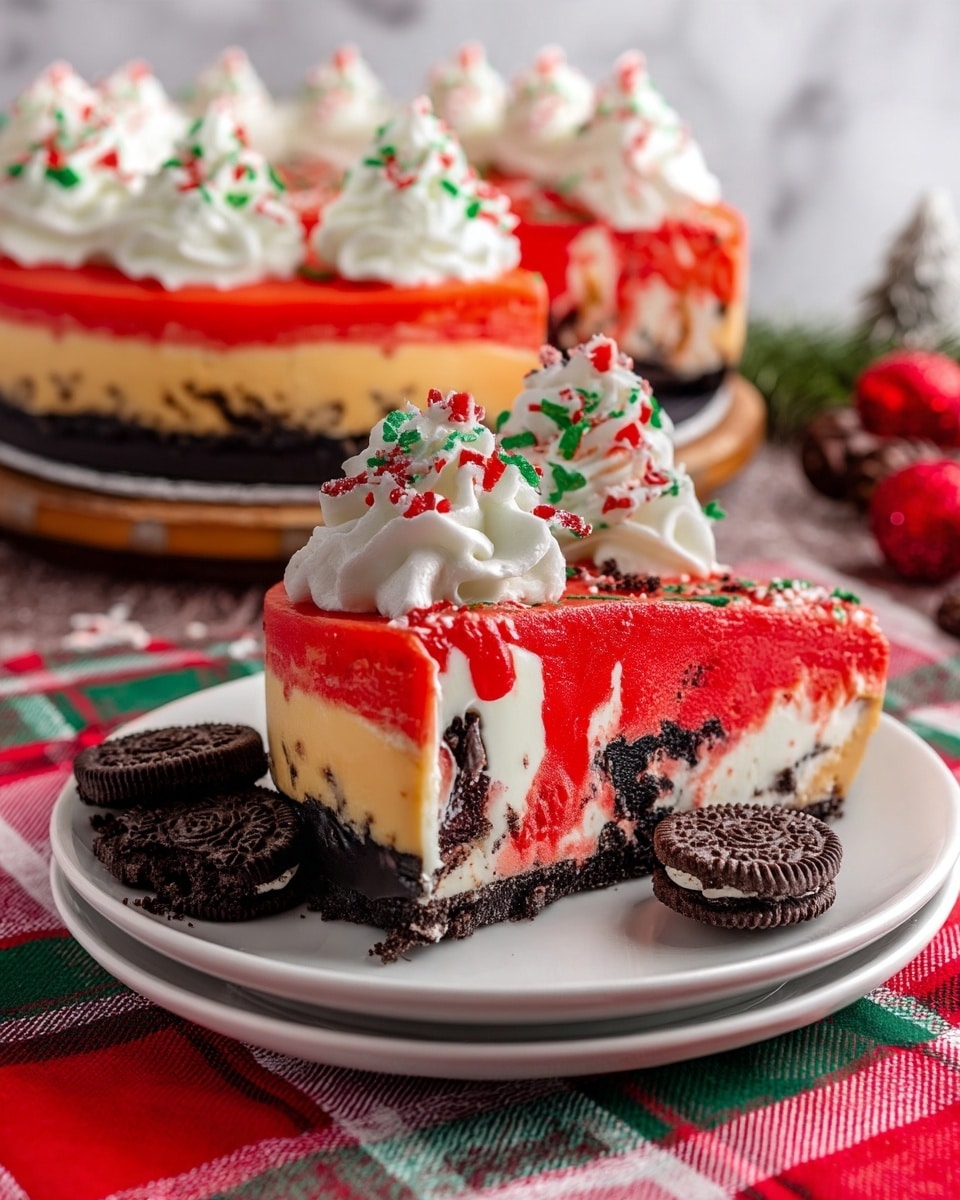
Serve this delicious recipe with your favorite sides.
FAQs
Can I make the cake layers in advance?
Yes, you can bake the cake layers up to 2 days ahead. Wrap them tightly in plastic wrap and store at room temperature or refrigerate. Allow them to come to room temperature before assembling.
What if I don’t have buttermilk?
You can make a buttermilk substitute by adding 1 tablespoon of lemon juice or white vinegar to 1 cup of milk. Let it sit for 5 minutes before using.
PrintRed Velvet Cheesecake Layer Recipe
This Red Velvet Cheesecake Layer recipe combines the rich, velvety texture of classic red velvet cake with a smooth, creamy cheesecake filling. Featuring a balanced blend of cocoa, vibrant red food coloring, and a luscious white chocolate-infused cheesecake layer, this dessert is perfect for special occasions. The cake layers are baked to perfection, topped with a creamy cream cheese frosting, and decorated with cake crumbs for an elegant finish.
- Prep Time: 40 minutes
- Cook Time: 25 minutes
- Total Time: 7 hours 5 minutes
- Yield: 12 servings 1x
- Category: Dessert
- Method: Baking
- Cuisine: American
- Diet: Vegetarian
Ingredients
For the Cake:
- 2 1/4 cups all-purpose flour
- 1 1/2 teaspoons baking soda
- Pinch of salt
- 1 cup buttermilk
- 2 large eggs, room temperature
- 1 tablespoon distilled white vinegar
- 1 teaspoon vanilla extract
- 2 tablespoons unsweetened cocoa powder
- 2 tablespoons red food coloring
- 12 tablespoons unsalted butter, softened
- 1 1/2 cups granulated sugar
For the Cheesecake Filling:
- 1 1/2 teaspoons unflavored gelatin
- 1 1/2 cups heavy cream, divided (½ cup + 1 cup)
- 6 ounces white chocolate, chopped
- 1 pound full-fat cream cheese, softened
- 1/2 cup granulated sugar
- 1 tablespoon lemon juice
For the Frosting:
- 8 tablespoons unsalted butter, softened
- 2 cups powdered sugar
- 8 ounces full-fat cream cheese, softened and cut into 4 pieces
- 3/4 teaspoon vanilla extract
- Pinch of salt
Instructions
- Prepare Cake Pans and Preheat Oven: Preheat your oven to 350°F (175°C). Line two 9-inch round cake pans with parchment paper and spray them with a nonstick cooking spray that contains flour, or alternatively, grease and flour the pans to ensure the cakes do not stick.
- Mix Dry Ingredients: In a medium bowl, whisk together the all-purpose flour, baking soda, and a pinch of salt until well combined to ensure even distribution of the leavening agent.
- Mix Wet Ingredients: In a separate 2-cup liquid measuring cup, combine the buttermilk, room temperature eggs, distilled white vinegar, and vanilla extract, whisking until fully blended.
- Prepare Cocoa and Food Coloring Paste: In a small bowl, mix the unsweetened cocoa powder with the red food coloring until a smooth, uniform paste forms. This enhances the red velvet color while adding subtle chocolate flavor.
- Cream Butter and Sugar: Using a stand mixer fitted with the paddle attachment, beat the softened butter and granulated sugar on medium-high speed until the mixture becomes pale and fluffy, about 3 to 4 minutes. This step incorporates air to create a light texture in the cake.
- Combine Ingredients into Batter: Lower the mixer speed to low and alternately add the flour mixture in thirds with the buttermilk mixture, starting and ending with the flour mixture. Scrape the bowl as needed to ensure even mixing. Add the cocoa and food coloring paste and beat on medium speed just until incorporated, about 30 seconds. Finish by gently folding the batter by hand to avoid overmixing and develop a tender crumb.
- Bake Cakes: Divide the batter evenly between the two prepared pans. Smooth the tops with a rubber spatula for even baking. Bake for approximately 25 minutes or until a toothpick inserted into the center comes out clean. Rotate the pans halfway through baking for even heat distribution. Cool the cakes in their pans on a wire rack for 10 minutes, then remove them from the pans to cool completely on the rack for about 2 hours.
- Level and Crumble Cake Tops: Once completely cooled, use a serrated knife to level the tops of the cakes to ensure they stack evenly. Crumble the trimmed cake tops into small crumbs using your fingers and store these in an airtight container for decorating later.
- Prepare Gelatin and White Chocolate Mixture: Sprinkle the unflavored gelatin over ½ cup of heavy cream in a small saucepan. Let it sit for 5 minutes to bloom the gelatin. Heat the mixture over low heat until bubbles appear on the edges. Remove from heat, add the chopped white chocolate, and stir continuously until the chocolate melts smoothly. Set aside to cool for 15 minutes.
- Whip Heavy Cream: Using a stand mixer with a whisk attachment, whip the remaining 1 cup of heavy cream on medium-high speed until stiff peaks form. Transfer the whipped cream to a separate bowl and set aside for folding into the filling.
- Beat Cream Cheese and Sugar: In a clean mixing bowl fitted with the paddle attachment, beat the pound of softened cream cheese and ½ cup granulated sugar on medium-high speed for 3 minutes until the mixture is light and fluffy. Scrape the sides occasionally to ensure even mixing.
- Incorporate Lemon Juice and White Chocolate Mixture: Reduce the mixer speed to medium-low. Add the lemon juice and the cooled white chocolate and gelatin mixture to the cream cheese base. Mix gently until just combined, scraping the bowl as needed to integrate all ingredients without overmixing.
- Fold in Whipped Cream: Using a rubber spatula, carefully fold the whipped cream into the cream cheese mixture until the filling is smooth and homogenous, taking care to preserve the airiness of the whipped cream.
- Assemble Cheesecake Layer: Place one cake round cut side up into a 9-inch springform pan lined with parchment paper. Spread the cheesecake filling evenly over the cake surface, smoothing the top with a spatula. Carefully place the second cake round on top, cut side down. Cover the pan with plastic wrap and refrigerate until firm, about 6 hours or overnight for best results.
- Prepare Frosting: In a mixing bowl, beat the softened butter and powdered sugar on medium-high speed until light and fluffy, about 2 minutes. Add the softened cream cheese pieces one at a time, beating each until incorporated. Finally, mix in the vanilla extract and a pinch of salt for flavor balance.
- Remove Cheesecake from Pan: Run a thin knife around the edge of the springform pan to loosen the cake. Carefully remove the pan sides and transfer the cheesecake to a serving plate or cake stand.
- Apply Crumb Coat: Reserve about ½ cup of the frosting. Using the remaining frosting, apply a thin crumb coat around the sides and top of the cake to seal in crumbs. Freeze the cake for 30 minutes to allow the crumb coat to set firmly.
- Final Frosting and Decoration: Spread the reserved frosting evenly over the top and sides of the cake for a smooth finish. Press the reserved cake crumbs gently onto the sides of the cake as decoration, adding a textured and visually appealing touch.
Notes
- Room temperature ingredients yield better batter and frosting textures.
- Use high-quality cream cheese and butter for best flavor and creaminess.
- Allow the cheesecake layer to refrigerate sufficiently to set for easy slicing.
- The reserved cake crumbs add a decorative finish and help incorporate leftover cake pieces.
- This cake is best served chilled but can be brought to room temperature before serving for softer texture.
Keywords: Red Velvet Cheesecake, Layer Cake, Cream Cheese Frosting, White Chocolate Cheesecake Filling, Festive Dessert