Lunch Box Cake Recipe
Introduction
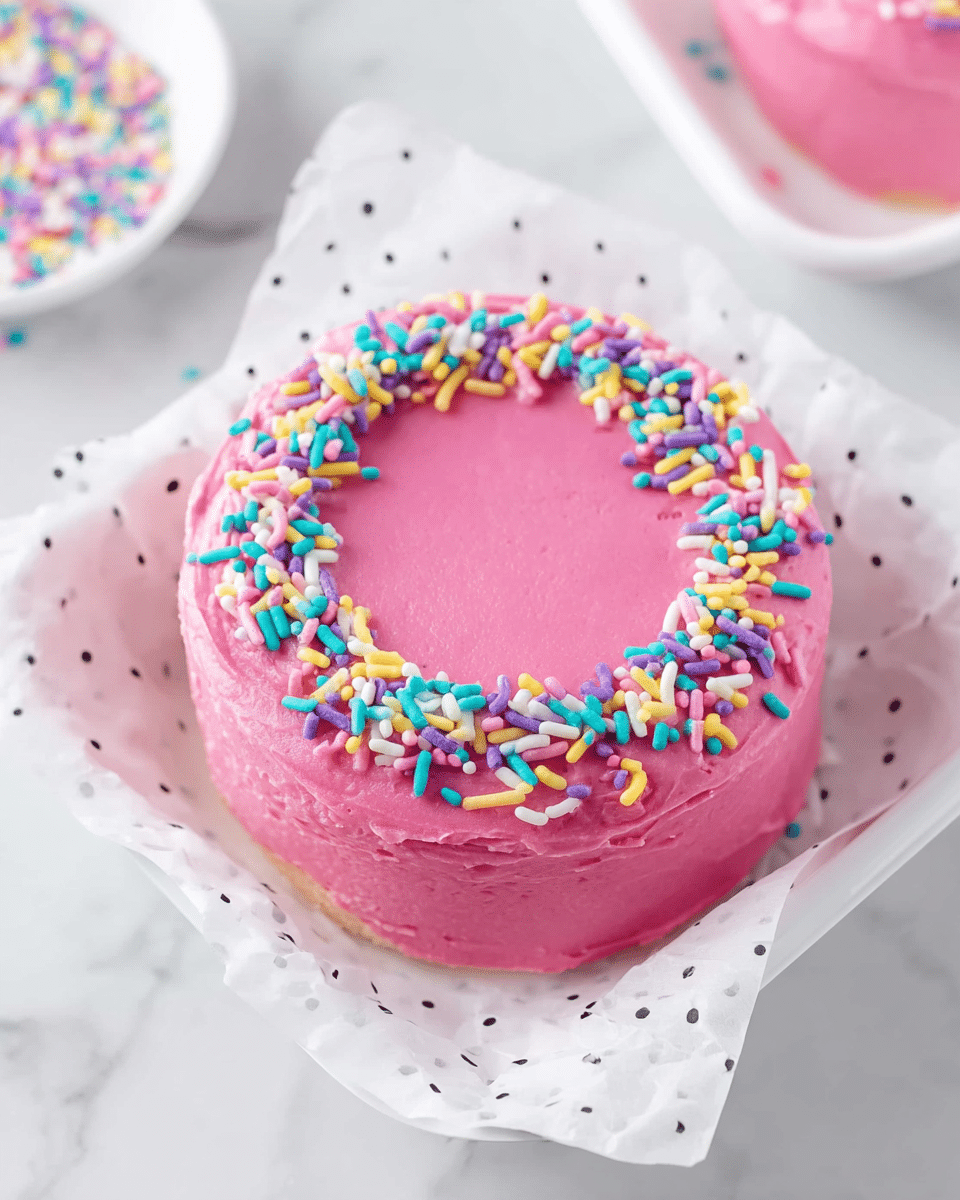
Lunch Box Cake is a fun, colorful dessert that’s perfect for portion-controlled treats or special occasions. Made from moist Devil’s Food cake layers and smooth, vibrant buttercream, these mini cakes are both delightful and easy to enjoy. With sprinkles on top, they bring a playful touch to any lunchbox or dessert table.
Ingredients
- 15 to 25 ounces Devil’s Food cake mix
- 1 cup water
- ½ cup vegetable oil
- 3 large eggs, room temperature
- 1½ cups salted sweet cream butter, softened
- 1 teaspoon clear vanilla flavoring
- ½ teaspoon almond extract
- 4 cups powdered sugar
- 2 to 3 tablespoons heavy cream
- 3 to 5 drops food color gel (e.g., fuchsia)
- Colorful sprinkles (optional garnish)
Instructions
- Step 1: Preheat the oven to 350°F. Line a half-sheet cake pan with parchment paper, then spray both the pan and parchment with nonstick cooking spray. Set aside.
- Step 2: In a medium bowl, combine the cake mix, water, vegetable oil, and eggs. Use a handheld mixer on medium speed to blend until well combined.
- Step 3: Spread the batter evenly in the prepared pan. Bake for 15-18 minutes, or until a toothpick inserted in the center comes out clean.
- Step 4: Run a knife gently around the edges of the pan to loosen the cake.
- Step 5: Spray a piece of parchment paper with nonstick spray and place it sprayed side down on top of the cake.
- Step 6: Place a cooling rack on top of the parchment. Carefully flip the whole setup so the cake rests on the rack. Remove the pan and parchment from the top. Let the cake cool completely.
- Step 7: Use a 3½-inch round cookie or biscuit cutter to cut 12 cake circles from the cooled cake.
- Step 8: In a stand mixer or large bowl, beat the softened butter, clear vanilla flavoring, and almond extract on medium-high speed for 1 to 1½ minutes until smooth.
- Step 9: Lower the mixer speed to low and add powdered sugar, one cup at a time, mixing well after each addition.
- Step 10: If the frosting is too stiff, add 2 to 3 tablespoons of heavy cream to reach desired consistency.
- Step 11: Increase mixer speed to medium-high and beat until the frosting is smooth and creamy.
- Step 12: Add food color gel and continue mixing until the color is even and streak-free.
- Step 13: Prepare a 4-inch square of parchment paper. Dab 1 teaspoon of buttercream in the center and place a cake circle on top.
- Step 14: Spread 1½ to 2 tablespoons of buttercream evenly over the cake circle using an offset spatula. Place another cake circle on top and spread 2 to 2½ tablespoons of buttercream over it.
- Step 15: Spread a thin crumb coat of buttercream over the sides of the layered cake. Repeat with remaining cake circles. Refrigerate the cakes for about 1 hour to firm the frosting.
- Step 16: Remove cakes from the refrigerator. Apply a thicker final layer of buttercream evenly over the tops and sides, smoothing as you go. Sprinkle colorful sprinkles over the cakes. Chill until ready to serve.
Tips & Variations
- For a bakery-style vanilla cake, substitute Devil’s Food mix with white or yellow cake mix.
- Use gel food coloring for vibrant hues without thinning the frosting.
- Try different extracts like lemon or peppermint to change the flavor profile of the buttercream.
- Make this a dairy-free treat by using vegan butter and plant-based milk for frosting adjustments.
- Add a layer of jam or fresh fruit between cake layers for extra flavor and texture.
Storage
Store the assembled Lunch Box Cakes in an airtight container in the refrigerator for up to 3 days. For best flavor, bring to room temperature before serving. They can also be frozen for up to 2 weeks; thaw overnight in the refrigerator and then bring to room temperature before eating.
How to Serve
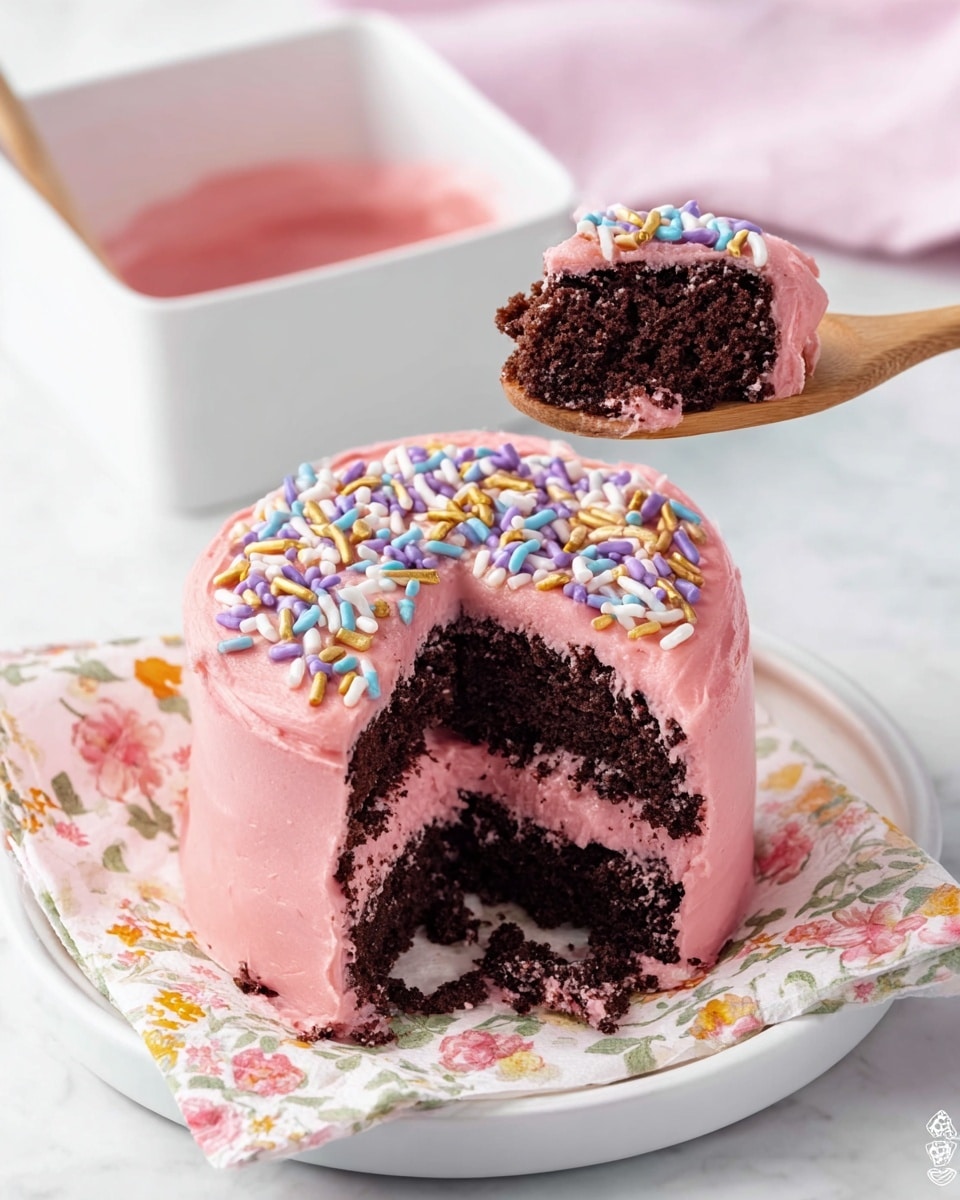
Serve this delicious recipe with your favorite sides.
FAQs
Can I use homemade cake instead of a cake mix?
Yes, homemade cake works well as long as it’s dense enough to hold its shape when cut. Devil’s Food or chocolate cake recipes that produce sturdy layers are best for assembly.
How do I prevent the frosting from being too runny or too stiff?
Adjust the consistency by adding small amounts of powdered sugar if too runny or a splash of heavy cream if too stiff. Beat thoroughly to ensure smooth, spreadable frosting.
PrintLunch Box Cake Recipe

Lunch Box Cake is a delightful mini layered cake made with Devil’s Food cake and a vibrant, smooth buttercream frosting. This recipe combines a moist chocolate cake base with a colorful, sweet buttercream, perfect for fun individual servings. The process involves baking a thin sheet cake, cutting it into small rounds, layering each with rich buttercream, and finishing with a crumb coat and a decorated final frosting layer, ideal for lunchbox treats or charming desserts.
- Prep Time: 20 minutes
- Cook Time: 18 minutes
- Total Time: 1 hour 40 minutes
- Yield: 12 mini layered cakes 1x
- Category: Dessert
- Method: Baking
- Cuisine: American
Ingredients
For the Cake
- 15 to 25 ounces Devil’s Food cake mix
- 1 cup water
- ½ cup vegetable oil
- 3 large eggs, room temperature
For the Buttercream Frosting
- 1½ cups salted sweet cream butter, softened
- 1 teaspoon clear vanilla flavoring
- ½ teaspoon almond extract
- 4 cups powdered sugar
- 2 to 3 tablespoons heavy cream
- 3 to 5 drops food color gel (fuchsia)
- Colorful sprinkles (optional garnish)
Instructions
- Preheat and Prepare Pan: Preheat the oven to 350°F. Line a ½ sheet cake pan with parchment paper and spray it with nonstick cooking spray. Set aside.
- Mix Cake Batter: In a medium bowl, combine the Devil’s Food cake mix, water, vegetable oil, and eggs. Use a handheld mixer on medium speed to blend ingredients until smooth and fully incorporated.
- Bake Cake: Spread the batter evenly into the prepared pan. Bake for 15-18 minutes or until a toothpick inserted into the center comes out clean.
- Release Cake from Pan: Run a knife gently around the edges to loosen the cake from the pan.
- Cool Cake Upside Down: Spray a piece of parchment paper with nonstick spray, place it sprayed side down on the cake. Place a cooling rack on top and carefully flip the whole setup so the cake is upside down on the rack. Allow to cool completely.
- Cut Cake Circles: Use a 3½-inch round cookie or biscuit cutter to cut 12 circles from the cooled cake.
- Make Buttercream Frosting: In a stand mixer or large bowl with a handheld mixer, beat softened butter, vanilla, and almond extract at medium-high speed for 1 to 1½ minutes until creamy.
- Add Powdered Sugar: Reduce mixer speed to low, and gradually add powdered sugar one cup at a time, mixing well after each addition.
- Adjust Consistency: Add 2 to 3 tablespoons of heavy cream if frosting is too stiff, then mix at medium-high speed until smooth.
- Color Buttercream: Mix in food color gel until the frosting is evenly colored with no streaks.
- Prepare Assembly Parchment: Cut parchment paper into 4-inch squares. Add 1 teaspoon of buttercream to center of each square.
- Layer Cakes: Place one cake circle on top of the buttercream on parchment. Spread 1½ to 2 tablespoons of buttercream evenly to the edges. Place a second cake circle on top and spread 2 to 2½ tablespoons of buttercream over it.
- Apply Crumb Coat: Spread a thin layer of buttercream over the sides of the mini cakes to seal in crumbs.
- Chill Cakes: Place the cakes in the refrigerator for about 1 hour to allow the crumb coat to firm up.
- Final Frosting Layer: Remove cakes from refrigerator and spread a thicker, smooth layer of buttercream over the top and sides using an offset spatula.
- Decorate and Chill: Add colorful sprinkles to the frosted cakes. Chill in the refrigerator until ready to serve.
Notes
- Room temperature eggs help ensure a smooth batter and even baking.
- Using a cooling rack upside down to cool cake prevents condensation and keeps the cake surface smooth for cutting.
- The crumb coat helps to trap cake crumbs, allowing for a neat final layer of frosting.
- Heavy cream in the frosting adjusts consistency for easier spreading.
- Food color gel is preferred over liquid coloring to avoid thinning the frosting.
- Chill cakes thoroughly for cleaner frosting application and better structure.
- Optionally garnish with colorful sprinkles for a fun appearance.
Keywords: Lunch Box Cake, Mini Layered Cake, Devil’s Food Cake, Buttercream Frosting, Individual Cakes, Fun Dessert