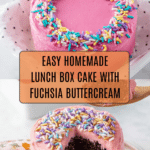
Lunch Box Cake Recipe

Lunch Box Cake is a delightful mini layered cake made with Devil’s Food cake and a vibrant, smooth buttercream frosting. This recipe combines a moist chocolate cake base with a colorful, sweet buttercream, perfect for fun individual servings. The process involves baking a thin sheet cake, cutting it into small rounds, layering each with rich buttercream, and finishing with a crumb coat and a decorated final frosting layer, ideal for lunchbox treats or charming desserts.
- Prep Time: 20 minutes
- Cook Time: 18 minutes
- Total Time: 1 hour 40 minutes
- Yield: 12 mini layered cakes 1x
- Category: Dessert
- Method: Baking
- Cuisine: American
Ingredients
Scale
For the Cake
- 15 to 25 ounces Devil’s Food cake mix
- 1 cup water
- ½ cup vegetable oil
- 3 large eggs, room temperature
For the Buttercream Frosting
- 1½ cups salted sweet cream butter, softened
- 1 teaspoon clear vanilla flavoring
- ½ teaspoon almond extract
- 4 cups powdered sugar
- 2 to 3 tablespoons heavy cream
- 3 to 5 drops food color gel (fuchsia)
- Colorful sprinkles (optional garnish)
Instructions
- Preheat and Prepare Pan: Preheat the oven to 350°F. Line a ½ sheet cake pan with parchment paper and spray it with nonstick cooking spray. Set aside.
- Mix Cake Batter: In a medium bowl, combine the Devil’s Food cake mix, water, vegetable oil, and eggs. Use a handheld mixer on medium speed to blend ingredients until smooth and fully incorporated.
- Bake Cake: Spread the batter evenly into the prepared pan. Bake for 15-18 minutes or until a toothpick inserted into the center comes out clean.
- Release Cake from Pan: Run a knife gently around the edges to loosen the cake from the pan.
- Cool Cake Upside Down: Spray a piece of parchment paper with nonstick spray, place it sprayed side down on the cake. Place a cooling rack on top and carefully flip the whole setup so the cake is upside down on the rack. Allow to cool completely.
- Cut Cake Circles: Use a 3½-inch round cookie or biscuit cutter to cut 12 circles from the cooled cake.
- Make Buttercream Frosting: In a stand mixer or large bowl with a handheld mixer, beat softened butter, vanilla, and almond extract at medium-high speed for 1 to 1½ minutes until creamy.
- Add Powdered Sugar: Reduce mixer speed to low, and gradually add powdered sugar one cup at a time, mixing well after each addition.
- Adjust Consistency: Add 2 to 3 tablespoons of heavy cream if frosting is too stiff, then mix at medium-high speed until smooth.
- Color Buttercream: Mix in food color gel until the frosting is evenly colored with no streaks.
- Prepare Assembly Parchment: Cut parchment paper into 4-inch squares. Add 1 teaspoon of buttercream to center of each square.
- Layer Cakes: Place one cake circle on top of the buttercream on parchment. Spread 1½ to 2 tablespoons of buttercream evenly to the edges. Place a second cake circle on top and spread 2 to 2½ tablespoons of buttercream over it.
- Apply Crumb Coat: Spread a thin layer of buttercream over the sides of the mini cakes to seal in crumbs.
- Chill Cakes: Place the cakes in the refrigerator for about 1 hour to allow the crumb coat to firm up.
- Final Frosting Layer: Remove cakes from refrigerator and spread a thicker, smooth layer of buttercream over the top and sides using an offset spatula.
- Decorate and Chill: Add colorful sprinkles to the frosted cakes. Chill in the refrigerator until ready to serve.
Notes
- Room temperature eggs help ensure a smooth batter and even baking.
- Using a cooling rack upside down to cool cake prevents condensation and keeps the cake surface smooth for cutting.
- The crumb coat helps to trap cake crumbs, allowing for a neat final layer of frosting.
- Heavy cream in the frosting adjusts consistency for easier spreading.
- Food color gel is preferred over liquid coloring to avoid thinning the frosting.
- Chill cakes thoroughly for cleaner frosting application and better structure.
- Optionally garnish with colorful sprinkles for a fun appearance.
Keywords: Lunch Box Cake, Mini Layered Cake, Devil’s Food Cake, Buttercream Frosting, Individual Cakes, Fun Dessert
Find it online: https://thefoodrecipe.com/lunch-box-cake-recipe/