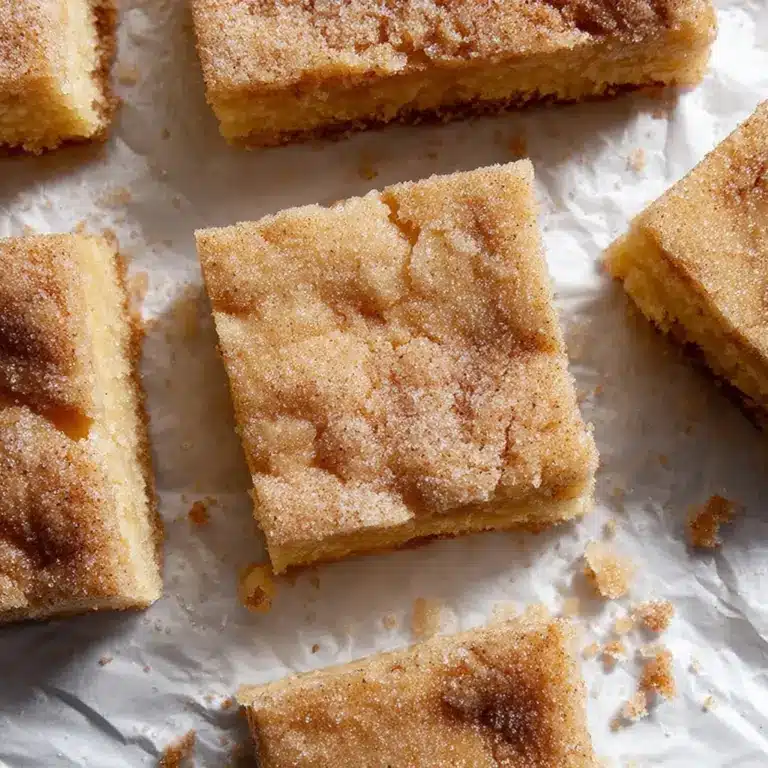
Tiramisu Brownies Recipe
Introduction
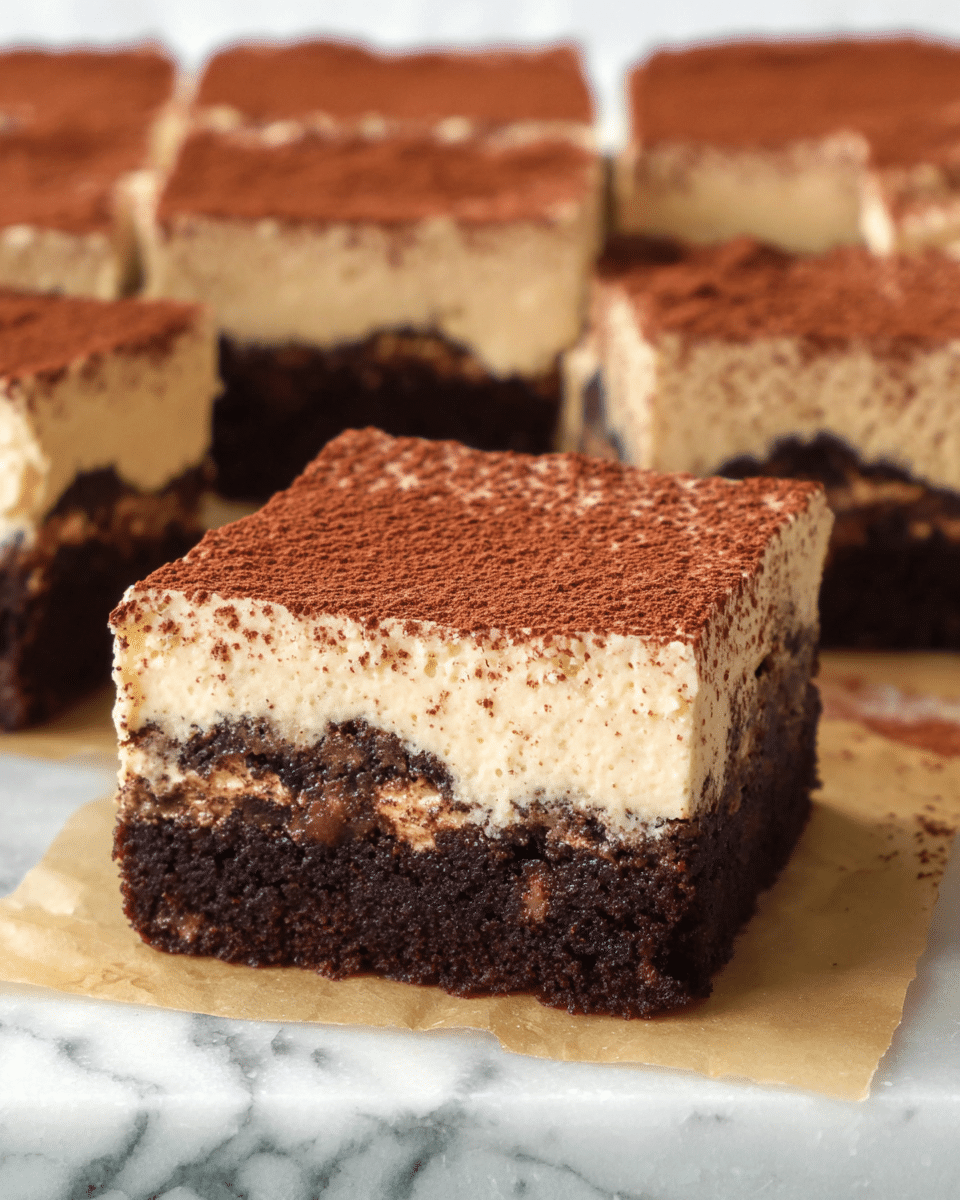
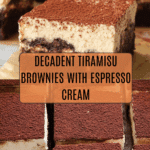
Tiramisu Brownies bring together the rich, chocolatey goodness of brownies with the creamy, coffee-infused flavors of classic tiramisu. This decadent dessert is easy to make and perfect for anyone who loves a twist on traditional treats.
Ingredients
- 113 g unsalted butter
- 200 g dark chocolate
- 100 g brown sugar
- 50 g granulated sugar
- 3 eggs
- 90 g all-purpose flour, sifted
- A pinch of salt
- ½ teaspoon vanilla extract
- 2 shots of espresso or instant coffee
Mascarpone Cream
- 250 g mascarpone cheese, room temperature
- 240 ml heavy cream
- 50 g sugar
- ¼ teaspoon salt
- ½ teaspoon vanilla extract
- 2 tablespoons espresso powder
- Cocoa powder for dusting
Instructions
- Step 1: Preheat the oven to 350°F (175°C). Line an 8 or 9-inch square baking tin with parchment paper.
- Step 2: Place the chopped dark chocolate and butter in a bowl. Microwave in 30-second intervals, stirring between sessions, until fully melted and smooth.
- Step 3: Stir the brown sugar and granulated sugar into the melted chocolate mixture until combined.
- Step 4: Add the vanilla extract, then add the eggs one at a time, whisking each in thoroughly before adding the next.
- Step 5: Sift the flour and salt into the mixture. Gently fold or whisk until every ingredient is just combined.
- Step 6: Pour the batter into the prepared baking tin and smooth the surface evenly. Bake for 25-30 minutes or until a toothpick inserted near the center comes out with a few moist crumbs.
- Step 7: Remove the brownies from the oven and, while still warm, poke holes across the surface using a skewer or fork. Pour the espresso shots evenly over the brownies and set aside to cool completely.
- Step 8: For the mascarpone cream, whisk together the mascarpone cheese, vanilla extract, and heavy cream for about 30 seconds until combined.
- Step 9: Add the espresso powder, sugar, and salt. Whisk vigorously for 2-3 minutes until stiff peaks form.
- Step 10: Spread the mascarpone cream evenly over the cooled brownies, smoothing the top with a spatula.
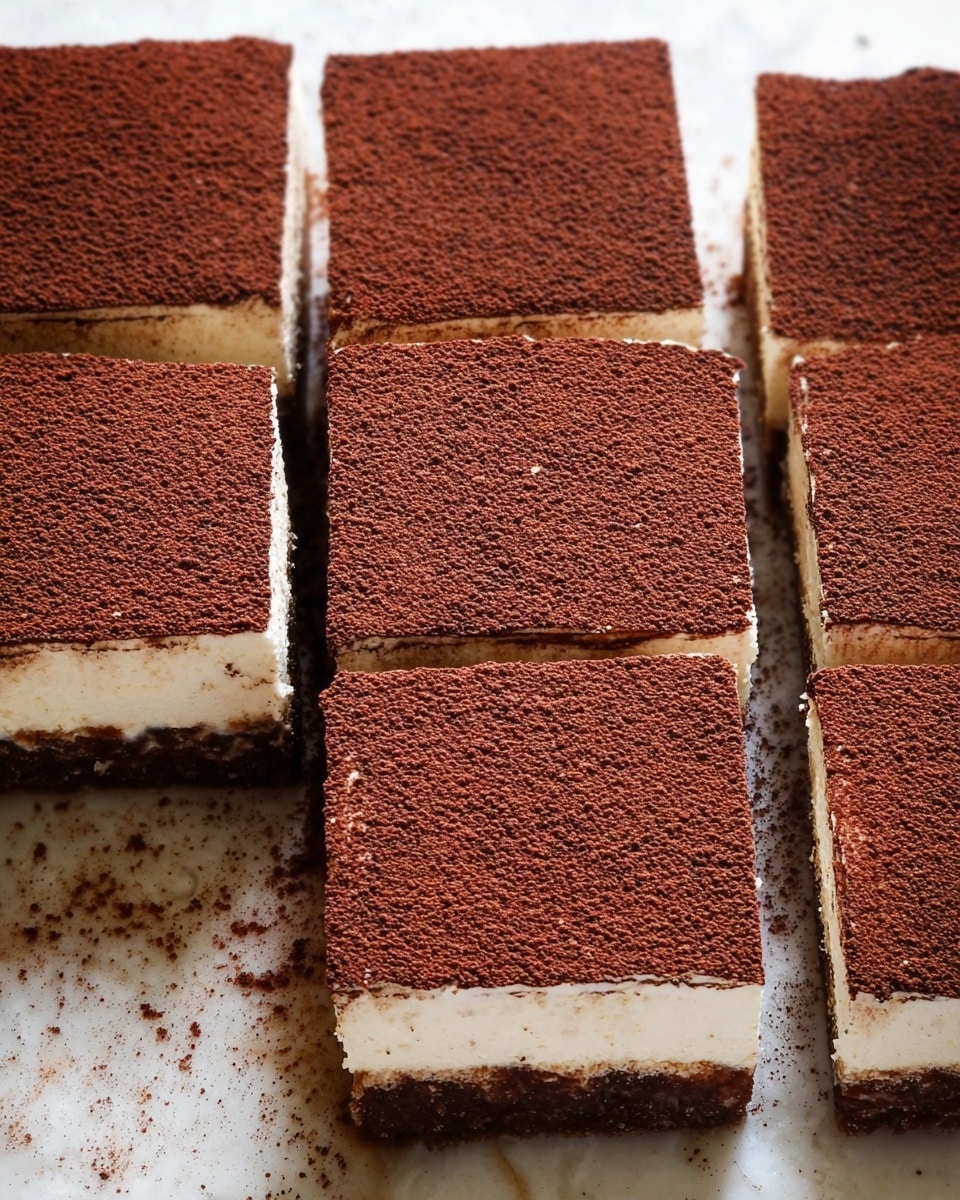
- Step 11: Dust the top with cocoa powder through a sieve for an even finish.
- Step 12: Carefully lift the brownies from the tin using the parchment paper, peel it away, cut the brownies into squares, and serve.
Tips & Variations
- Use freshly brewed espresso for the best coffee flavor, or dissolve instant espresso powder in a small amount of hot water if preferred.
- For added texture, sprinkle finely chopped dark chocolate or chocolate chips into the batter before baking.
- Make sure the mascarpone is at room temperature to avoid lumps in the cream topping.
- Dust the top with a mix of cocoa powder and finely grated dark chocolate for an extra rich finish.
- For a boozy version, add a tablespoon of coffee liqueur to the espresso before pouring over the brownies.
Storage
Store the tiramisu brownies covered in the refrigerator for up to 3 days to keep the mascarpone cream fresh. Before serving, you can let them sit at room temperature for 10-15 minutes to soften slightly. These brownies are best enjoyed fresh but can be frozen without the mascarpone topping for up to one month; thaw completely before adding the cream.
How to Serve
Serve this delicious recipe with your favorite sides.
FAQs
Can I use regular coffee instead of espresso?
While regular brewed coffee can work, espresso provides a more concentrated flavor that complements the richness of the brownies. If you only have regular coffee, use less liquid to avoid making the batter too wet.
Is it necessary to poke holes in the brownies before adding espresso?
Yes, poking holes allows the espresso to seep into the brownies, adding moistness and infusing that signature coffee flavor throughout the dessert.
PrintTiramisu Brownies Recipe
Delight in these rich and decadent Tiramisu Brownies, combining the intense flavors of dark chocolate and espresso with a luscious mascarpone cream topping. A perfect fusion of classic Italian tiramisu and fudgy brownies, ideal for coffee lovers and dessert enthusiasts alike.
- Prep Time: 20 minutes
- Cook Time: 30 minutes
- Total Time: 50 minutes
- Yield: 16 brownies 1x
- Category: Dessert
- Method: Baking
- Cuisine: Italian-American
- Diet: Vegetarian
Ingredients
Brownie Base
- 113 g unsalted butter
- 200 g dark chocolate, chopped
- 100 g brown sugar
- 50 g granulated sugar
- 3 eggs
- 90 g all-purpose flour, sifted
- A pinch of salt
- ½ teaspoon vanilla extract
- 2 shots of espresso or instant coffee
Mascarpone Cream
- 250 g mascarpone cheese, room temperature
- 240 ml heavy cream
- 50 g sugar
- ¼ teaspoon salt
- ½ teaspoon vanilla extract
- 2 tablespoons espresso powder
- Cocoa powder for dusting
Instructions
- Preheat and Prepare: Preheat your oven to 350°F (175°C). Line an 8 or 9-inch square baking tin with parchment paper to prevent the brownies from sticking and ensure even baking.
- Melt Chocolate and Butter: Combine the chopped dark chocolate and butter in a microwave-safe bowl. Microwave in 30-second intervals, stirring after each, until the mixture is completely melted and smooth.
- Add Sugars: Stir the brown sugar and granulated sugar into the melted chocolate and butter mixture until well combined.
- Incorporate Eggs and Vanilla: Add the vanilla extract, then add eggs one at a time, whisking each thoroughly into the mixture for a smooth batter.
- Add Dry Ingredients: Sift the all-purpose flour and a pinch of salt over the batter and gently fold or whisk until fully incorporated without overmixing.
- Bake the Brownies: Pour the batter into the prepared baking tin and smooth the surface. Bake for 25-30 minutes or until a toothpick inserted into the center comes out with a few moist crumbs.
- Add Espresso: Once baked, immediately poke small holes in the brownies and pour the two shots of espresso evenly over them. Allow the brownies to cool completely, which lets the espresso soak in and infuse flavor.
- Prepare Mascarpone Cream: In a mixing bowl, whisk mascarpone cheese, vanilla extract, and heavy cream together for about 30 seconds to combine the ingredients smoothly.
- Whip Mascarpone with Espresso and Sugar: Add espresso powder, sugar, and salt to the mascarpone mixture. Whisk vigorously for 2-3 minutes or until stiff peaks form, creating a light and airy cream.
- Assemble: Spread the mascarpone cream evenly over the cooled brownies, smoothing the top for an attractive finish.
- Finish and Serve: Dust the top generously with cocoa powder using a sieve. Carefully lift the brownies from the tin by the parchment paper and peel it away. Cut into equal-sized squares and enjoy.
Notes
- For the espresso, use freshly brewed shots or dissolve instant espresso powder in hot water if espresso machines are unavailable.
- Ensure the mascarpone cheese is at room temperature for smoother mixing and better texture.
- Do not overbake the brownies; they should remain fudgy for the best texture combined with the creamy topping.
- Store leftover brownies in an airtight container in the refrigerator for up to 3 days to maintain freshness.
- For a gluten-free version, substitute all-purpose flour with a gluten-free flour blend of equal quantity.
Keywords: Tiramisu Brownies, espresso brownies, mascarpone dessert, chocolate espresso dessert, Italian inspired brownies, creamy topping brownies