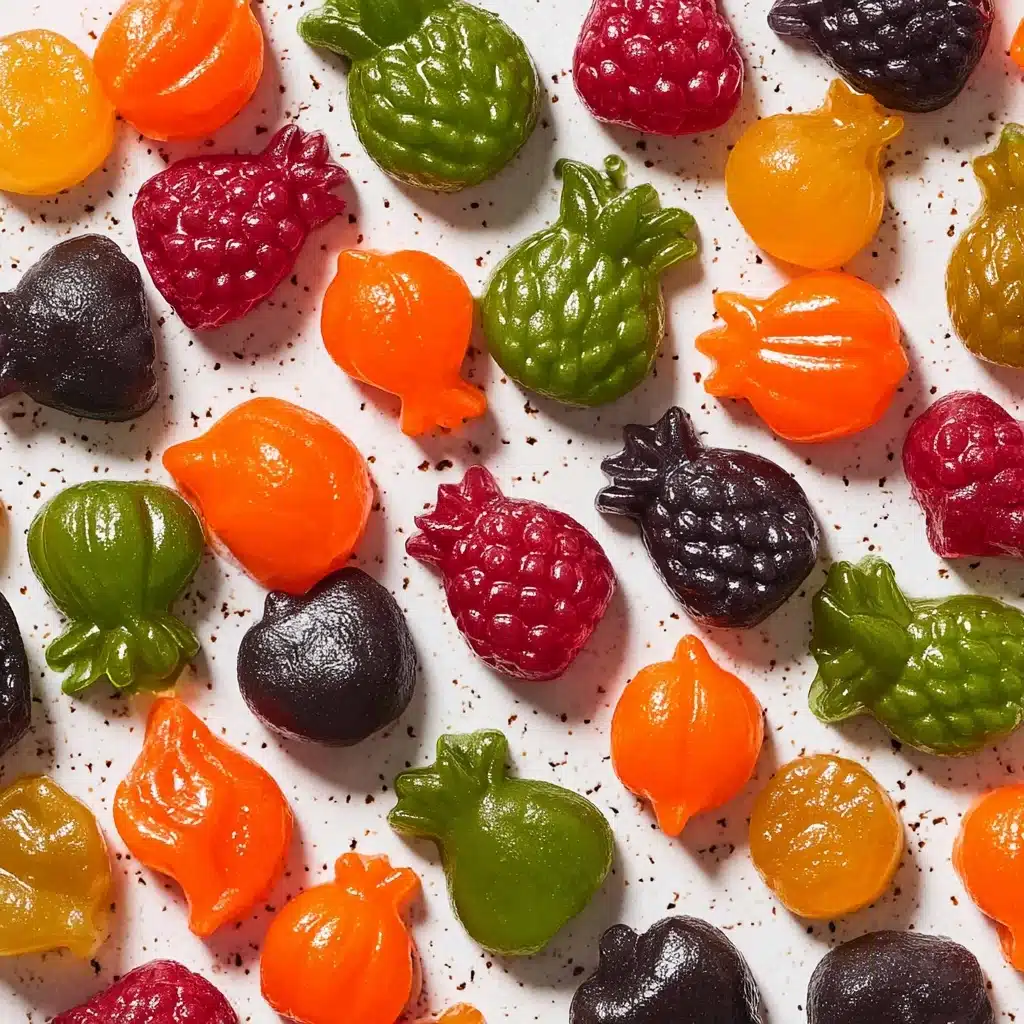
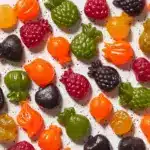
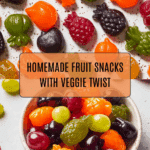
Homemade Fruit Snacks Recipe
Get ready to wow your family and friends with a treat that’s every bit as fun to make as it is to eat—this Homemade Fruit Snacks Recipe is a far cry from the store-bought packets! Packed with the vibrant colors and flavors of real fruits and veggies, these delightful bites are naturally sweetened, bursting with fresh taste, and surprisingly wholesome. Making them from scratch means you get to control exactly what goes in, making snacks that are just as perfect for school lunches as they are for grown-up snacking. Whether you’re packing them for the kids or enjoying them as a treat yourself, these gummies deliver pure joy in every bite!
Ingredients You’ll Need
These simple but power-packed ingredients are the secret to delicious, vibrant gummies. Every single component serves a purpose—from pure natural sweetness and gorgeous color to that perfect bouncy texture and a boost of nutrition.
- Fruit (1 cup, chopped): Use fresh or frozen options like strawberries, peaches, blueberries, or green grapes to provide flavor and beautiful, natural color.
- Vegetables (1/4 cup, chopped and peeled if needed): Veggies like spinach, beets, carrots, or zucchini effortlessly tuck extra nutrients into your snacks without overpowering the fruity taste.
- Pure Apple Juice (1/4 to 1/2 cup, no added sugar): Adds sweet liquid to blend your mixture smoothly while enhancing the fruitiness. Adjust the amount for consistency.
- Raw Honey (2 tablespoons): Naturally sweetens the snacks and provides a touch of floral flavor. Feel free to add more or less to suit your tastes.
- Pure Vanilla Extract (1/4 teaspoon): Rounds out the flavors with warmth and complexity.
- Gelatin (3 tablespoons, preferably collagen, grass-fed): This is the magic that gives your fruit snacks their chewy, bouncy charm—don’t skip it!
- Green Grapes (1 cup): For a sweet, refreshing, and subtly tart base, perfect for mixing with other fruits or veggies.
- Spinach (1/4 cup): Sneak in some greens for an added nutrition boost—kids won’t even notice it’s in there.
- Strawberries (1 cup, diced): Gives a beautiful red hue and classic berry flavor to your fruit snacks.
- Beets (1/4 cup): A little goes a long way to add brilliant color, earthy flavor, and extra vitamins.
- Peaches (1 cup, chopped): Brings in sunny, juicy sweetness—fantastic for a soft, summery snack.
- Carrots (1/4 cup): Adds mild sweetness and a dose of natural vitamins for a guilt-free treat.
- Blueberries (1 cup): Delivers deep blue-purple color and a burst of antioxidant goodness.
- Zucchini (1/4 cup): Mild and nearly undetectable, it seamlessly blends in, adding moisture and nutrition.
How to Make Homemade Fruit Snacks Recipe
Step 1: Prepare Your Molds or Pan
Start by setting up your silicone molds on a large baking sheet, or, if you don’t have molds, simply line an 8×8-inch square baking dish with wax paper and give it a light grease. This little bit of prep helps your homemade fruit snacks pop out effortlessly later on!
Step 2: Blend Fruit, Veggies, and Juice
Pop your chosen fruits, veggies, and 1/4 cup of apple juice into a high-powered blender. Blend on high until completely smooth, pausing to scrape down the sides if necessary. If your blend is too thick, add more juice a tablespoon at a time until you’ve got a silky, pourable puree.
Step 3: Add Honey and Vanilla
Next, drizzle in the raw honey and vanilla extract. Blend again to evenly distribute their luscious flavor throughout the fruity mix. Give it a quick taste—if you want it a bit sweeter, no one’s stopping you from adding a touch more honey!
Step 4: Whisk in the Gelatin
Pour your pureed mixture into a small saucepan. Sprinkle the gelatin over the top, then whisk it in briskly. This step is essential for those irresistible chewy bites, so make sure the gelatin is fully combined before moving on.
Step 5: Gently Heat and Dissolve
Warm the saucepan over medium heat, stirring continuously until the gelatin is completely dissolved and the mixture loses all its graininess—usually just about 3 minutes. Avoid letting it come to a boil; gentle heating will give your fruit snacks the perfect texture.
Step 6: Fill the Molds or Pan
With the mixture still warm, use a dropper or spoon to fill your silicone molds, or carefully pour it into your waiting baking dish. If you’re using molds, keeping the saucepan on the (now off) warm burner helps the mixture stay liquid long enough to fill every nook and cranny.
Step 7: Chill Until Set
Slide the molds or pan into your refrigerator and let them set for at least 2 hours. It’s worth the wait—this is when your Homemade Fruit Snacks Recipe transforms into bouncy, colorful gems!
Step 8: Pop Out and Enjoy
Gently remove the chilled snacks from the molds, or, if you used a pan, lift out the slab, cut into bite-sized squares, and get ready for the compliments. Grab one (or a handful) and savor your homemade achievement!
How to Serve Homemade Fruit Snacks Recipe

Garnishes
For a punch of extra fun, toss your gummies with a little powdered freeze-dried fruit for a candy-like finish, or dust them with a whisper of coconut sugar for sparkle. Fresh citrus zest is another lovely topper for a bright, aromatic kick.
Side Dishes
Turn snack time into a mini tasting adventure by serving these fruit snacks with a bowl of fresh berries, a handful of roasted nuts, or a dollop of Greek yogurt for dipping. They also make a sweet, wholesome finish to a lunchbox or after-school platter.
Creative Ways to Present
Pack these fruit snacks in cupcake liners for party favors, thread them onto small skewers for a playful “candy kabob,” or fill mason jars and tie with a ribbon for a thoughtful homemade gift. The lively colors and adorable shapes will win over both kids and adults!
Make Ahead and Storage
Storing Leftovers
Keep any extras from your Homemade Fruit Snacks Recipe in an airtight container in the refrigerator. They’ll stay fresh and chewy for up to a week—though around here, they rarely last that long!
Freezing
If you’re thinking ahead or want to batch prep, these snacks freeze beautifully! Lay them out on a baking sheet to freeze individually before transferring to a resealable bag. When you need a quick, cold treat, just grab a handful—no thawing needed.
Reheating
Reheating isn’t usually necessary, but if you prefer your fruit snacks a bit softer after chilling or freezing, just let them sit out at room temperature for 5-10 minutes. They’ll be perfectly chewy and ready to enjoy.
FAQs
Can I use agar-agar instead of gelatin?
Yes! For a vegetarian version of this Homemade Fruit Snacks Recipe, swap gelatin for agar-agar powder. Just follow the package directions for ratios, as agar sets differently and often requires a quick boil.
Are there other juice options instead of apple juice?
Absolutely. Grape, orange, or even pear juice work beautifully. Just make sure it’s 100 percent juice with no added sugar and adjust for sweetness and flavor balance as needed.
How can I make these snacks super smooth?
The key is thorough blending with a high-powered blender. If you see a few tiny veggie flecks and want candy-shelf smoothness, push the puree through a fine mesh sieve after blending before heating.
Can I double the Homemade Fruit Snacks Recipe?
Definitely! This recipe scales up easily. Make sure to blend and heat in batches if your blender or saucepan is on the smaller side, so each batch sets up perfectly bouncy.
Do I need to grease silicone molds?
Not usually—most silicone molds release the gummies beautifully. If you’re using a plastic or metal pan or notice sticking with your molds, a quick mist of nonstick spray works wonders.
Final Thoughts
Homemade snacks have never felt so joyful! Whether you’re treating your kids, surprising friends, or looking for a fun way to sneak more fruits and veggies into your day, this Homemade Fruit Snacks Recipe is a fantastic place to start. Let your creativity shine, have fun with flavor combos, and enjoy snacking the delicious, wholesome way!
PrintHomemade Fruit Snacks Recipe
These Homemade Fruit Snacks are a delightful and healthier alternative to store-bought snacks. Packed with real fruits and vegetables, these gummy treats are a perfect way to satisfy your sweet cravings.
- Prep Time: 15 minutes
- Cook Time: 5 minutes
- Total Time: 2 hours 20 minutes
- Yield: Varies
- Category: Snack
- Method: Blending, Heating, Refrigeration
- Cuisine: American
- Diet: Vegetarian
Ingredients
Fruit Mixture:
- 1 cup fruit, chopped
- 1 cup green grapes
- 1 cup strawberries, diced
- 1 cup peaches, chopped
- 1 cup blueberries
Vegetable Mixture:
- 1/4 cup vegetables, chopped (and peeled if necessary)
- 1/4 cup spinach
- 1/4 cup beets
- 1/4 cup carrots
- 1/4 cup zucchini
Other Ingredients:
- 1/4 to 1/2 cup pure apple juice, no added sugar
- 2 tablespoons raw honey
- 1/4 teaspoon pure vanilla extract
- 3 tablespoons gelatin, preferably collagen, grass-fed
Instructions
- Prepare Molds: Place silicone molds on a large baking sheet or line an 8×8’ square dish with wax paper and lightly grease, set aside.
- Blend Fruit and Vegetables: In a high-powered blender, combine fruit, vegetables, and 1/4 cup apple juice. Blend until smooth.
- Add Sweeteners: Add honey and vanilla extract to the blender and blend until smooth. Adjust sweetness to taste.
- Heat and Dissolve Gelatin: Transfer the mixture to a saucepan, whisk in gelatin, and heat on medium heat until dissolved and smooth.
- Fill Molds: Use a dropper to fill silicone molds or pour the mixture into a baking pan. Refrigerate for at least 2 hours to set.
- Serve: Once set, remove from molds and enjoy your homemade fruit snacks.
Notes
- You can customize this recipe by using your favorite fruits and vegetables.
- Ensure the gelatin is fully dissolved to avoid grainy texture in the fruit snacks.
Nutrition
- Serving Size: 1 serving
- Calories: 80
- Sugar: 10g
- Sodium: 15mg
- Fat: 0.5g
- Saturated Fat: 0g
- Unsaturated Fat: 0.3g
- Trans Fat: 0g
- Carbohydrates: 18g
- Fiber: 2g
- Protein: 2g
- Cholesterol: 0mg
Keywords: Homemade Fruit Snacks, Fruit Gummies, Healthy Snacks
