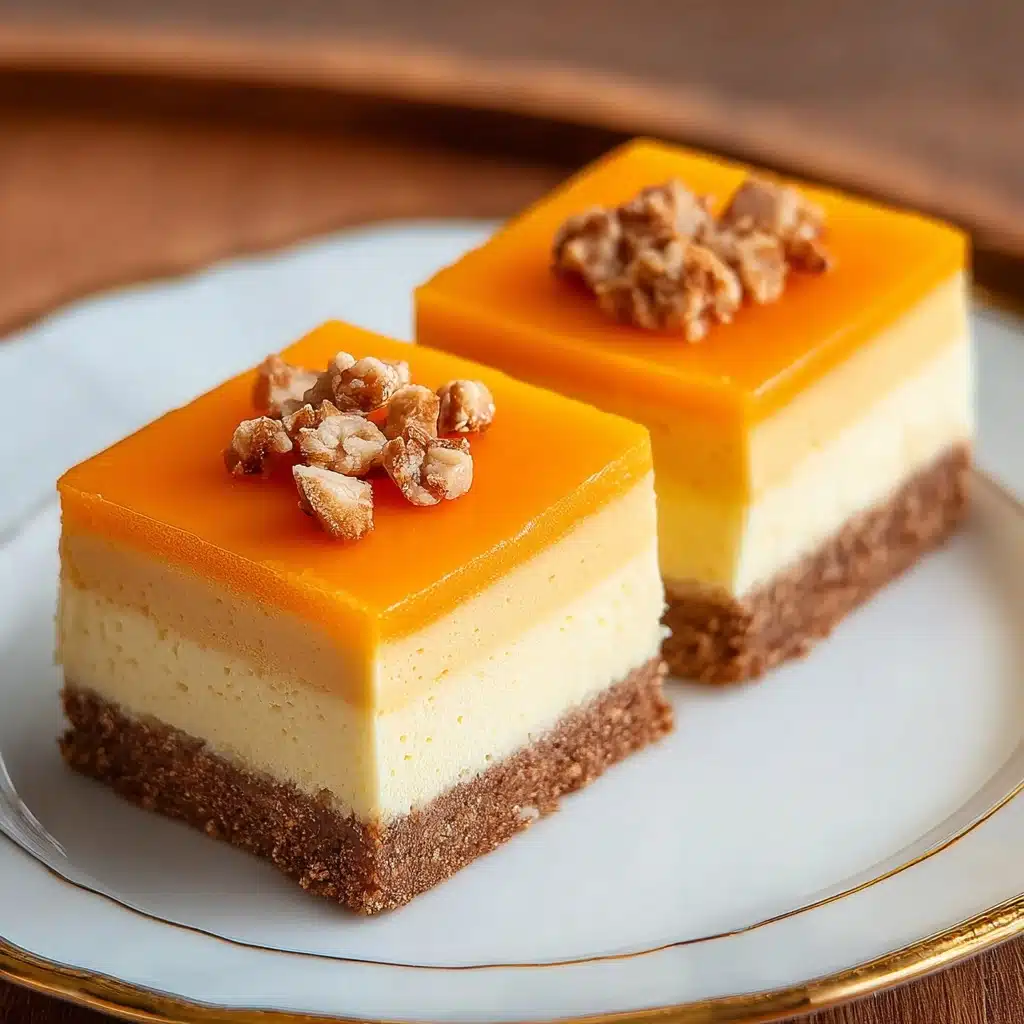
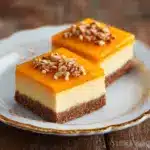
Homemade Cheesecake for Dogs Recipe
If you have a furry friend who deserves a special treat, look no further than this delightful Homemade Cheesecake for Dogs. This recipe combines simple, wholesome ingredients that are not only safe but incredibly tasty for your pup. Every bite offers a creamy, smooth texture with just the right hint of sweetness, making it a perfect celebration dessert or an everyday indulgence your canine companion will adore. Sharing this Homemade Cheesecake for Dogs is like giving your pet a little piece of joy straight from your heart.

Ingredients You’ll Need
The beauty of this recipe lies in its simplicity and purposeful ingredients. Each component contributes something unique to the taste, texture, or nutritional value, making the cheesecake both irresistible and healthy for your dog.
- Low-fat cream cheese: One 8-ounce package, adds the signature creamy richness without excess fat.
- Greek yogurt: 1/2 cup of unsweetened, plain yogurt brings a tangy smoothness and beneficial probiotics.
- Peanut butter: Two tablespoons of unsweetened, xylitol-free peanut butter for a nutty flavor that dogs love.
- Banana: One ripe banana, mashed to naturally sweeten and add a smooth, hearty texture.
- Honey: One teaspoon optional, provides natural sweetness and a touch of floral aroma that’s safe if used sparingly.
How to Make Homemade Cheesecake for Dogs
Step 1: Prepare the Base
Start by choosing a dog-friendly base like crushed dog biscuits or oats. If you’re using oats, mix them with a little coconut oil to bind everything together. Press this mixture firmly into the bottom of a silicone mold or any baking pan that’s pet-safe, creating a solid foundation for your cheesecake.
Step 2: Mix the Filling
In a large bowl, combine the low-fat cream cheese, Greek yogurt, peanut butter, mashed banana, and honey if using. Stir these ingredients thoroughly until you achieve a smooth, creamy consistency that will set perfectly as the cheesecake filling.
Step 3: Pour the Cream Mixture into the Mold
Once your base is firmly packed, pour the creamy filling evenly over it. Use a flat spatula to smooth the top, ensuring an even layer that’s perfect for setting and slicing later on.
Step 4: Chill the Cheesecake
Place the mold in your refrigerator and let the cheesecake chill for at least 3 to 4 hours. This step is crucial as it helps the texture firm up, making it easier to slice and serve without crumbling.
Step 5: Decorative Garnish
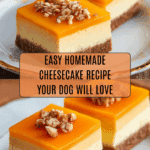
Add a little flair with safe garnishes like fresh blueberries or strawberries. These not only enhance the cheesecake’s appearance but add a burst of natural flavor that dogs find exciting. A sprinkle of carob powder is another pet-safe option for a chocolate-like finish.
Step 6: To Serve Homemade Cheesecake for Dogs
Slice the cheesecake into small, manageable pieces suitable for your dog’s size. Serve as an occasional treat and watch your canine friend’s eyes light up with happiness with every bite.
How to Serve Homemade Cheesecake for Dogs
Garnishes
Using fresh fruit like blueberries or strawberries adds a fresh and colorful touch to the cheesecake. These fruits are packed with antioxidants, making your treat even healthier. A light dusting of carob powder can bring a fun, chocolaty twist without any harmful ingredients.
Side Dishes
While the cheesecake can stand beautifully on its own, pairing it with crunchy dog biscuits or carrot sticks provides a delightful contrast in texture. This combination makes snack time even more engaging for your pup.
Creative Ways to Present
You can turn this treat into a party favorite by serving small mini cheesecakes in muffin liners or layering the filling and base in clear jars for a pretty parfait-style dessert. Presentation makes the cake exciting not just for you but also for your dog!
Make Ahead and Storage
Storing Leftovers
Keep any leftover Homemade Cheesecake for Dogs refrigerated in an airtight container to maintain freshness. It should stay delicious and safe for up to 3 days, making it easy to treat your pup anytime.
Freezing
This cheesecake freezes well, allowing you to prepare in advance or save portions. Wrap individual slices tightly in plastic wrap and store them in a freezer-safe container for up to a month. Thaw overnight in the fridge before serving.
Reheating
Since this is a no-bake, chilled dessert, reheating isn’t necessary and can affect texture. Simply let the cheesecake come to room temperature for 10-15 minutes before serving to soften slightly for your dog’s enjoyment.
FAQs
Is Homemade Cheesecake for Dogs safe for all breeds?
Yes! This recipe uses dog-friendly ingredients that are safe for most breeds. However, always consider any individual allergies or dietary restrictions your dog may have and consult your vet if unsure.
Can I substitute peanut butter with another ingredient?
Absolutely! If your dog is allergic to peanuts, you can replace peanut butter with sunflower seed butter or plain pumpkin puree for a similar creamy texture and flavor boost.
How often can I give this cheesecake to my dog?
Because this is a treat, it’s best to offer it in moderation — perhaps once or twice a week. Moderation helps maintain your dog’s balanced diet while keeping them excited for special snacks.
Can I add other fruits or ingredients to the cheesecake?
Certain fruits like blueberries and strawberries are great additions. However, avoid grapes, raisins, or anything toxic to dogs. You can experiment with safe ingredients but always research or check with your vet first.
Will this recipe help with sensitive stomachs?
This cheesecake is made with gentle, wholesome ingredients like Greek yogurt and banana that may be easier on sensitive stomachs compared to sugary, processed treats. Still, monitor your dog’s reaction the first time they try it.
Final Thoughts
Whipping up Homemade Cheesecake for Dogs is one of the most rewarding ways to show your pup how much you care. It’s simple, wholesome, and delicious—a perfect blend that transforms snack time into a celebration. Give this recipe a try and delight in the joyful tail wags that follow every bite!
PrintHomemade Cheesecake for Dogs Recipe
This homemade cheesecake for dogs is a healthy, dog-friendly dessert made with simple, safe ingredients like low-fat cream cheese, Greek yogurt, peanut butter, and banana. It’s a nutritious treat that your furry friend will love, free from harmful additives and sugars, and easy to prepare in just a few steps.
- Prep Time: 15 minutes
- Cook Time: 0 minutes (no baking required)
- Total Time: 4 hours 15 minutes (including chilling time)
- Yield: 8 small servings 1x
- Category: Dog Treats, Desserts
- Method: No-Bake, Refrigerated Dessert
- Cuisine: Pet-Friendly
- Diet: Low Fat
Ingredients
Crust Ingredients
- Dog-friendly cookie crackers or grains/oats – enough to crush and form the base
- 1 tablespoon coconut oil (to bind the crust)
Filling Ingredients
- 8 oz package low-fat plain cream cheese
- 1/2 cup unsweetened plain Greek yogurt
- 2 tablespoons unsweetened, xylitol-free peanut butter
- 1 ripe banana, mashed
- 1 teaspoon honey (optional, use sparingly)
Garnish (Optional)
- Fresh blueberries or strawberries
- Sprinkle of carob powder
Instructions
- Prepare the base: Crush dog-friendly cookie crackers or oats and mix with coconut oil. Press this mixture firmly into the bottom of a silicone mold or dog-friendly baking pan to create a stable crust layer.
- Mix the filling: In a large bowl, combine the low-fat cream cheese, Greek yogurt, peanut butter, mashed banana, and honey if using. Stir thoroughly until the mixture is smooth and creamy.
- Assemble the cheesecake: Pour the creamy filling over the prepared crust, spreading it evenly with a flat spatula to cover the base uniformly.
- Chill the cheesecake: Place the assembled cheesecake in the refrigerator and chill for at least 3-4 hours. This firming time helps the cheesecake hold its shape for easy slicing.
- Decorate (optional): Before serving, garnish the top with a few blueberries or strawberries safe for dogs. You can also lightly sprinkle carob powder for extra flavor and visual appeal.
- Serve: Cut the cheesecake into small, dog-appropriate portion sizes and offer as an occasional treat, watching your dog enjoy the delicious snack.
Notes
- Ensure peanut butter is unsweetened and free of xylitol, which is toxic to dogs.
- Use only dog-safe fruits like blueberries and strawberries for garnishing; avoid toxic fruits such as grapes or raisins.
- Serve cheesecake treats in moderation as part of a balanced diet.
- The optional honey should be used sparingly or avoided if your dog has diabetes or sensitivity to sugars.
- Always consult your vet before introducing new foods to your dog’s diet, especially if they have allergies or health conditions.
- Refrigerate leftovers and consume within 3 days to maintain freshness.
Nutrition
- Serving Size: 1 small piece (about 40 grams)
- Calories: 90 kcal
- Sugar: 3 grams
- Sodium: 50 mg
- Fat: 4 grams
- Saturated Fat: 2 grams
- Unsaturated Fat: 2 grams
- Trans Fat: 0 grams
- Carbohydrates: 10 grams
- Fiber: 1 gram
- Protein: 3 grams
- Cholesterol: 15 mg
Keywords: dog cheesecake recipe, homemade dog treats, low-fat dog dessert, peanut butter dog cheesecake, healthy dog snacks