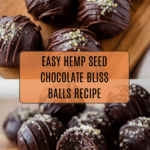
Hemp Seed Chocolate Bliss Balls Recipe
Introduction
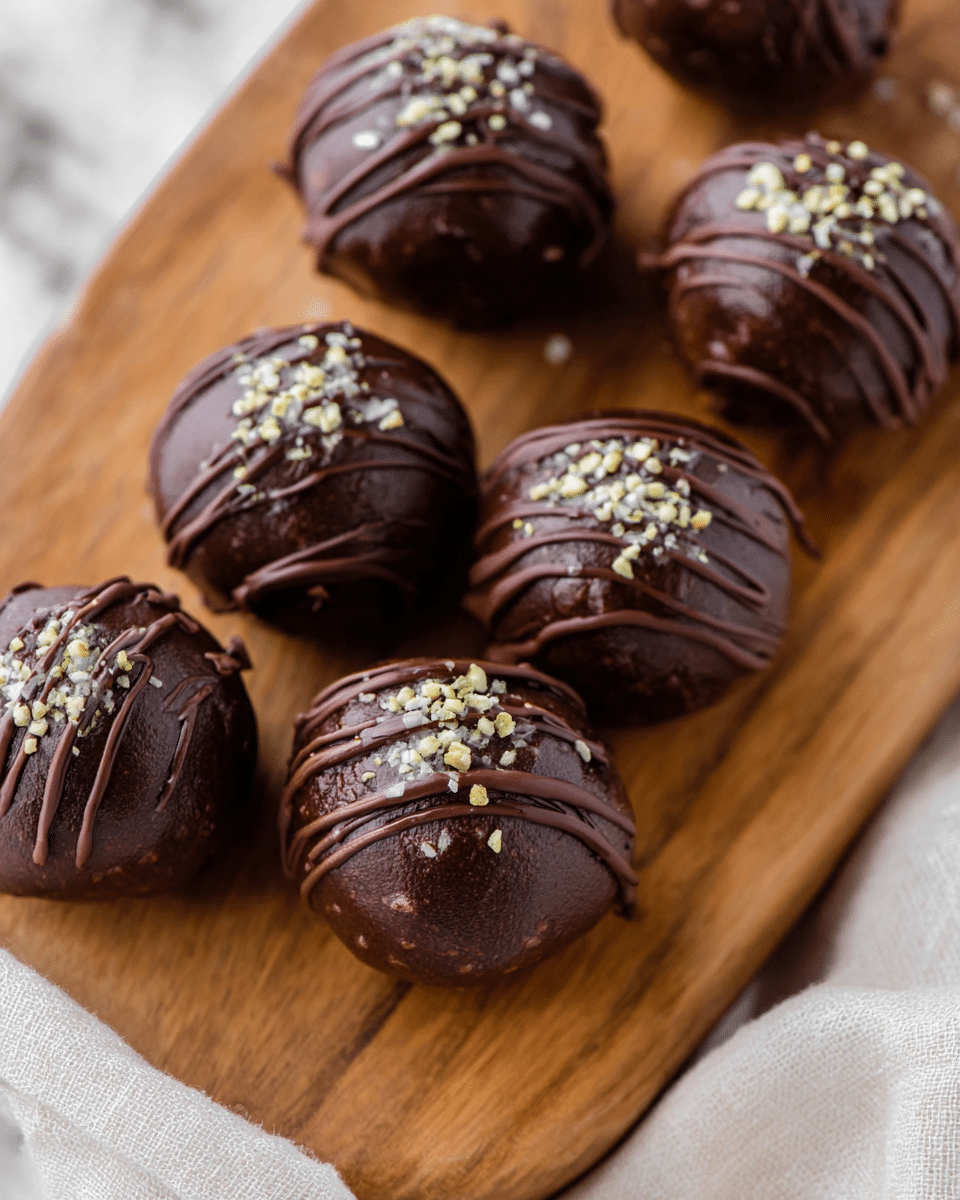
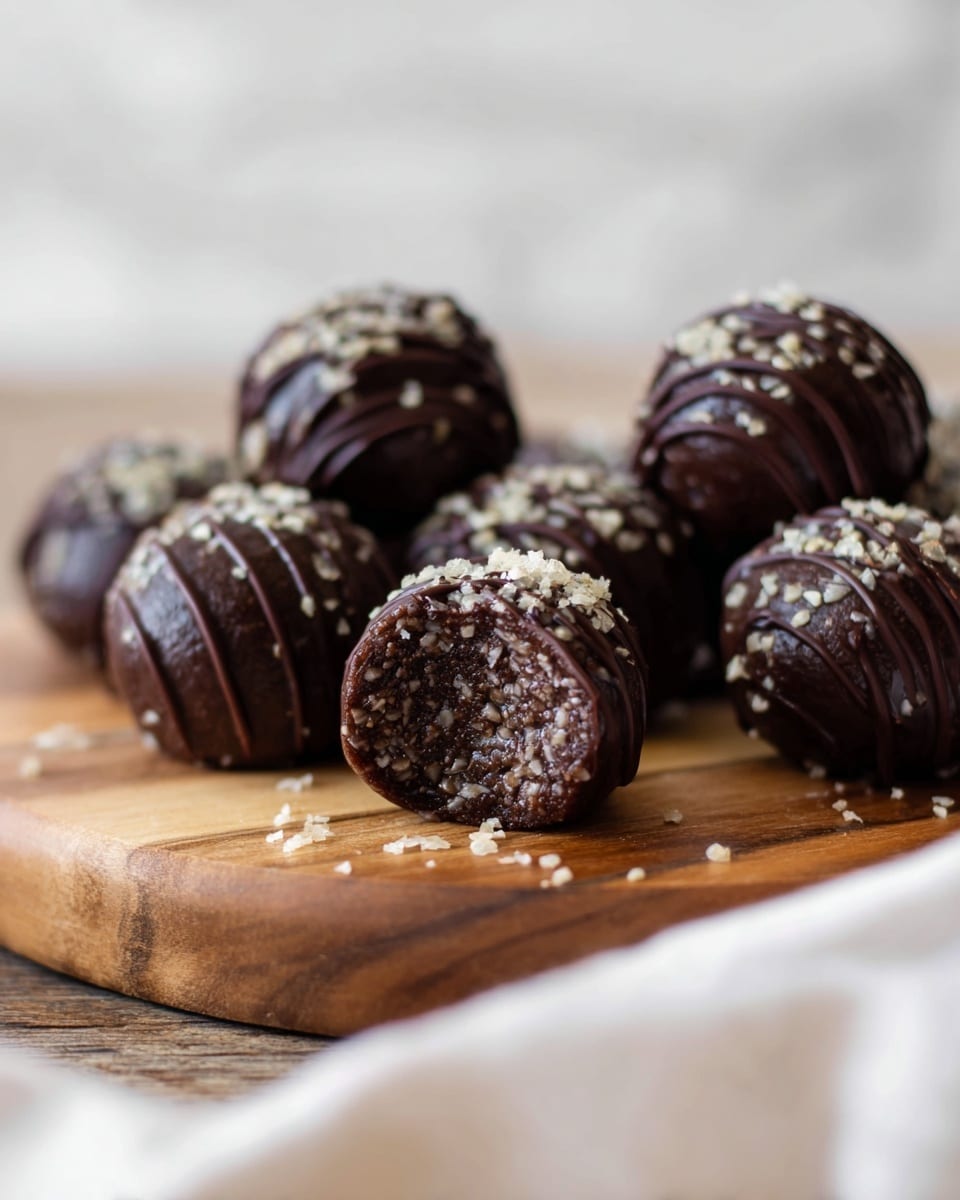
These hemp seed chocolate bliss balls are a delightful, nutritious treat that’s quick to prepare and perfect for a healthy snack. Combining dates, peanut butter, and hemp seeds, they offer a rich chocolate flavor with a boost of natural energy.
Ingredients
- 1/2 cup dates (about 8 dates)
- 1-2 tbsp hot water (optional, use only if your dates are a little hard)
- 1/4 cup peanut butter
- 1/4 cup + 2 tbsp hemp seeds
- 2 tbsp cocoa powder
- 1-2 tbsp chocolate chips for topping
- More hemp seeds for topping
Instructions
- Step 1: Pit the dates and place them in a food processor. Add 1 tablespoon of hot water at a time if the dates are hard, then pulse until a sticky ball forms.
- Step 2: Add the peanut butter, hemp seeds, and cocoa powder to the food processor. Pulse a few more times to combine. The dough should be moist but hold its shape. If too wet, add a bit more cocoa powder.
- Step 3: Refrigerate the dough for 15 minutes. Then, using a tablespoon, scoop out dough portions and roll them gently into balls. Place the balls on a parchment-lined baking sheet; you should get about 12.
- Step 4: In a small bowl, melt the chocolate chips in the microwave in 30-second intervals. Drizzle the melted chocolate over the bliss balls, sprinkle with extra hemp seeds, and refrigerate again to set.
Tips & Variations
- Use almond or cashew butter instead of peanut butter for a different nutty flavor.
- If you prefer a sweeter treat, add a teaspoon of maple syrup or honey to the dough.
- Roll the balls in shredded coconut or crushed nuts for extra texture.
Storage
Store the bliss balls in an airtight container in the refrigerator for up to one week. You can also freeze them for up to three months. To enjoy, thaw in the fridge or at room temperature for a short time before serving.
How to Serve
Serve this delicious recipe with your favorite sides.
FAQs
Can I use fresh dates instead of dried dates?
Dried dates work best because they provide the right sticky texture needed for binding the balls. Fresh dates are softer and wetter, which may make the dough too sticky.
Are hemp seed chocolate bliss balls vegan?
Yes, as long as you use dairy-free chocolate chips and check that the peanut butter does not contain honey, this recipe is completely vegan-friendly.
PrintHemp Seed Chocolate Bliss Balls Recipe

These Hemp Seed Chocolate Bliss Balls are a nutritious and delicious no-bake snack combining dates, peanut butter, cocoa, and hemp seeds. Naturally sweetened and packed with plant-based protein and healthy fats, they make a perfect energy-boosting treat or dessert bite, ideal for those seeking a simple, wholesome snack that comes together in minutes without any cooking.
- Prep Time: 10 minutes
- Cook Time: 0 minutes
- Total Time: 25 minutes
- Yield: 12 bliss balls 1x
- Category: Snack
- Method: No-Cook
- Cuisine: Fusion
- Diet: Vegan
Ingredients
Ingredients
- 1/2 cup dates (about 8 dates)
- 1–2 tbsp hot water (optional, use only if your dates are a little hard)
- 1/4 cup peanut butter
- 1/4 cup + 2 tbsp hemp seeds
- 2 tbsp cocoa powder
- 1–2 tbsp chocolate chips for topping
- More hemp seeds for topping
Instructions
- Prepare the dates: Pit the dates and place them in a food processor. Add 1 tablespoon of hot water if the dates seem dry or hard. Pulse until the mixture clumps together and forms a sticky ball.
- Mix the ingredients: Add peanut butter, 1/4 cup plus 2 tablespoons of hemp seeds, and cocoa powder to the date mixture in the food processor. Pulse several times until all ingredients are well combined forming a moist dough that holds its shape. If too wet, add a little more cocoa powder until desired consistency.
- Chill the dough: Refrigerate the dough for 15 minutes to firm up, making it easier to roll into balls.
- Shape the bliss balls: Using a tablespoon, scoop portions of dough and gently roll them into balls about 1 inch in diameter. Place them on a parchment-lined baking sheet. This recipe should yield approximately 12 bliss balls.
- Melt and drizzle chocolate: Melt chocolate chips in a microwave-safe bowl, heating in 30-second intervals and stirring in between until smooth. Drizzle melted chocolate over each bliss ball.
- Top with hemp seeds and set: Sprinkle extra hemp seeds over the chocolate-topped balls. Place the tray back in the refrigerator to allow the chocolate to set firmly before serving.
Notes
- If dates are soft, hot water may not be needed.
- Adjust cocoa powder quantity to achieve desired dough firmness.
- Use natural or unsweetened peanut butter for a healthier option.
- Store bliss balls in an airtight container in the refrigerator for up to one week.
- These bliss balls are a great source of plant-based protein and healthy fats.
Keywords: hemp seed, chocolate bliss balls, no bake, vegan snack, healthy energy balls, peanut butter, dates, cocoa powder
