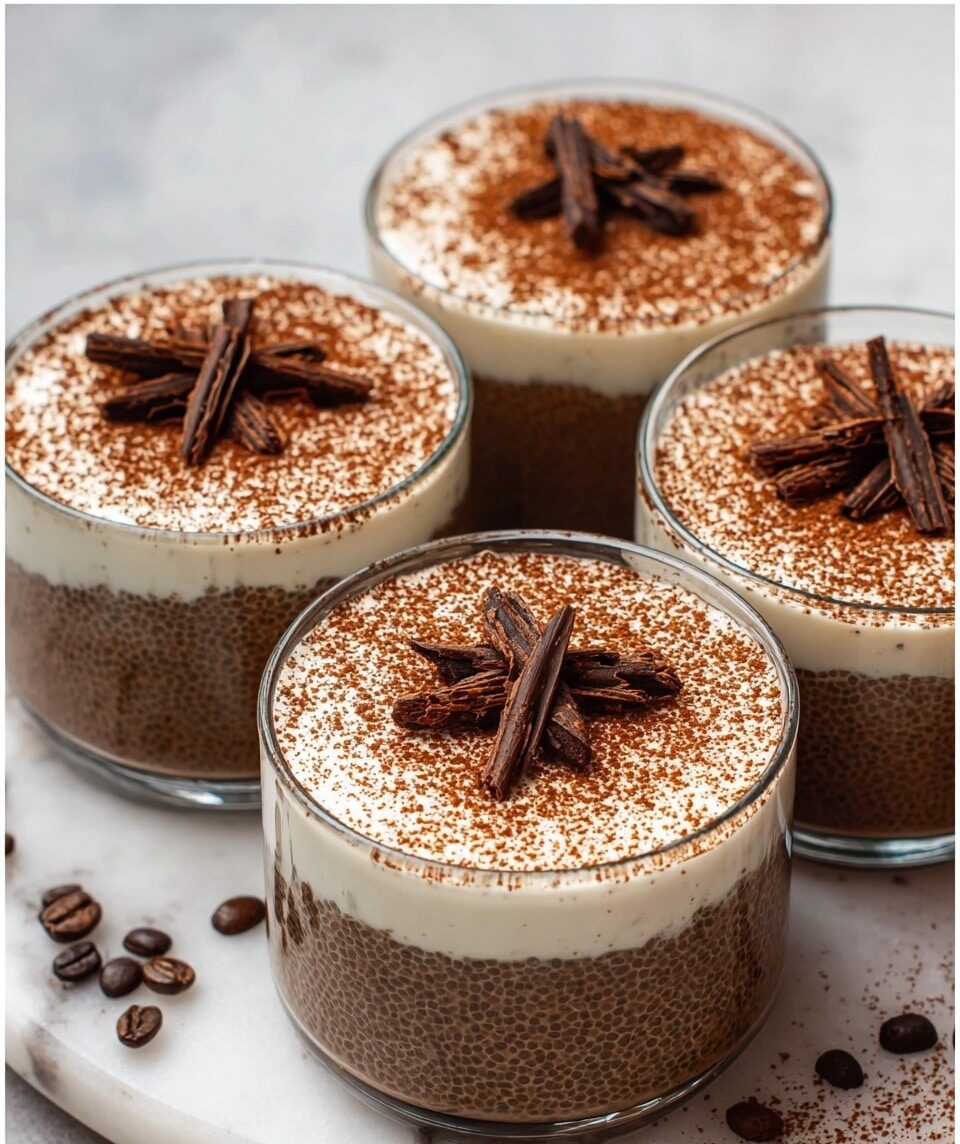
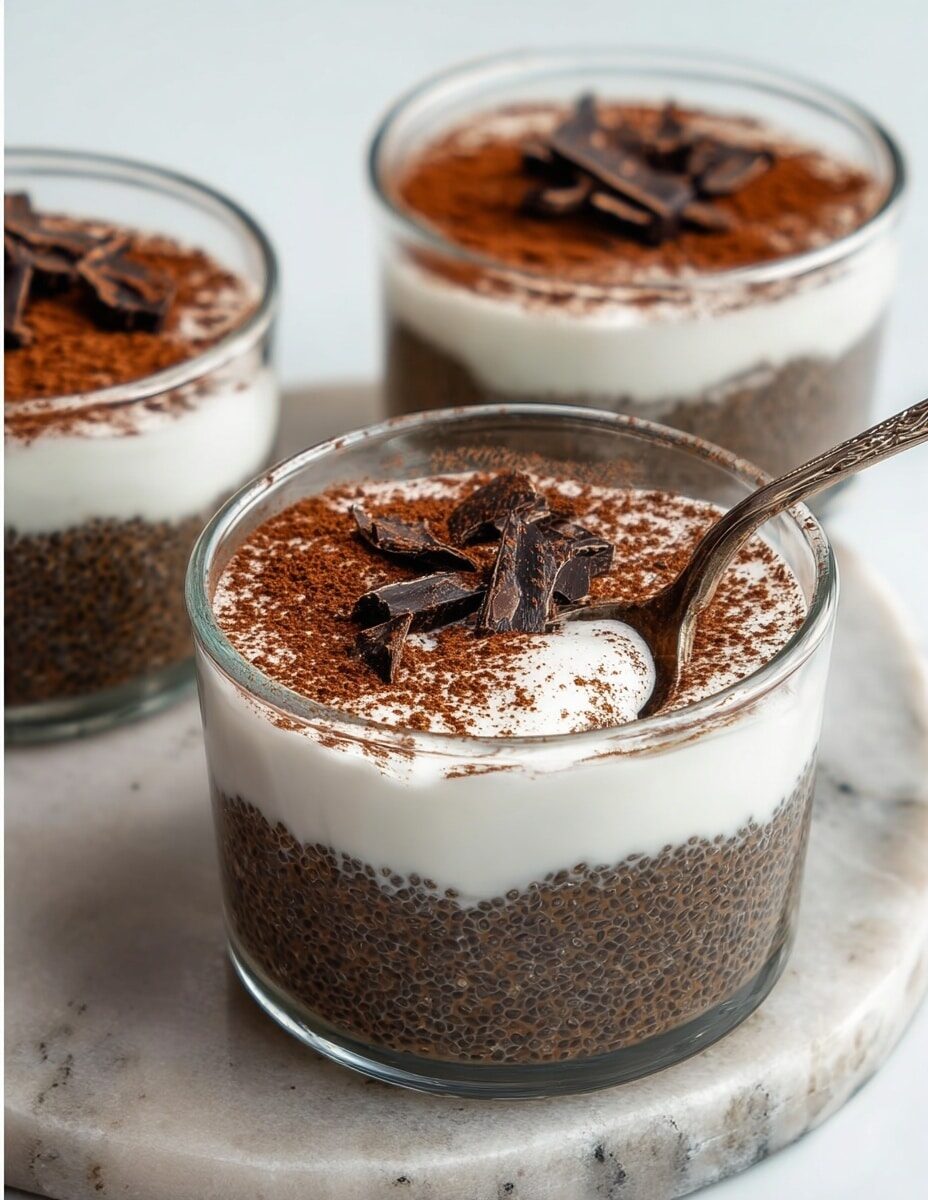
Tiramisu Chia Pudding (5-Minute, No Chilling) Recipe
Introduction
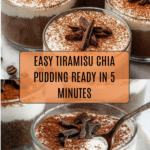
This Tiramisu Chia Pudding is a quick, no-chill dessert that combines the rich flavors of tiramisu with the healthy texture of chia pudding. Ready in just five minutes, it’s a perfect vegan treat that satisfies your coffee and chocolate cravings without fuss.
Ingredients
- 4 tablespoons chia seeds
- 1/2 cup hot water (not boiling)
- 2 tablespoons agave or maple syrup (or to taste)
- 1/2 teaspoon vanilla extract
- 1 1/2 teaspoons espresso powder
- 1/2 teaspoon cocoa powder
- Pinch of salt (optional)
- 1/2 cup plant-based milk (such as oat or soy)
- 1/4 cup vegan vanilla yogurt or vegan whipped cream
- 1 teaspoon cocoa powder (for dusting)
- Optional: shaved dark chocolate or crushed vegan vanilla cookie like a graham cracker or vanilla wafer
Instructions
- Step 1: In a small bowl, combine the chia seeds and hot water. Stir well and let sit for 2 minutes. The mixture will thicken and become clumpy; stir again before proceeding. If it isn’t thickened yet, wait another minute.
- Step 2: Stir in the agave syrup, vanilla extract, espresso powder, cocoa powder, and salt. Mix thoroughly. Pour in the plant-based milk and stir again, breaking up any clumps. Let the pudding rest for 2 to 3 minutes to thicken further.
- Step 3: Give the pudding one final stir and divide it between two small jars or glasses. Top each with 2 tablespoons of vegan yogurt or whipped cream, spreading into an even layer. Dust with cocoa powder and add shaved chocolate or crushed cookies if desired. Serve immediately or refrigerate.
Tips & Variations
- Warm the plant-based milk slightly before adding to the chia mixture to speed up thickening, especially if doubling the recipe.
- For a stronger coffee flavor, increase the espresso powder slightly or use cooled brewed espresso instead of the powder.
- Swap agave or maple syrup for your preferred sweetener, adjusting sweetness to taste.
- Try layering the pudding with vegan ladyfingers or cookie crumbs for more texture and a layered tiramisu effect.
Storage
Store the pudding covered in the refrigerator for up to 3 days. The texture may firm up further when chilled. If desired, let sit at room temperature for a few minutes before eating or stir well to loosen. Toppings are best added fresh to maintain texture.
How to Serve
Serve this delicious recipe with your favorite sides.
FAQs
Can I use regular milk instead of plant-based milk?
Yes, you can substitute with any milk you prefer, including dairy milk. The recipe works well with all types, just note that the flavor and texture might vary slightly.
Do I have to use espresso powder?
No, espresso powder gives a classic tiramisu coffee flavor, but you can use instant coffee granules dissolved in the hot water or skip it if you prefer a milder taste.
PrintTiramisu Chia Pudding (5-Minute, No Chilling) Recipe

This Tiramisu Chia Pudding is a quick and delicious vegan dessert inspired by the classic Italian tiramisu. Ready in just 5 minutes without any chilling required, it combines the rich flavors of espresso, cocoa, and vanilla with creamy plant-based milk and the satisfying texture of chia seeds, topped with vegan yogurt or whipped cream and optional chocolate or cookie crumbs for an indulgent yet healthy treat.
- Prep Time: 5 minutes
- Cook Time: 0 minutes
- Total Time: 5 minutes
- Yield: 2 servings 1x
- Category: Dessert
- Method: No-Cook
- Cuisine: Italian-inspired
- Diet: Vegan
Ingredients
Chia Pudding Base
- 4 tablespoons chia seeds
- 1/2 cup hot water (not boiling)
- 2 tablespoons agave or maple syrup (or to taste)
- 1/2 teaspoon vanilla extract
- 1 1/2 teaspoons espresso powder
- 1/2 teaspoon cocoa powder
- Pinch of salt (optional)
- 1/2 cup plant-based milk (such as oat or soy)
Toppings
- 1/4 cup vegan vanilla yogurt or vegan whipped cream
- 1 teaspoon cocoa powder (for dusting)
- Optional: shaved dark chocolate or crushed vegan vanilla cookie (like graham cracker or vanilla wafer)
Instructions
- Mix the chia and water: In a small bowl, combine the chia seeds and hot water. Stir well and let sit for 2 minutes. You will notice the mixture looks watery at first, but after about 30 seconds it will start thickening. After 2 minutes, it should be quite thick and clumpy. Stir once more before adding milk, and if it’s not thick enough, allow it to sit for another minute.
- Add the flavorings and milk: Stir in the agave syrup, vanilla extract, espresso powder, cocoa powder, and salt until evenly combined. Then pour in the plant-based milk and stir thoroughly, breaking up any remaining clumps. Let the mixture rest for 2 to 3 minutes longer, during which it will thicken as the chia seeds absorb the liquid. For faster setting when doubling the recipe, you can warm the plant milk before adding it.
- Layer and serve: Stir the pudding a final time to ensure even mixing, then divide it between 2 small jars or glasses. Top each serving with 2 tablespoons of vegan vanilla yogurt or whipped cream and spread it evenly. Dust with cocoa powder and add shaved dark chocolate or crushed vegan cookies if desired. Serve immediately or store covered in the refrigerator for up to 3 days.
Notes
- Use hot water (not boiling) to help chia seeds absorb liquid quickly without cooking them.
- If using espresso powder, choose a finely ground for best flavor integration.
- Plant-based milk options like oat or soy milk work best for creamy texture.
- Warming the plant-based milk slightly helps the pudding set faster if doubling quantities.
- Can be stored covered in the refrigerator for up to 3 days, but best enjoyed fresh.
- For a sweeter pudding, adjust amount of agave or maple syrup to taste.
- Optional toppings add texture and extra flavor to complement the pudding base.
Keywords: Tiramisu chia pudding, vegan dessert, quick chia pudding, no cook dessert, espresso chia pudding, plant-based dessert


