Mango Mochi Recipe
Introduction
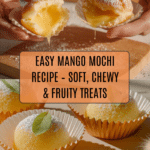
Mango Mochi is a delightful, chewy dessert combining the sweet tropical flavor of mango with soft glutinous rice dough. This recipe makes a perfect treat to enjoy fresh, whether as a snack or a charming finish to any meal.
Ingredients
- 40g (1/2 cup) glutinous rice flour, toasted (for dusting)
- 94g (3/4 cup) glutinous rice flour
- 30g (3 tbsp) cornstarch
- 90g (1/2 cup) mango
- 40g (1/2 cup) sugar
- 90g (1/3 cup + 1 tbsp) milk
- 30g (2 tbsp) unsalted butter
- 150g fresh or frozen mango, cut into cubes (for filling)
Instructions
- Step 1: In a small pan over low heat, toast 1/2 cup of glutinous rice flour for 15 minutes, stirring constantly until it gives off a popcorn-like aroma. Remove from heat and let cool. This toasted flour is used to dust the mochi.
- Step 2: In a large bowl, mix 3/4 cup glutinous rice flour with 3 tablespoons cornstarch until well combined.
- Step 3: Place 1/2 cup mango, 1/2 cup sugar, and 1/3 cup plus 1 tablespoon milk into a blender. Blend until smooth, then pour the mixture over the flour and cornstarch. Stir until the batter reaches a yogurt-like consistency.
- Step 4: Transfer the mixture to a microwave-safe container and cover with plastic wrap. Poke around 20 small air holes in the wrap using a toothpick.
- Step 5: Microwave on high for 3 minutes. Test doneness by inserting a toothpick into the dough through one of the holes; if it comes out dry, the dough is ready. If not, microwave for another 30 seconds and test again.
- Step 6: Remove the container from the microwave. Add 2 tablespoons of unsalted butter to the hot dough and allow it to melt. Once cool enough to handle, knead the dough until the butter is fully incorporated and the dough becomes elastic and stretchy, able to stretch up to 30cm.
- Step 7: Dust a clean surface generously with the toasted glutinous rice flour. Turn the mochi dough onto the surface and sprinkle more toasted flour on top. Roll the dough into a rough square shape and divide it into 8 equal pieces.
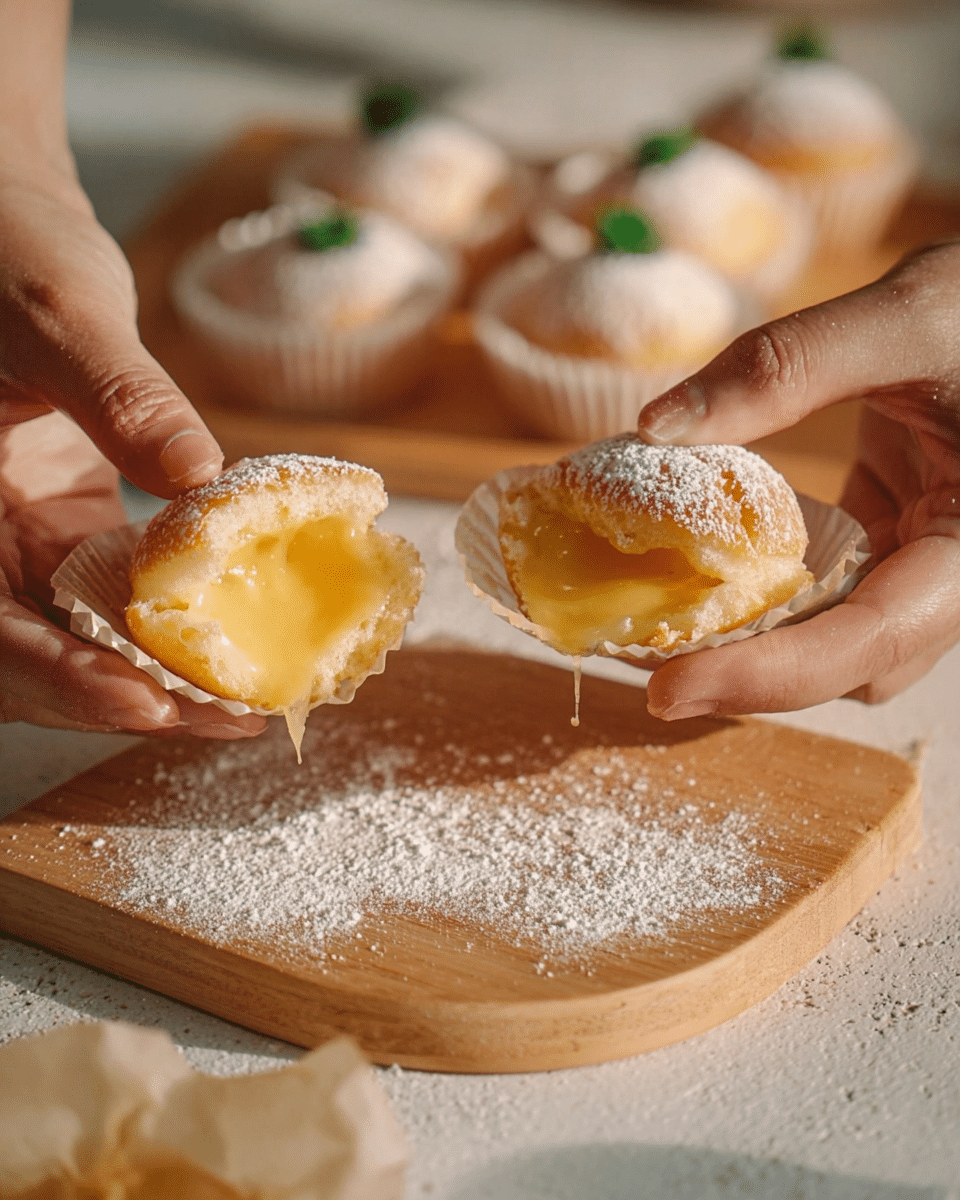
- Step 8: Flatten each piece and place a few mango cubes in the center. Carefully gather the edges around the filling, sealing it completely to form mochi balls.
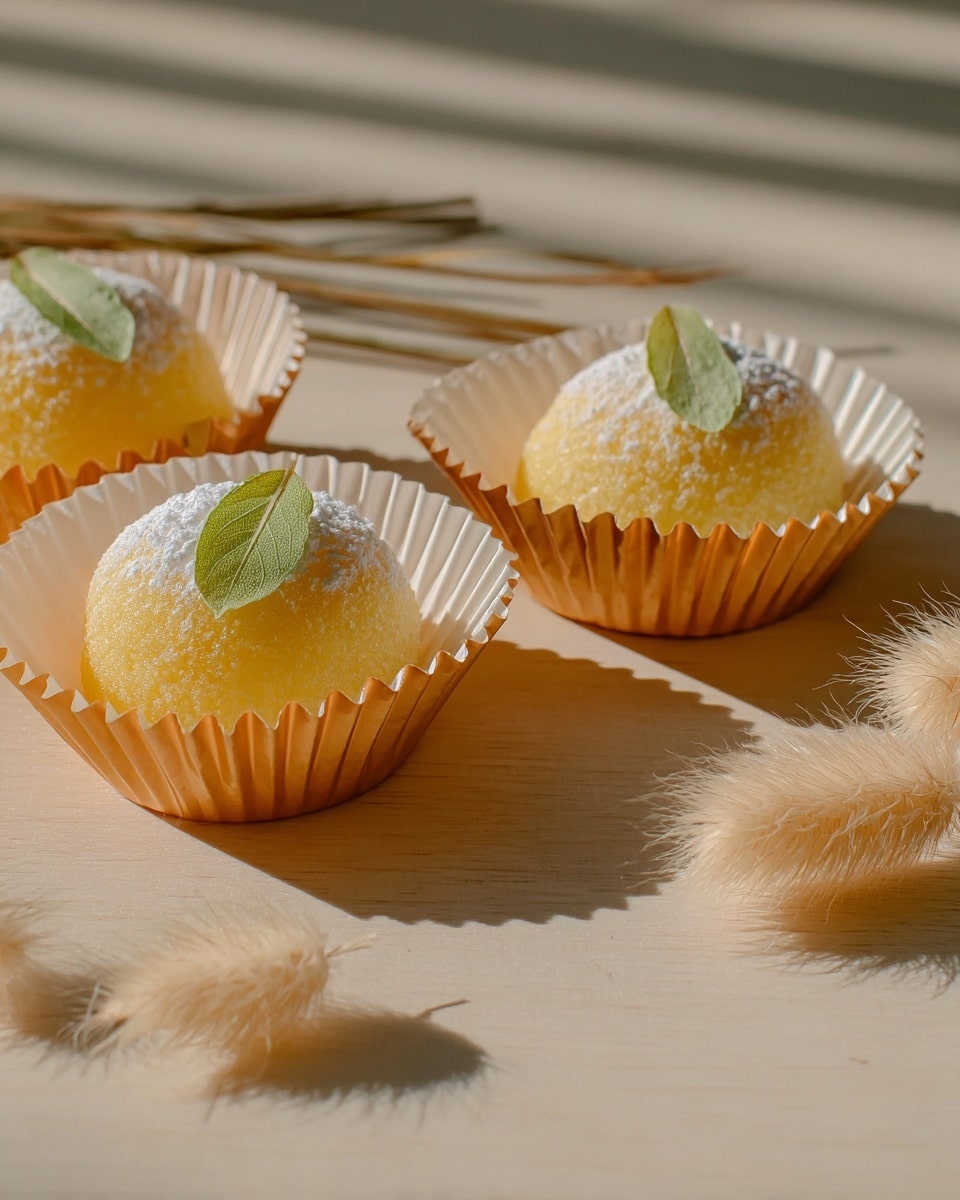
- Step 9: Serve the Mango Mochi fresh for the best texture. They pair wonderfully with tea or can be enjoyed as a sweet standalone treat.
Tips & Variations
- Use ripe, sweet mangoes for the best flavor, or substitute with other fruits like strawberries or kiwi for variation.
- Lightly dust your hands with toasted flour when shaping mochi to prevent sticking.
- For a creamier filling, add a small dollop of sweetened cream cheese with the mango cubes.
Storage
Store any leftover mochi in an airtight container at room temperature for up to 1 day to retain softness. For longer storage, refrigerate for up to 2 days but note the texture may firm up. Reheat gently by steaming or microwaving briefly with a damp paper towel to soften before serving.
How to Serve
Serve this delicious recipe with your favorite sides.
FAQs
Can I use frozen mango for the filling?
Yes, frozen mango works well. Just thaw and drain any excess liquid before using to avoid soggy mochi.
What if I don’t have a microwave?
You can steam the mochi dough mixture for about 15 minutes until cooked through instead of microwaving. Be sure to stir halfway through steaming for even cooking.
PrintMango Mochi Recipe

Mango Mochi is a delightful Japanese-inspired dessert featuring a soft, chewy glutinous rice dough filled with sweet, juicy mango cubes. This recipe combines the tropical flavor of fresh mango with a tender mochi skin made from glutinous rice flour, sugar, and buttery milk, steamed and kneaded into the perfect stretchy texture. Ideal for a refreshing snack or dessert, these mochi can be enjoyed fresh and are sure to please fruit and mochi lovers alike.
- Prep Time: 20 minutes
- Cook Time: 5 minutes
- Total Time: 25 minutes
- Yield: 8 mochi pieces 1x
- Category: Dessert
- Method: Microwaving
- Cuisine: Japanese
- Diet: Vegetarian
Ingredients
Kneading:
- 40g (1/2 cup) glutinous rice flour, toasted
Mochi Dough:
- 94g (3/4 cup) glutinous rice flour
- 30g (3 tbsp) cornstarch
- 90g (1/2 cup) mango
- 40g (1/2 cup) sugar
- 90g (1/3 cup + 1 tbsp) milk
- 30g (2 tbsp) unsalted butter
Filling:
- 150g fresh or frozen mango, cut into cubes
Instructions
- Toast the Flour: In a small pan over low heat, toast 1/2 cup of glutinous rice flour for 15 minutes, stirring constantly until it emits a popcorn-like aroma. Let it cool; this toasted flour will be used later to dust the mochi to prevent sticking.
- Mix Dry Ingredients: In a large bowl, combine 3/4 cup glutinous rice flour with 3 tablespoons of cornstarch. Stir well until thoroughly mixed to form the base of your mochi dough.
- Prepare Mango Mixture: Place 1/2 cup of mango, 1/2 cup sugar, and 1/3 cup plus 1 tablespoon of milk into a blender. Blend until completely smooth. Pour the mango mixture over the dry ingredients and stir until you achieve a yogurt-like consistency.
- Microwave the Mochi Dough: Transfer the mixture to a microwave-safe container and cover with plastic wrap. Poke around 20 small air holes in the wrap using a toothpick to allow steam to escape. Microwave on high for 3 minutes, then test doneness by inserting a toothpick through a hole. If it comes out dry, the dough is ready; if not, microwave in 30-second increments until done.
- Incorporate Butter: Remove the hot mochi dough from the microwave and add 2 tablespoons of unsalted butter. Let the butter melt into the dough. When it is cool enough to handle, knead the dough thoroughly until the butter is fully incorporated and the dough is elastic and able to stretch up to 30cm.
- Shape and Fill Mochi: Dust a clean surface generously with the toasted glutinous rice flour. Turn the mochi dough out onto the surface and sprinkle more toasted flour on top. Roll the dough into a rough square shape and divide it into 8 equal pieces. Flatten each piece further, place a few mango cubes in the center, then carefully gather and pinch the edges to seal each mochi around the mango filling.
- Serve: Enjoy your Mango Mochi fresh for the best chewy texture and sweet mango flavor. They can be served alongside tea or as a refreshing standalone dessert treat.
Notes
- Toasting the flour is essential to prevent sticking when shaping the mochi.
- Use ripe mangoes for the best natural sweetness and flavor.
- Adjust microwave time slightly depending on your appliance power for optimal dough consistency.
- Handle the dough gently during kneading to maintain the chewy texture.
- Serve mochi fresh as they tend to harden over time.
Keywords: Mango mochi, glutinous rice dessert, Japanese sweets, mango recipe, chewy mochi, fruit-filled mochi