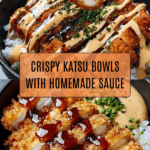
Japanese Katsu Bowls with Tonkatsu Sauce Recipe
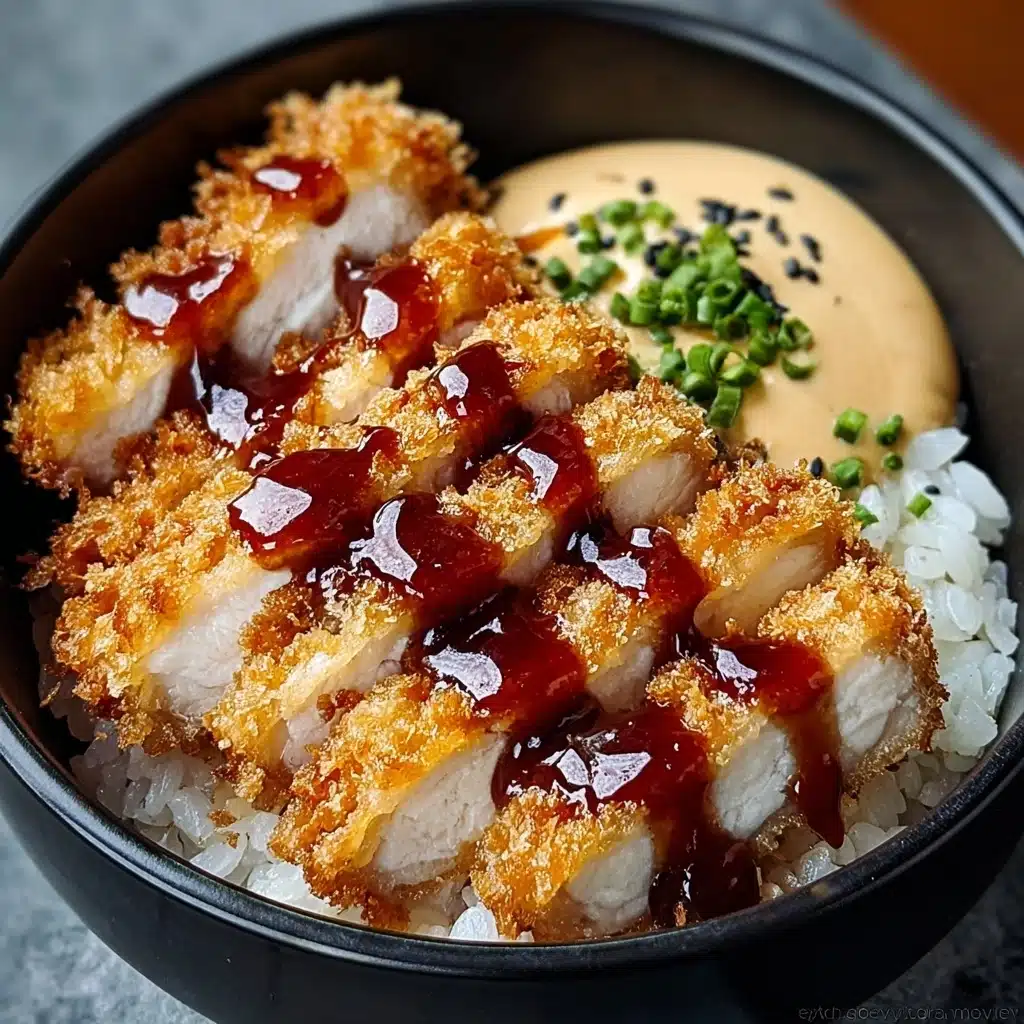
These Japanese Katsu Bowls with Tonkatsu Sauce are an absolute crowd-pleaser—a harmony of crispy, golden-fried cutlets, fluffy white rice, and that irresistible sweet-savory sauce that pulls it all together. Each bite takes you right to a cozy Tokyo eatery, where crunchy panko-coated chicken or pork meets silky rice and tangy tonkatsu sauce, all in one comforting bowl. Simple to make and wildly satisfying, this recipe will have everyone diving in for seconds.

Ingredients You’ll Need
You only need a handful of classic ingredients to bring these Japanese Katsu Bowls with Tonkatsu Sauce to life. Each one has a purpose, from panko that gives the signature crunch to the silky tonkatsu sauce that ties all the flavors together.
- Chicken breasts or pork loin cutlets: Pounded to a half-inch thickness for fast, even cooking and ultimate tenderness.
- Panko breadcrumbs: These airy Japanese breadcrumbs stay extra crisp and light, setting the katsu apart.
- All-purpose flour: Essential for dredging, the flour helps the egg and breadcrumbs adhere perfectly.
- Large eggs: Beaten eggs give a luscious barrier between the flour and panko, locking in moisture.
- Cooked white rice: Sushi rice is ideal—it’s sticky, fluffy, and holds the cutlet beautifully in each spoonful.
- Tonkatsu sauce: Whether you grab a bottle or whip up your own, this tangy-sweet sauce is the soul of a true katsu bowl.
- Oil for frying: A neutral oil like vegetable or canola works best for crispiness without overpowering flavor.
- Fresh parsley or green onion: Adds color and a refreshing pop when sprinkled over the finished bowl.
- Ketchup: Use this as a base for the homemade tonkatsu sauce for that authentic sweet tang.
- Worcestershire sauce: Gives depth and umami to your homemade tonkatsu sauce.
- Soy sauce: Creates that signature savory note in the sauce, balancing the sweetness.
- Sugar: A touch of sugar rounds out the flavors in your homemade sauce.
How to Make Japanese Katsu Bowls with Tonkatsu Sauce
Step 1: Prep Your Cutlets
Begin by laying your chicken breasts or pork cutlets flat between two sheets of plastic wrap and pounding them to about half an inch thick. This does two things: it ensures quick, even frying, and it makes each bite wonderfully tender. Don’t forget to season the meat generously with salt and pepper—this simple step infuses the cutlet with flavor top to bottom.
Step 2: Set Up the Breading Station
Grab three shallow bowls or plates. In the first, add flour. The second, beaten eggs. The third, that beautiful pile of panko breadcrumbs. This classic breading lineup is your cheat code for super crispy katsu—just keep everything handy so breading moves smoothly and mess-free!
Step 3: Bread the Cutlets
Working one at a time, dredge each cutlet in flour first, shake off the excess, then dip into the egg mixture until coated. Finally, press both sides into the panko, making sure every nook gets covered. Don’t rush this part—the more panko you press on, the crunchier your katsu will be.
Step 4: Fry to Golden Perfection
Heat about a half-inch of vegetable or canola oil in a large skillet over medium-high. To check if it’s ready, drop in a few panko crumbs—they should sizzle immediately. Carefully fry the cutlets for 3–4 minutes per side if using chicken (2–3 minutes for pork) until each is golden brown and cooked through. Transfer to a plate lined with paper towels to absorb any excess oil.
Step 5: Make (or Grab) the Tonkatsu Sauce
If you’re whipping up your own tonkatsu sauce, simply stir together ketchup, Worcestershire sauce, soy sauce, and a splash of sugar in a small bowl. Taste and tweak as you like—some prefer it a little sweeter, others more savory. If you’re short on time, store-bought sauce works perfectly and keeps things stress-free!
Step 6: Assemble the Bowls
Spoon fluffy, hot sushi rice into each serving bowl. Slice the crispy katsu into strips and gently fan them on top of the rice. Now comes the magic moment: drizzle over a generous helping of tonkatsu sauce. Finish with a sprinkle of chopped parsley or green onion if you like a pop of color and freshness.
How to Serve Japanese Katsu Bowls with Tonkatsu Sauce
Garnishes
A simple scatter of freshly chopped parsley or green onions does wonders for bringing these Japanese Katsu Bowls with Tonkatsu Sauce to life. If you like a little zing, add a few slices of pickled ginger or a sprinkle of toasted sesame seeds for a subtle nutty aroma. Garnishes boost both the visual appeal and the overall experience.
Side Dishes
This dish pairs beautifully with a crisp cabbage slaw lightly dressed with lemon, or a quick cucumber sunomono (Japanese vinegar salad). Some like to offer miso soup or a handful of edamame for extra protein and color. The goal is to keep sides light and refreshing, letting the katsu and sauce be the star.
Creative Ways to Present
Try serving these bowls bento-style for a fun, portable lunch—layer the rice on one side, katsu on the other, and small compartments for sauce and veggies. Or, arrange mini versions in small bowls for a tapas-style dinner party. However you serve them, Japanese Katsu Bowls with Tonkatsu Sauce always invite excitement to the table!
Make Ahead and Storage
Storing Leftovers
Cool any extra katsu and rice to room temperature before storing. Wrap cutlets in foil or parchment and keep them in an airtight container in the fridge for up to three days. Keep sauce and rice in separate containers to prevent sogginess—this keeps every element tasty and fresh for a speedy remake.
Freezing
If you want to stash away a future meal, freeze the breaded (but unfried) cutlets flat on a tray, then transfer to a zip-top bag once solid. You can also freeze fried cutlets after cooling, although they’ll be crispiest when cooked fresh. Rice and sauce freeze well separately; just pack tightly and use within a month for best flavor.
Reheating
To recapture that coveted crunch, pop katsu cutlets in a 375°F oven or toaster oven on a wire rack for 10–15 minutes, or until hot and crispy again. Microwaving is quick but can make the breading soft, so use it only for rice and sauce. Reheated Japanese Katsu Bowls with Tonkatsu Sauce taste close to fresh if you keep things separate until serving.
FAQs
Can I use chicken thighs instead of chicken breast or pork?
Absolutely! Chicken thighs are juicier and pack more flavor. Just trim any excess fat before pounding, and keep an eye out during frying so the thicker pieces cook through without burning the coating.
What’s the best way to keep the panko coating extra crispy?
Make sure your oil is hot enough (about 350°F) and don’t overcrowd the pan. Press the panko into the cutlets firmly, and always drain on a rack or paper towel after frying to keep things shatteringly crisp.
Can I make the tonkatsu sauce ahead of time?
Yes! Homemade tonkatsu sauce actually gets even tastier after sitting for a few hours. Store it in the fridge in an airtight jar, and it’ll stay fresh for a week, ready to pour over your bowls at the last minute.
What kind of rice should I use for Japanese Katsu Bowls with Tonkatsu Sauce?
Sushi rice is traditional and clings together nicely, making it easy to pick up with chopsticks or a spoon. However, any short or medium-grain white rice will work—the important part is that it’s fluffy and hot when serving!
Is there a vegetarian version of Japanese Katsu Bowls with Tonkatsu Sauce?
Definitely! Swap out the chicken or pork for firm tofu or thick slices of eggplant. Bread and cook them the same way; both take on the crispy panko breading and taste amazing smothered in homemade tonkatsu sauce.
Final Thoughts
With their blend of comforting flavors and eye-catching textures, Japanese Katsu Bowls with Tonkatsu Sauce are the kind of meal you’ll crave again and again. Whether you’re after weeknight ease or planning a special treat, these bowls promise to deliver pure, joyful eating. Give them a try, and prepare for happy faces around your table!
PrintJapanese Katsu Bowls with Tonkatsu Sauce Recipe

These Japanese Katsu Bowls with Tonkatsu Sauce are a delicious and satisfying meal that brings the flavors of Japan to your table. Crispy breaded chicken or pork cutlets are served over steamed rice and drizzled with a savory-sweet tonkatsu sauce.
- Prep Time: 15 minutes
- Cook Time: 10 minutes
- Total Time: 25 minutes
- Yield: 2 servings 1x
- Category: Main Course
- Method: Frying
- Cuisine: Japanese
- Diet: Diabetic
Ingredients
For the Cutlets:
- 2 boneless chicken breasts or pork loin cutlets (pounded to ½-inch thickness)
- 1 cup panko breadcrumbs
- ½ cup all-purpose flour
- 2 large eggs (beaten)
- Oil for frying (vegetable or canola)
For the Tonkatsu Sauce:
- 3 tbsp ketchup
- 2 tbsp Worcestershire sauce
- 1 tbsp soy sauce
- 1 tsp sugar
For Serving:
- 3 cups cooked white rice (sushi rice preferred)
- ½ cup tonkatsu sauce (store-bought or homemade*)
- Fresh parsley or green onion for garnish (optional)
Instructions
- Pound and Season the Cutlets: Pound the chicken or pork to ½-inch thickness and season with salt and pepper.
- Prepare the Breading Station: Set up three bowls for flour, beaten eggs, and panko breadcrumbs.
- Bread the Cutlets: Coat each cutlet in flour, then egg, and finally panko breadcrumbs.
- Fry the Cutlets: Heat oil in a pan and fry cutlets until golden and cooked through.
- Make Tonkatsu Sauce: Mix ketchup, Worcestershire sauce, soy sauce, and sugar in a bowl.
- Assemble the Bowls: Serve the cutlets over rice, drizzle with tonkatsu sauce, and garnish with parsley or green onions.
Nutrition
- Serving Size: 1 bowl
- Calories: 650
- Sugar: 6g
- Sodium: 1050mg
- Fat: 12g
- Saturated Fat: 3g
- Unsaturated Fat: 7g
- Trans Fat: 0g
- Carbohydrates: 85g
- Fiber: 2g
- Protein: 45g
- Cholesterol: 180mg
Keywords: Japanese Katsu Bowls, Tonkatsu Sauce, Chicken Katsu, Pork Katsu, Japanese cuisine
