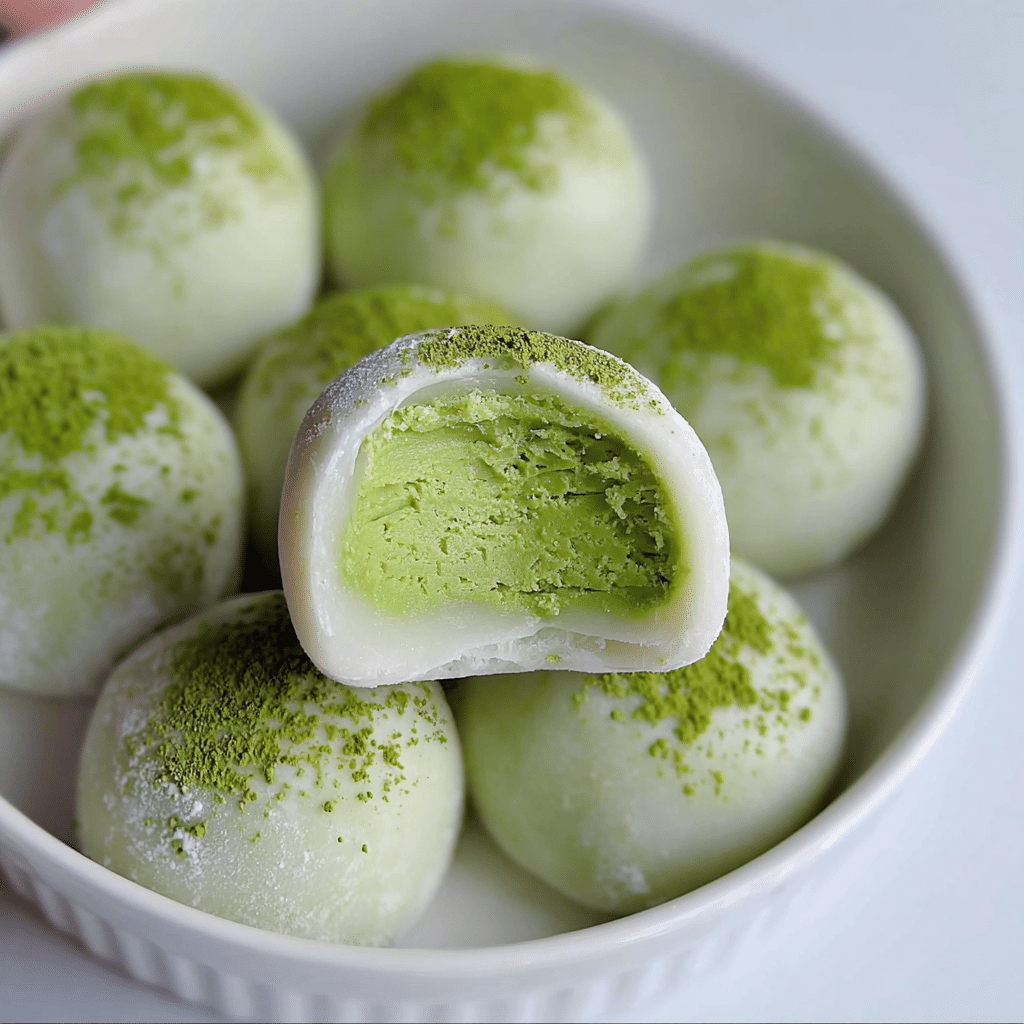
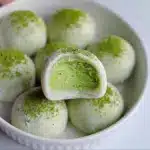
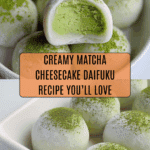
Homemade Matcha Cheesecake Daifuku Recipe
If you have a sweet tooth and a love for innovative Japanese-inspired treats, you are going to fall head over heels for this Homemade Matcha Cheesecake Daifuku. Picture the silky smoothness of rich matcha-flavored cheesecake delicately enclosed within a soft, chewy mochi layer — it’s a dessert that balances earthiness, creaminess, and subtle sweetness in every bite. This delightful fusion of traditional daifuku with a luscious cheesecake filling not only looks stunning but also tastes like a little celebration in your mouth. Let me walk you through creating this irresistible treat from scratch!
Ingredients You’ll Need
These ingredients are surprisingly simple, yet each one plays a crucial role in crafting the perfect texture and flavor of your Homemade Matcha Cheesecake Daifuku. From the creamy tang of cream cheese to the unique earthiness of matcha, everything comes together harmoniously.
- Cream cheese (200 g, softened): Provides the rich, smooth base for the cheesecake filling with a creamy tang.
- Granulated sugar (25 g + 15 g): Adds balanced sweetness to both the filling and mochi dough.
- Matcha powder (8 g, preferably Japanese): Infuses that vibrant green tea flavor and beautiful color for an authentic taste.
- Heavy cream (150 g, chilled): Whipped into the filling to create a light, luscious texture.
- Glutinous rice flour (120 g): The foundation of the mochi dough, giving it that signature chewy, tender bite.
- Cornstarch (30 g): Helps stabilize the mochi dough and prevent stickiness during shaping.
- Whole milk (180 g): Adds moisture and softness to the mochi dough.
- Unsalted butter (15 g): Enriches the dough with a subtle creaminess and smooth finish.
How to Make Homemade Matcha Cheesecake Daifuku
Step 1: Make the Matcha Cream Cheese Filling
Start by placing your softened cream cheese in a large bowl, then add 25 grams of granulated sugar. Mix vigorously with a spatula until the mixture turns smooth and lump-free — this usually takes about two minutes and ensures you won’t get any unpleasant curds. Next, sprinkle in the matcha powder and blend well until the green hue is even throughout the mixture. Finally, pour in the chilled heavy cream and whisk by hand until it thickens into a luscious, creamy filling. Transfer this blend into a piping bag and pipe it into molds lined with plastic wrap. Freeze these little cheesecake treasures for at least two hours or ideally overnight, so they become firm and easy to handle later.
Step 2: Prepare the Glutinous Rice Dough
For the mochi dough, combine glutinous rice flour, cornstarch, and sugar in a mixing bowl and whisk in whole milk until everything is silky smooth. For a perfectly fine dough without lumps, strain the batter once before steaming. Cover the bowl tightly with plastic wrap and poke a handful of holes using a toothpick for steam to circulate. Steam the mixture over high heat for 20 minutes without lifting the lid. When done, you’ll notice a translucent, elastic dough that holds its shape nicely. While it’s still hot, stir in the unsalted butter until melted completely. When the dough cools a bit, wear kitchen gloves and knead it thoroughly until it becomes stretchy and smooth — this step is key to achieving that signature mochi chewiness.
Step 3: Wrap and Shape Your Daifuku
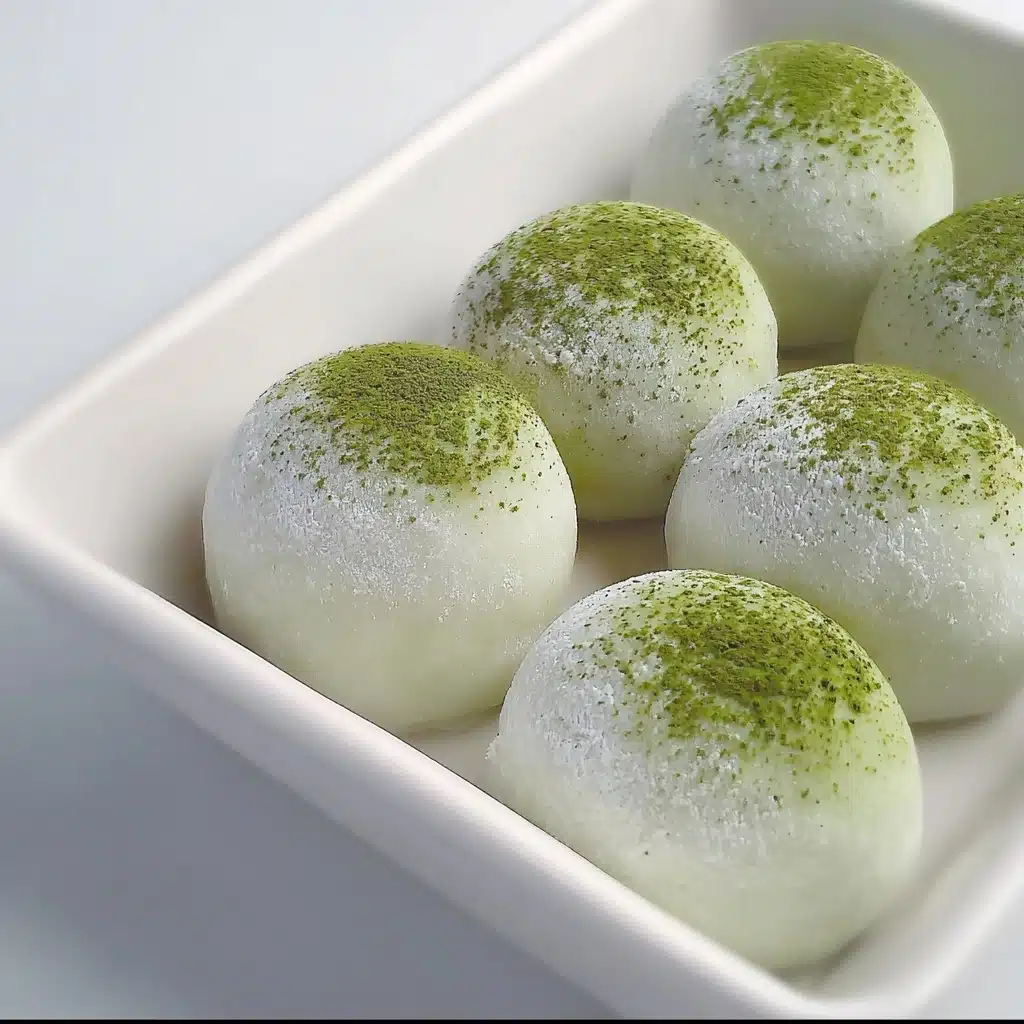
Divide your mochi dough into 8 to 10 equal portions. Roll each into a ball, then flatten into circles roughly 10 centimeters across, making sure the edges are thinner than the center. Dust your working surface generously with cooked glutinous rice flour to keep everything non-sticky. Place one mochi circle on your palm or a mold, add one frozen piece of matcha cream cheese filling in the center, and pinch the edges tightly to seal the filling inside without any gaps. Trim any excess dough to keep a neat appearance, then dust the entire daifuku lightly with more cooked glutinous rice flour. For the finishing touch, sift a thin layer of matcha powder on top to enhance its color and flavor. Chill the finished daifuku in your fridge for 30 minutes before serving to let the textures meld beautifully.
How to Serve Homemade Matcha Cheesecake Daifuku
Garnishes
Adding a delicate garnish can elevate your Homemade Matcha Cheesecake Daifuku into a stunning dessert. Consider dusting extra matcha powder for an earthy finish or sprinkling some toasted sesame seeds for crunch and nutty notes. A light drizzle of sweetened condensed milk or a few edible flowers can also make each bite feel like an elegant experience.
Side Dishes
These daifuku pair beautifully with a cup of hot green tea or matcha latte to double down on that verdant flavor. For a more substantial treat, serve alongside fresh seasonal fruits like strawberries or kiwis to brighten the palate. Lightly sweetened red bean paste also harmonizes well if you love traditional Japanese accents in your desserts.
Creative Ways to Present
Try arranging your Homemade Matcha Cheesecake Daifuku on a platter with a bed of fresh mint leaves or a sprinkle of crushed pistachios for texture contrast. Present them in adorable mini wooden boxes or on decorative ceramic plates to impress guests. You can even create bite-sized versions for party platters—it’s a conversation starter every time!
Make Ahead and Storage
Storing Leftovers
If you happen to have any leftovers of this delicate Homemade Matcha Cheesecake Daifuku, store them in an airtight container in the refrigerator. They’re best enjoyed within 2 to 3 days to maintain the freshness of the cheesecake filling and the tender texture of the mochi.
Freezing
Because the filling is already frozen during preparation, you can freeze the fully assembled daifuku for up to a month. Wrap each piece individually in plastic wrap and place them in a freezer-safe container to avoid freezer burn. Thaw in the fridge overnight before serving for the best texture.
Reheating
These treats are not meant to be reheated like regular baked goods. Instead, let them gently come to room temperature or enjoy chilled, allowing the cream cheese center to soften slightly without melting the delicate mochi outer layer.
FAQs
Can I use regular green tea powder instead of matcha for this recipe?
While you could try regular green tea powder, matcha is finely ground and has a much richer, more vibrant flavor and color which is essential for this dessert’s signature taste. Other green teas might result in a less intense flavor and color.
What if I don’t have a mold for piping the cheese filling?
No problem at all! You can simply spoon the filling onto plastic wrap and shape it into small balls before freezing. Alternatively, use any small, clean container or ice cube tray to create uniform portions.
Is it possible to make a vegan version of this Homemade Matcha Cheesecake Daifuku?
Transforming this recipe into vegan-friendly is a bit tricky since cream cheese and heavy cream are central to the creamy texture. However, you might experiment with vegan cream cheese and coconut cream, though the texture and flavor will differ slightly.
How do I prevent the mochi dough from sticking to my hands?
Dust your hands generously with cooked glutinous rice flour or cornstarch when handling the dough. Wearing thin kitchen gloves can also help in kneading the dough without it sticking excessively.
What is the best way to enjoy Homemade Matcha Cheesecake Daifuku for dessert?
For the best experience, serve chilled after a little rest in the fridge so the flavors marry well and the filling softens gently. Pair with a warm cup of tea for a comforting balance of temperatures.
Final Thoughts
Making Homemade Matcha Cheesecake Daifuku might feel like an adventure at first, but once you get the hang of it, this dessert becomes a beloved staple for any occasion. Its enticing matcha flavor paired with creamy cheesecake and tender mochi creates a truly unforgettable bite you’ll want to make again and again. So dive in, give this recipe a try, and watch your kitchen fill with the sweet aroma of matcha magic!
PrintHomemade Matcha Cheesecake Daifuku Recipe
Homemade Matcha Cheesecake Daifuku is a delightful fusion dessert combining creamy matcha-infused cheesecake filling wrapped in soft and chewy glutinous rice dough. This recipe guides you through making a smooth matcha cream cheese filling, preparing the tender mochi dough, and assembling the perfect bite-sized Japanese-style sweets that are refreshing, mildly sweet, and perfect for any special occasion or tea time.
- Prep Time: 30 mins
- Cook Time: 25 mins
- Total Time: 3 hours 5 mins
- Yield: 8 to 10 pieces 1x
- Category: Dessert
- Method: Steaming and freezing
- Cuisine: Japanese fusion
- Diet: Vegetarian
Ingredients
Matcha Cream Cheese Filling
- 200 g cream cheese, softened
- 25 g granulated sugar
- 8 g matcha powder (preferably Japanese matcha)
- 150 g heavy cream, chilled
Glutinous Rice Dough
- 120 g glutinous rice flour
- 30 g cornstarch
- 15 g granulated sugar
- 180 g whole milk
- 15 g unsalted butter
Instructions
- Make the Matcha Cream Cheese Filling: In a large bowl, place the softened cream cheese and add 25 g granulated sugar. Mix thoroughly with a spatula for about 2 minutes until the mixture is smooth and free of lumps. Add 8 g matcha powder and continue mixing until the powder is fully incorporated without clumps. Pour in 150 g of chilled heavy cream and whisk manually until the mixture thickens and turns creamy. Transfer this filling into a piping bag, pipe about 30 g portions into molds lined with plastic wrap, and freeze for at least 2 hours or overnight until solid.
- Prepare the Glutinous Rice Dough: In a clean bowl, combine 120 g glutinous rice flour, 30 g cornstarch, 15 g granulated sugar, and 180 g whole milk. Whisk continuously until the batter is smooth and has no lumps; strain the batter once to ensure a silky smooth texture. Cover the bowl tightly with plastic wrap and pierce 5-6 small holes with a toothpick for steam circulation. Steam over high heat for 20 minutes, making sure not to lift the lid during steaming. The dough is ready when it is translucent, holds shape, and a chopstick inserted in the center comes out clean.
- Incorporate Butter and Knead Dough: Remove the steamed dough while hot, add 15 g unsalted butter, and mix with chopsticks until the butter melts completely. Let the dough cool slightly until comfortable to handle. Wearing gloves, knead and stretch the dough repeatedly on a surface dusted with cooked glutinous rice flour until it becomes smooth, elastic, and forms a thin translucent film when pulled.
- Divide and Shape the Dough: Divide the mochi dough into 8 to 10 equal portions, approximately 40 g each. Roll each portion into a ball and then press it into a flattened circle about 10 cm in diameter, ensuring the edges are thinner than the center. Dust your work surface and the dough with cooked glutinous rice flour to prevent sticking.
- Wrap the Filling: Place one mochi dough circle on your palm or a mold, add one frozen matcha cream cheese filling portion in the center, then carefully pinch the dough edges to seal the filling completely, removing any excess dough. Dust the finished daifuku lightly with cooked glutinous rice flour to keep from sticking.
- Chill and Decorate: For the final touch, sift a light layer of matcha powder over the top of each daifuku for decoration. Chill the wrapped daifuku in the refrigerator for 30 minutes before serving to enhance the flavor and texture.
Notes
- Use preferably high-quality Japanese matcha powder for the best flavor and bright green color.
- Chill the heavy cream before mixing to help achieve the right creamy texture in the filling.
- Steam the dough without lifting the lid to ensure it cooks evenly and becomes perfectly translucent.
- Use gloves or keep your hands lightly floured to prevent the dough from sticking while kneading and shaping.
- The frozen cream cheese filling makes it easier to wrap without melting or deforming.
- The cooked glutinous rice flour dusting prevents sticking but use sparingly to avoid a powdery texture.
- Store daifuku in the fridge and consume within 1-2 days for optimal freshness.
Nutrition
- Serving Size: 1 piece (approx. 60 g)
- Calories: 160 kcal
- Sugar: 7 g
- Sodium: 50 mg
- Fat: 9 g
- Saturated Fat: 5.5 g
- Unsaturated Fat: 2.5 g
- Trans Fat: 0 g
- Carbohydrates: 15 g
- Fiber: 1.5 g
- Protein: 3 g
- Cholesterol: 35 mg
Keywords: Matcha cheesecake, daifuku, mochi dessert, Japanese dessert, matcha recipes, homemade daifuku, cream cheese filling