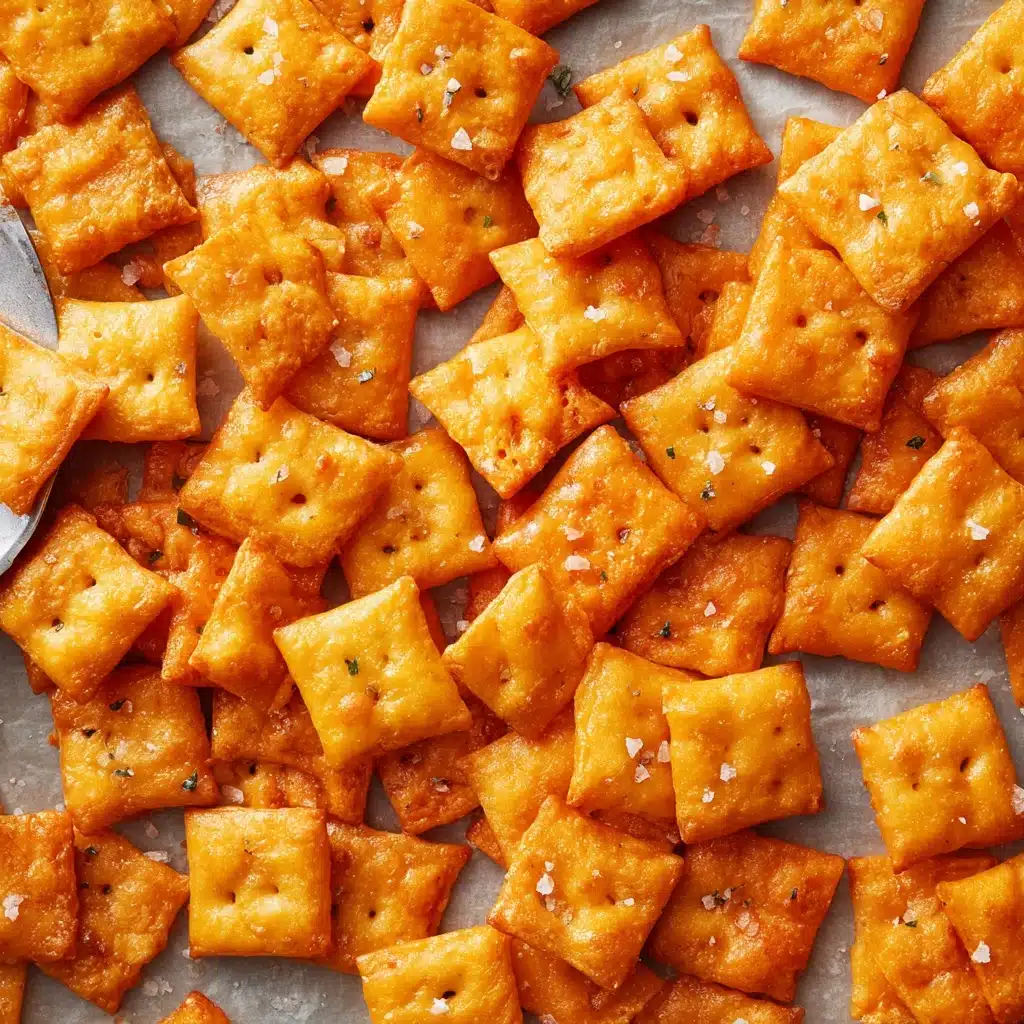
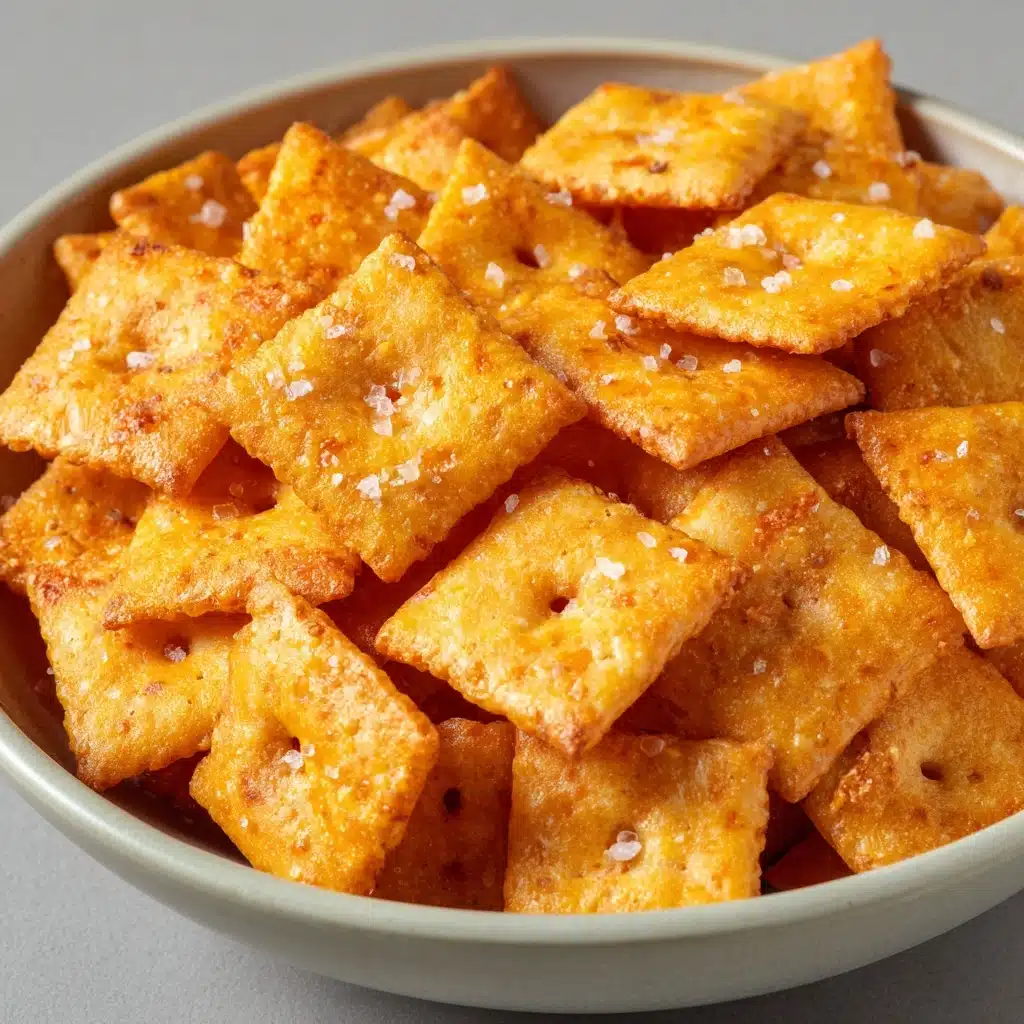
Homemade Cheeze-Its Recipe
If you’ve ever reached into a bright orange box for a crunchy, cheesy snack, prepare to be amazed at just how simple it is to make Homemade Cheeze-Its from scratch right in your own kitchen! These bite-sized crackers are astonishingly addictive, delivering that bold cheddar flavor and unmistakable crunch you love—without any mystery ingredients. The result? A nostalgic treat that’s even better than the store-bought version, with a melt-in-your-mouth richness that will become a new go-to for snack time.
Ingredients You’ll Need
You might be surprised by how purely simple this Homemade Cheeze-Its ingredient list is, yet each item brings something crucial to the party. From the powerfully sharp cheese to the touch of butter and that all-important seasoning, every ingredient pulls its weight in creating flavor, texture, and golden color.
- Shredded sharp cheddar cheese (8 ounces): The star of the show—use the sharpest cheddar you grab for the ultimate punch of flavor and classic color.
- Salted butter, softened (4 tablespoons or ½ stick): Gives the dough its melt-in-your-mouth feel and a richer finish in every bite.
- Seasoning salt (½ teaspoon): Adds depth and a savory balance that will make people reach for more.
- Garlic powder (½ teaspoon): For a subtle background warmth that enhances the cheese even further, making these crackers irresistible.
- All-purpose flour (1 cup, spooned and leveled): The magic that binds everything together, giving each cracker structure without weighing them down.
- Ice water (2–3 tablespoons): Helps the dough come together perfectly—super cold water keeps things crisp and flaky.
How to Make Homemade Cheeze-Its
Step 1: Pulse the Base Ingredients
Start by adding your shredded sharp cheddar, softened butter, seasoning salt, and garlic powder to a food processor or blender. Give everything a few pulses until your mixture looks crumbly yet even. This method combines all the fat and flavor, so every Homemade Cheeze-Its cracker comes out bold, rich, and totally cheesy.
Step 2: Add the Flour
Next, sprinkle in the all-purpose flour right over that cheese mixture, and pulse again. You’re looking for the dough to turn into something that resembles coarse sand. Don’t worry—it shouldn’t clump or form a ball just yet! This step ensures that the flour gets perfectly coated with cheese and butter, setting up that crunchy texture we’re after.
Step 3: Drizzle in the Ice Water
While pulsing, carefully drizzle in your ice-cold water one tablespoon at a time. Watch as the dough suddenly gathers itself together. The water helps everything bind without getting sticky or tough. Add just enough, and stop as soon as the mixture begins to form a ball. If it’s still crumbling, don’t hesitate to add an extra tablespoon.
Step 4: Chill the Dough
Scoop out the dough, gather it onto a piece of plastic wrap, and press it into a disc about one inch thick. Wrap it tightly, then let it rest in the refrigerator for at least an hour. This chill time is absolutely essential—it relaxes the gluten in the flour and firms up the fat, making the crackers easier to roll, cut, and bake up extra crisp.
Step 5: Prepare Your Baking Sheet
Preheat your oven to 350 degrees Fahrenheit and line a baking sheet with parchment paper. This makes cleanup a breeze and ensures your Homemade Cheeze-Its won’t stick, even if any cheese bubbles out during baking.
Step 6: Roll Out the Dough
Once the dough is well-chilled, cut it in half for easier handling. Roll out one half at a time on a lightly floured surface until it’s about 1/8 to 1/4 inch thick. The thinner you go, the crunchier the results! Rotate as you roll to keep things even.
Step 7: Cut into Squares
Use a sharp knife or pastry cutter to slice the dough into little squares, roughly 1 inch each. Aim for uniformity, but remember, part of the charm is the homemade look—no need for perfection! These little pieces will puff a bit in the oven, so don’t worry about tiny gaps.
Step 8: Add the Classic Dot
With a skewer or the tip of a toothpick, poke a hole through the center of each square. Not only is this a nod to the classic Cheeze-It style, but it also helps steam escape so your crackers stay snappy, not puffy.
Step 9: Arrange on the Baking Sheet
Place all the squares onto your prepared baking sheet, leaving a bit of space between each one. This helps them bake evenly and keep their shape, turning golden and bubbly without sticking together.
Step 10: Bake to Perfection
Slide the tray into the oven and bake for 12 to 16 minutes. Watch for the edges to turn the perfect shade of golden brown—that’s your cue! If you like a bit of extra crunch, leave them in for the full 16. Let your senses guide you; every oven is a little different.
Step 11: Cool and Enjoy
Once out of the oven, let Homemade Cheeze-Its cool directly on the baking sheet. This extra rest crisps them up even further, making them wonderfully snappy and ready to devour. Transfer to an airtight container once they’re completely cool (if you can resist nibbling them all right away!).
How to Serve Homemade Cheeze-Its
Garnishes
While these crackers are packed with flavor all by themselves, you can sprinkle them with a little extra flaky sea salt, poppy seeds, or even a pinch of smoked paprika just before baking for a fancier finish. A little dusting of parmesan as they cool is also a delightful way to boost the umami punch.
Side Dishes
Homemade Cheeze-Its make a knockout companion for tomato soup, classic chicken soup, or even a simple green salad. Try serving them on a cheese board alongside grapes, dried fruit, and cured meats for a DIY snack attack.
Creative Ways to Present
Pile Homemade Cheeze-Its into cute mason jars for grab-and-go snacks or stack them high on a small plate at your next party with a sign that says, “Yes, these are homemade!” For lunchboxes and picnics, toss in a few handfuls alongside some crunchy veggies and dip.
Make Ahead and Storage
Storing Leftovers
Store any leftover Homemade Cheeze-Its in an airtight container at room temperature. They’ll stay fresh and crispy for up to a week—though it’s unlikely they’ll last that long!
Freezing
Believe it or not, you can freeze both the shaped dough squares (before baking) or the finished crackers. Spread the unbaked squares on a tray until frozen, then transfer to a zip-top bag. For baked crackers, cool completely first, then pop them in a freezer-safe container for up to a month.
Reheating
If the crackers lose a bit of their crispness, just pop them on a baking sheet in a 300 degree oven for 5 minutes. Let them cool before snacking—they’ll crisp right back up, good as new!
FAQs
Can I use a different type of cheese in these Homemade Cheeze-Its?
Absolutely! Try swapping in extra-sharp cheddar, white cheddar, or even a blend of hard cheeses like parmesan or gruyere for a fun twist. Just make sure your cheese is on the dry side to keep the crackers snappy.
Do I have to use a food processor for the dough?
A food processor makes things super easy and quick, but you can absolutely make Homemade Cheeze-Its by hand. Just mash everything together with a pastry cutter or even clean hands—the crackers might turn out a touch more rustic, but just as delicious.
Why do I need to chill the dough?
Chilling gives the flour a chance to hydrate, keeps the butter cold (which leads to flakes and crunch!), and firms everything up. If you skip the chill, the dough will be harder to roll and the crackers won’t bake up quite as crisp.
Can I make Homemade Cheeze-Its gluten-free?
Yes! Use a good quality 1:1 gluten-free flour blend in place of the all-purpose flour. Be sure it contains some starch (like tapioca or potato starch) for the closest texture to classic Homemade Cheeze-Its.
How do I make these even cheesier?
Boost the cheese flavor by adding a couple tablespoons of nutritional yeast to the flour, or dust the finished crackers with a little extra finely grated cheese while they’re still hot from the oven.
Final Thoughts
There’s just something magical about pulling a tray of Homemade Cheeze-Its out of your own oven, golden, fragrant, and impossibly crisp. If you never thought you could top the famous boxed snack, this recipe will make you a believer. Try it and watch these crackers disappear faster than you can say “cheese”!
PrintHomemade Cheeze-Its Recipe

Learn how to make Homemade Cheeze-Its from scratch with this easy and delicious recipe. These cheesy, crispy crackers are perfect for snacking or entertaining!
- Prep Time: 15 minutes
- Cook Time: 15 minutes
- Total Time: 1 hour 45 minutes
- Yield: Approximately 100 crackers 1x
- Category: Appetizer, Snack
- Method: Baking
- Cuisine: American
- Diet: Vegetarian
Ingredients
For the Dough:
- 8 ounces shredded sharp cheddar cheese
- 4 tablespoons (½ stick) salted butter (softened)
- ½ teaspoon seasoning salt
- ½ teaspoon garlic powder
- 1 cup all-purpose flour (spooned and leveled)
- 2–3 tablespoons ice water
Instructions
- Prepare the Dough: In a food processor or blender, pulse the shredded cheddar cheese, softened butter, seasoning salt, and garlic powder until the mixture is crumbly.
- Add the Flour: Add the flour and pulse until the dough resembles coarse sand.
- Drizzle in Water: Drizzle in the ice water, one tablespoon at a time, and continue pulsing until the dough begins to form a ball. Add 1 more Tablespoon of water if needed.
- Chill the Dough: Transfer the dough to a sheet of plastic wrap, shape it into a disc, wrap tightly, and refrigerate for at least one hour.
- Roll Out the Dough: Preheat the oven to 350 degrees Fahrenheit and line a baking sheet with parchment paper. Cut dough in half and roll out each half of the chilled dough on a lightly floured surface to about ⅛-¼ inch thick.
- Cut and Bake: Use a sharp knife or a pastry cutter to cut the dough into small squares, approximately 1 inch in size. Use the tip of a skewer or a toothpick to poke a hole in the center of each square. Arrange the squares on the prepared baking sheet, leaving a small space between each piece. Bake for 12-16 minutes, or until the crackers are crisp and lightly golden around the edges.
- Cool and Serve: Remove from the oven and let cool completely on the baking sheet before serving or storing in an airtight container.
Nutrition
- Serving Size: 1 cracker
- Calories: 45
- Sugar: 0.1g
- Sodium: 65mg
- Fat: 3g
- Saturated Fat: 2g
- Unsaturated Fat: 1g
- Trans Fat: 0g
- Carbohydrates: 3g
- Fiber: 0.1g
- Protein: 2g
- Cholesterol: 10mg
Keywords: Homemade Cheeze-Its, Cheeze-Its recipe, homemade crackers, cheddar cheese crackers


