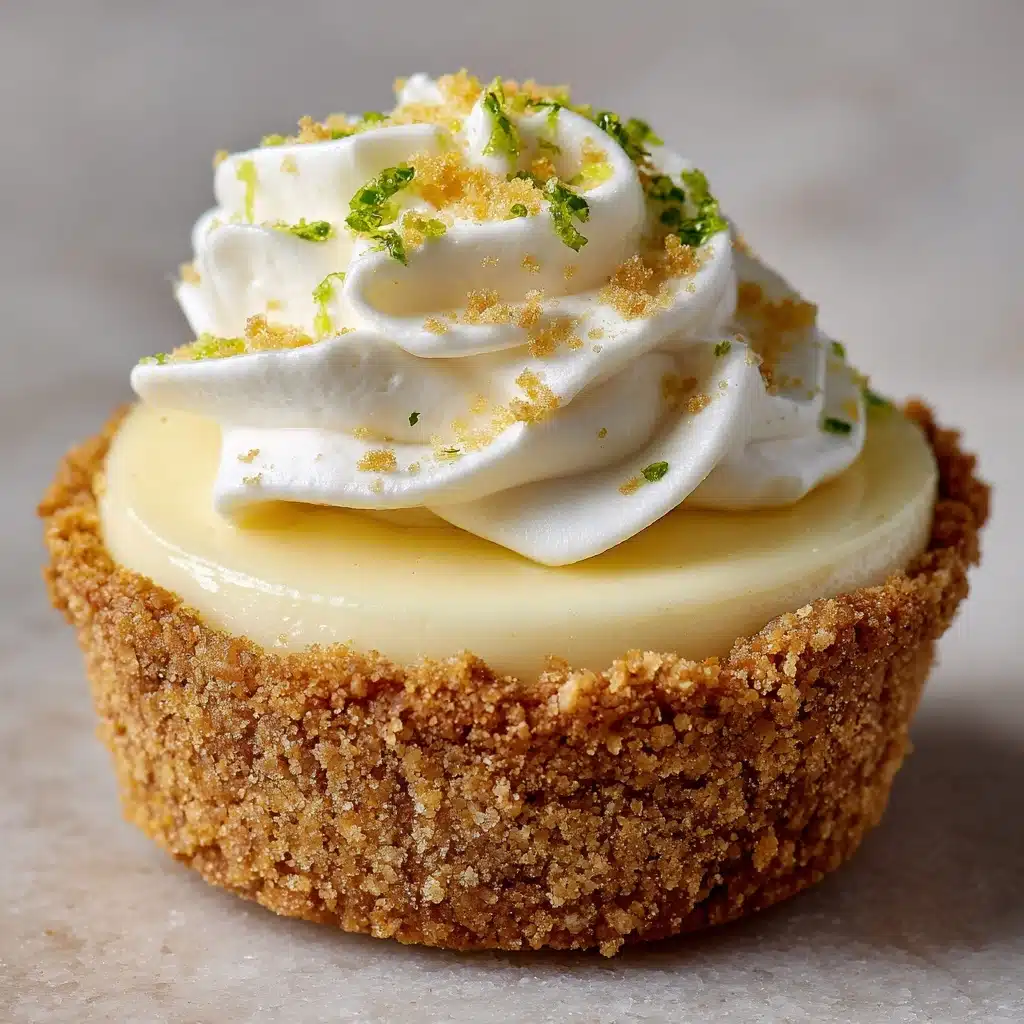
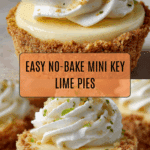
Heavenly No-Bake Mini Key Lime Pies Recipe
Get ready to transport your taste buds straight to a tropical paradise with Heavenly No-Bake Mini Key Lime Pies! This sweet-tart dessert boasts layers of crunchy graham cracker crust, silky citrus filling, and a cloud of whipped cream, all without ever turning on your oven. It’s one of those feel-good recipes that’s as fun to make as it is satisfying to serve—perfect for impressing guests or simply indulging your own citrus cravings.
Ingredients You’ll Need
When it comes to making the perfect Heavenly No-Bake Mini Key Lime Pies, the beauty is in both its simplicity and the magic of the ingredients. Each component brings something special—whether it’s texture, flavor, or a pop of color—that creates irresistible little treats.
- Graham cracker crumbs: These set the stage with their sweet, crunchy texture and classic flavor, forming the sturdy base for our minis.
- Melted butter: The secret to binding the crumb crust, while also adding a rich, silky note to every bite.
- Sugar: A touch increases both sweetness and structure in the crust, making sure every bite is balanced.
- Sweetened condensed milk: Essential for creating the creamy, luscious filling—no oven needed, just mix and pour.
- Key lime juice: The star of the show, providing that bold, zesty tartness you expect from a classic key lime pie.
- Lime zest: This tiny addition packs a serious punch of citrus and vivid color, elevating aroma and visual appeal.
- Heavy cream: Whipped to perfection, this gives that dreamy, airy topping which balances out the tangy filling.
- Powdered sugar: Adds a touch of sweetness and stability to your homemade whipped cream.
- Lime slices for garnish: These pretty green wheels are the perfect finishing flourish, adding color and extra citrus pop for each mini pie.
How to Make Heavenly No-Bake Mini Key Lime Pies
Step 1: Assemble the Crust
In a mixing bowl, combine the graham cracker crumbs, melted butter, and sugar. Use a fork to stir everything together until the mixture looks like damp sand and holds together when you press it between your fingers. This mixture turns into the crunchy, buttery foundation for your Heavenly No-Bake Mini Key Lime Pies, so take a moment to make sure every crumb is evenly coated in butter for the most satisfying crust.
Step 2: Press and Chill the Crusts
Spoon the crumb mixture into the wells of a muffin tin, dividing it evenly among each cup. Use the back of a spoon or the bottom of a small glass to firmly press the mixture into the bottom (and a little up the sides) of the tin, forming a compact crust. Pop the tin into the fridge for a few minutes while you prepare the filling, letting the butter set up and lock the crusts in place.
Step 3: Prepare the Zesty Fillings
While the crusts set, grab a clean bowl and whisk together the sweetened condensed milk, key lime juice, and lime zest. The mixture should become silky, thick, and slightly pale-green—a sure sign your Heavenly No-Bake Mini Key Lime Pies are about to shine with that signature zingy flavor. Be sure to really blend well for a perfectly smooth texture.
Step 4: Fill the Crusts
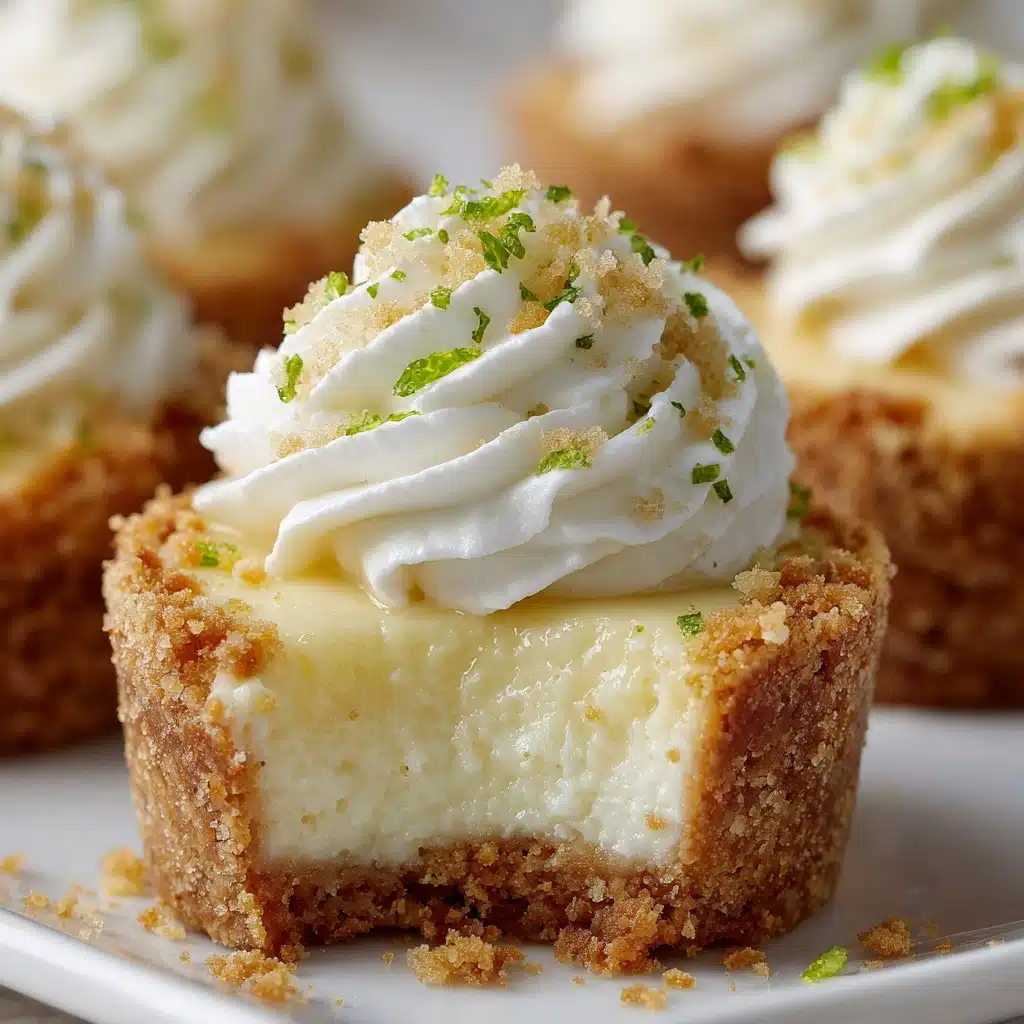
Carefully spoon or pour the filling over the chilled crusts, dividing it equally. Smooth the tops with a spatula or the back of a spoon, making sure each mini pie has a luscious, generous cloud of lime filling. The filling will still be a bit soft at this point—that’s exactly what you want!
Step 5: Chill Until Set
Pop the whole tray of filled mini pies into the refrigerator and let them chill for at least 2 hours. This step is key! The filling will set magically into a sliceable, creamy layer without needing any oven time, thanks to the magic of sweetened condensed milk and citrus juice. If you have time, a little extra chill won’t hurt either.
Step 6: Whip the Cream
Just before serving, pour the heavy cream and powdered sugar into a chilled mixing bowl. Beat with a hand mixer (or plenty of elbow grease with a whisk) until you get fluffy, stiff peaks. This whipped cream acts as a soft, sweet cloud that contrasts beautifully with the punchy citrus underneath.
Step 7: Garnish and Enjoy
Top each mini pie with a generous swirl of whipped cream and crown it with a vibrant slice of lime. These final touches take your Heavenly No-Bake Mini Key Lime Pies from pretty to showstopping—now get ready to dig in and watch them disappear!
How to Serve Heavenly No-Bake Mini Key Lime Pies
Garnishes
Dress each mini pie with a swoop of whipped cream and a thin wheel of lime for that unmistakable homemade charm. For a little extra flair, scatter a bit of extra lime zest or even a sprinkle of toasted coconut on top. Those bright green pops and airy swirls are just as much a feast for the eyes as they are for the palate!
Side Dishes
Heavenly No-Bake Mini Key Lime Pies shine on their own, but if you want to create a full dessert spread, serve alongside fresh mixed berries or a cool fruit salad. Their creamy-tart nature pairs wonderfully with sweet, juicy fruits—think strawberries, mangoes, or blueberries—for a truly refreshing combination.
Creative Ways to Present
If you’re feeling playful, assemble these minis in pretty individual ramekins or clear plastic cups for parties or picnics. You can also try layering the components in small mason jars for a fun parfait-style twist. Even a vintage plate or tiered dessert tray can transform your presentation, making these pies the centerpiece of your dessert table.
Make Ahead and Storage
Storing Leftovers
If you’re lucky enough to have leftover Heavenly No-Bake Mini Key Lime Pies, store them covered in the fridge. They’ll stay fresh and delicious for 2–3 days—just be sure to keep them sealed or tightly wrapped so the crust doesn’t dry out and the flavors stay bright and dreamy.
Freezing
These little pies actually freeze beautifully! Once assembled and chilled, wrap each mini pie well in plastic wrap and foil before freezing. When you’re craving a taste of summer, just thaw in the fridge for a few hours. The filling may be a little softer, but the flavors remain perfectly intact.
Reheating
No reheating required! In fact, they’re best enjoyed cool straight from the fridge. If you prefer a slightly softer texture after freezing, let them sit at room temperature for a few minutes before serving, but avoid microwaving to keep the crusts crisp.
FAQs
Can I use regular limes instead of key limes?
Absolutely! While key limes give a distinctive flavor that’s bright and tangy, regular limes work well in a pinch and still create a delicious mini pie. Just use the same measurements and enjoy the citrus zing!
How do I get mini pies out of the muffin tin?
The easiest way is to line your muffin tin with paper or silicone liners before adding the crust. When ready to serve, simply lift out each mini pie. If you skipped liners, run a thin knife around the edge and gently pop them out after chilling.
Can I make these pies ahead for a party?
Definitely! In fact, Heavenly No-Bake Mini Key Lime Pies are the ultimate make-ahead dessert. Prepare and refrigerate them up to a day in advance, then whip and garnish with fresh cream right before serving to impress your guests.
What if I don’t have a hand mixer for the whipped cream?
No problem! You can whisk heavy cream and powdered sugar by hand. Use a chilled bowl and whisk, and it’ll just take a few minutes (and a little muscle) to reach those perfect fluffy peaks.
Are these safe for kids to help make?
Yes! Since there’s no baking or hot oven required, kids can help with mixing, pressing crusts, and decorating. It’s a fun family project where everyone gets their own mini masterpiece to enjoy at the end.
Final Thoughts
If you haven’t tried Heavenly No-Bake Mini Key Lime Pies yet, there’s no better time! With so many layers of bright, creamy, crunchy deliciousness and barely any fuss, these playful pies are a guaranteed hit. Go on—whip up a batch and treat yourself and your loved ones to a bite-sized taste of sunshine.
PrintHeavenly No-Bake Mini Key Lime Pies Recipe
These Heavenly No-Bake Mini Key Lime Pies are a refreshing and tangy dessert perfect for any occasion. With a buttery graham cracker crust and a creamy lime filling, these mini pies are sure to impress your guests.
- Prep Time: 20 minutes
- Cook Time: 0 minutes
- Total Time: 2 hours 20 minutes
- Yield: 12 mini pies 1x
- Category: Dessert
- Method: No-Bake
- Cuisine: American
- Diet: Vegetarian
Ingredients
For the Crust:
- 1 cup graham cracker crumbs
- 1/4 cup melted butter
- 2 tablespoons sugar
For the Filling:
- 1 (14-ounce) can sweetened condensed milk
- 1/3 cup key lime juice
- 1 teaspoon lime zest
For Topping:
- 1 cup heavy cream
- 2 tablespoons powdered sugar
- Lime slices for garnish
Instructions
- Prepare the Crust: In a bowl, combine graham cracker crumbs, melted butter, and sugar until mixture resembles wet sand.
- Form the Crust: Press the crumb mixture into the bottom of a muffin tin to form the crust.
- Make the Filling: In another bowl, mix sweetened condensed milk, key lime juice, and lime zest until smooth.
- Fill the Crusts: Pour the filling over the crusts.
- Chill: Refrigerate the pies for at least 2 hours or until set.
- Whip the Cream: Whip the heavy cream and powdered sugar to stiff peaks.
- Top and Serve: Top each pie with whipped cream and a lime slice before serving.
Notes
- You can also garnish with additional lime zest for extra flavor.
- These mini pies can be stored in the refrigerator for up to 3 days.
Nutrition
- Serving Size: 1 mini pie
- Calories: 280
- Sugar: 22g
- Sodium: 120mg
- Fat: 18g
- Saturated Fat: 10g
- Unsaturated Fat: 6g
- Trans Fat: 0g
- Carbohydrates: 26g
- Fiber: 0.5g
- Protein: 3g
- Cholesterol: 50mg
Keywords: Key Lime Pie, Mini Desserts, No-Bake Pies, Lime Desserts