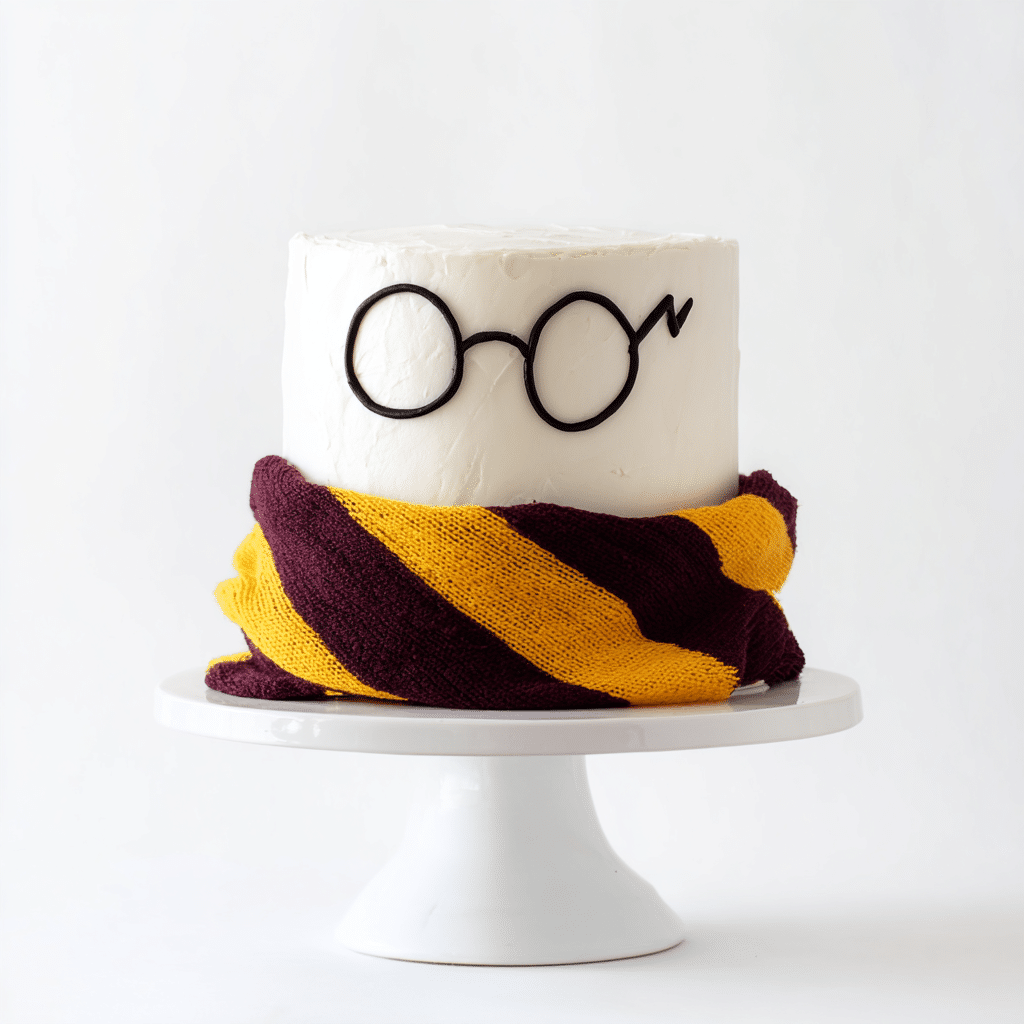
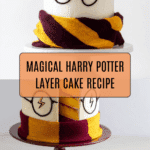
Harry Potter Layer Cake Recipe
If you’ve ever dreamed of celebrating your favorite wizarding world with something truly magical, look no further than this Harry Potter Layer Cake. Each slice reveals striking golden and maroon layers—Gryffindor colors, of course—held together with luscious vanilla frosting and decked out with a nod to Harry’s iconic glasses and scar. The cake is as delicious as it is enchanting, making it perfect for birthdays, movie marathons, or just turning an ordinary day into something memorable. Whether you’re a novice Muggle baker or the head of a Hogwarts feast, this cake will have everyone under its spell!
Ingredients You’ll Need
The magic of this Harry Potter Layer Cake starts with humble pantry staples, but every ingredient plays a vital role—giving the cake a tender crumb, vibrant colors, and that enchanting flavor that brings out the childlike wonder in all of us.
- Unsalted butter (1 C + 1 3/4 C + 2 Tb): For ultra-richness and a creamy base—room temperature is key!
- Granulated sugar (2 C): Sweetens the batter, helping achieve a light, airy crumb.
- Large eggs (4): Add structure and that irresistible moistness.
- Vanilla extract (6 Tb total): Infuses warmth and classic cake flavor—don’t skimp on the real stuff!
- Salt (1 tsp): Rounds out flavors and keeps the sweetness in check.
- Baking powder (2 Tb): Lightens the cake for the perfect rise.
- Cake flour (4 1/4 C + 2 Tb): Gives each layer a fine, delicate crumb—don’t substitute all-purpose if you can avoid it!
- Sour cream (2 C): Adds moisture and a subtle tang that keeps the cake tender.
- Americolor Lemon Yellow & Gold: Just a few drops give you that unmistakable Gryffindor gold.
- Americolor Maroon & Red Red: For the bold maroon layers; color is everything in this cake.
- Shortening (1/2 C + 2 Tb): Helps create a stable, fluffy frosting that’s perfect for decorating.
- Powdered sugar (4 1/2 C): Sifts into the frosting for that sweet, melt-in-your-mouth finish.
- Heavy cream (3 Tb + as needed): Makes the frosting extra smooth and easy to spread.
- Americolor Chocolate Brown, Eggplant, & Navy Blue: These shades combine for Harry’s iconic glasses and the scar detail.
- Cocoa powder: Deepens the color for realistic, magical piping.
How to Make Harry Potter Layer Cake
Step 1: Prep the Oven and Pans
Begin by preheating your oven to 350°F. Lightly coat two 8-inch round cake pans, then line the bottoms with parchment paper. If you have bake-even strips, wrap them around your pans—they help prevent domes, making your layers even and beautiful from the start.
Step 2: Mix the Golden Cake Batter
In your stand mixer, cream together 1/2 cup butter and 1 cup sugar until light and fluffy. Beat in 2 eggs, one at a time, then add 2 teaspoons vanilla, 1/2 teaspoon salt, and 1 tablespoon baking powder. Gradually alternate adding 2 cups plus 3 tablespoons cake flour with 1 cup sour cream, incorporating each until just combined. Finish with 6 drops lemon yellow and 4 drops gold Americolor gel—to conjure that Gryffindor gold. Mix well until the color is even, then divide the batter between your prepared pans and bake for 30 minutes or until a toothpick comes out clean. Cool the cakes completely before inverting them onto cake boards, then flip and cool on a rack.
Step 3: Whip Up the Maroon Layers
Repeat the previous mixing steps to prepare your maroon layers: keep your method the same, but color this batter with 6 drops Maroon Americolor and 2 drops Red Red Americolor. It’s like painting with magic—watch the deep maroon swirl into your batter! Bake just as before and let the cakes cool thoroughly for the most manageable layers.
Step 4: Chill the Layers
Once all layers are completely cool, wrap each one tightly in two layers of plastic wrap. Place them in the refrigerator for 6–12 hours, or overnight if you can wait—this trick makes the cake easier to assemble and slice later, and the flavors actually improve as they rest.
Step 5: Make the Magical Frosting
In a clean bowl of your stand mixer, beat together the remaining butter and shortening until fluffy, then blend in the vanilla. Add powdered sugar one cup at a time, mixing well after each addition. Finally, beat in the heavy cream until your frosting is pillowy smooth and spreadable You’re looking for a texture that will glide over cake layers without tearing them. Cover with plastic wrap until assembly time!
Step 6: Level the Cake Layers
Use a serrated knife or a cake leveler to carefully trim any domes off your cooled cakes—flat layers build tall, dramatic cakes and make stacking even easier. Save those tasty scraps for a baker’s sneak preview!
Step 7: Assemble Your Harry Potter Layer Cake
Place one cake layer on your turntable or serving stand. Add a generous amount of frosting (about four large cookie scoops!) and spread evenly. Top with a contrasting colored layer, more frosting, and continue alternating colors. Stack until you have all four layers nestled together, finishing with a thin coating of frosting all around (this is your crumb coat—it keeps crumbs from escaping into the final coat). Chill the cake for 1–2 hours to set the crumb coat.
Step 8: Reserve Frosting for Decoration
Scoop out up to half a cup of frosting and cover it for later decoration—this is what you’ll color for Harry’s glasses and lightning bolt scar.
Step 9: Frost the Cake Beautifully
Remove your chilled cake from the fridge and slather the remaining frosting thickly on top and sides. Use a large offset spatula and bench scraper to create ultra-smooth sides and sharp edges (channel your inner pastry chef). Don’t rush this part—each swipe is a little more magic!
Step 10: Chill Again for Perfection
Transfer the frosted cake back to the refrigerator to set for at least another hour. This ensures a super clean finish and easy decorating.
Step 11: Tint and Prepare Decoration Frosting
Color your reserved frosting with drops of Americolor chocolate brown, eggplant, and navy blue. Add cocoa powder a bit at a time until you’ve nailed the deep, magical shade for Harry’s glasses. If it gets too thick, thin with a splash of cream until perfect piping consistency is achieved. Transfer to a small piping bag fitted with a round tip.
Step 12: Add the Finishing Touches
Gently press a small round cookie cutter (or similar object) into the top of the cake to guide the glasses shape. Pipe the glasses and Harry’s iconic lightning bolt scar—this little detail will delight every fan lucky enough to score a slice!
Step 13: Store Until Ready to Serve
Keep your finished masterpiece chilled in the refrigerator until serving. The chilling keeps the frosting firm and colors vibrant—plus, anticipation only makes the first bite sweeter.
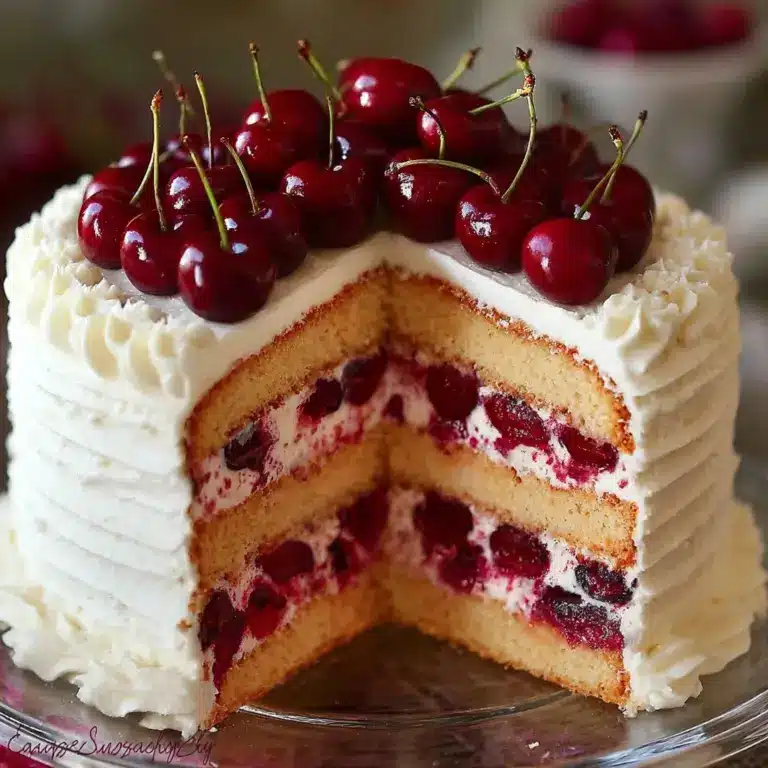
Step 14: Slice and Share
When you’re ready to serve, use a sharp knife for clean, dramatic slices that show off all four gorgeously colored layers. Serve thick for a showstopper look, or cut each in half horizontally for more portions—either way, every piece is a magical reveal!
How to Serve Harry Potter Layer Cake

Garnishes
This cake is a showstopper as is, but you can add edible gold stars, a dusting of shimmering luster dust, or even little chocolate frogs to the plate for maximum wizarding flair. For birthdays, a few tall sparkler candles make the moment extra enchanting!
Side Dishes
While the Harry Potter Layer Cake is certainly the star of any dessert table, pairing it with a simple vanilla ice cream or a mug of homemade butterbeer can double the fun. Even a bowl of fresh berries makes a magical contrast to the cake’s sweet richness.
Creative Ways to Present
For a real Hogwarts celebration, set your cake atop a golden platter and surround it with themed props: a Gryffindor scarf, a wand or two, and maybe a golden snitch hidden nearby. If serving at a party, consider slicing it in front of your guests—the reveal gets gasps every time!
Make Ahead and Storage
Storing Leftovers
Keep any leftover slices of your Harry Potter Layer Cake in an airtight container in the refrigerator. The cake will stay moist and flavorful for up to four days. If layers begin to dry a bit, a quick zap in the microwave (just a few seconds) brings life right back.
Freezing
This cake is freezer friendly! Wrap individual slices tightly in plastic wrap, then foil, and store for up to two months. Thaw overnight in the refrigerator before serving to preserve texture and flavor.
Reheating
If you like your cake just slightly warm, remove from the fridge and let it sit at room temperature for 30 minutes, or microwave slices for 10-15 seconds. Don’t overheat, especially with frosted cakes—the frosting softens quickly!
FAQs
Can I use all-purpose flour instead of cake flour?
While all-purpose flour will work in a pinch, cake flour gives you a much softer, fluffier crumb—it’s worth the extra trip to the store for that authentic bakery feel in your Harry Potter Layer Cake.
Do I need Americolor gel food colorings?
Gel colors, like Americolor, deliver intense shades without thinning the batter. If you substitute with liquid food coloring, you might need a little extra, but try to stick to gels for those bold Gryffindor hues.
Why do I need to chill the cakes before frosting?
Chilling the layers after baking makes them firmer, which prevents crumbling and shifting during assembly. This step is key for tall, awe-inspiring layers in your Harry Potter Layer Cake.
What’s the best way to get even cake layers?
Weigh your batter before dividing, and opt for bake-even strips around each pan. Level the cooled cakes with a serrated knife for perfectly flat, stackable layers every time.
Can this cake be made a day or two ahead?
Absolutely! In fact, the flavors deepen and the structure holds even better after chilling overnight. Just keep your Harry Potter Layer Cake covered and in the fridge until it’s time to unveil your masterpiece.
Final Thoughts
There’s something truly magical about slicing into a Harry Potter Layer Cake and seeing the bold Gryffindor colors revealed inside. Whether you’re hosting a Hogwarts-themed birthday or treating yourself to a fantastical baking project, this cake is guaranteed to be a conversation starter and a crowd-pleaser. Give it a try—your inner wizard and all your guests will thank you!
PrintHarry Potter Layer Cake Recipe
This Harry Potter Layer Cake is a magical dessert that will delight any fan of the wizarding world. With its vibrant colors and delicious flavors, this cake is sure to be a hit at any celebration or themed party.
- Prep Time: 45 minutes
- Cook Time: 30 minutes
- Total Time: 12 hours
- Yield: 1 Harry Potter Layer Cake 1x
- Category: Dessert
- Method: Baking
- Cuisine: American
- Diet: Vegetarian
Ingredients
For the Vanilla Cake Layers:
- 1 cup unsalted butter, softened
- 2 cups granulated sugar
- 4 large eggs
- 4 tsp vanilla extract
- 1 tsp salt
- 2 tbsp baking powder
- 4 1/4 cups + 2 tbsp cake flour
- 2 cups sour cream
For the Frosting:
- 1 3/4 cups + 2 tbsp unsalted butter
- 1/2 cup + 2 tbsp shortening
- 2 tbsp vanilla extract
- 4 1/2 cups powdered sugar
- 3 tbsp heavy cream
Food Coloring:
- Americolor Lemon Yellow
- Americolor Gold
- Americolor Maroon
- Americolor Red Red
- Americolor Chocolate Brown
- Americolor Eggplant
- Americolor Navy Blue
- Cocoa powder
Instructions
- Preheat the Oven: Preheat the oven to 350°F and prepare cake pans.
- Prepare Vanilla Cake Layers: Cream butter and sugar, add eggs and vanilla, mix in dry ingredients and sour cream, divide batter and color for layers, bake and cool.
- Create Maroon Cake Layers: Repeat steps for maroon layers with specific food coloring, bake and cool.
- Chill Cakes: Wrap cooled cakes and refrigerate for 6-12 hours.
- Make Frosting: Beat butter, shortening, sugar, and cream until smooth.
- Assemble Cake: Level cakes, stack layers with frosting, chill, then frost the entire cake.
- Decorate Cake: Reserve some frosting, frost the cake, chill, tint reserved frosting and pipe decorations.
- Serve: Chill until ready to serve, cut and enjoy!
Notes
- For best results, follow the instructions carefully to achieve vibrant colors and delicious flavors.
- Store the decorated cake in the refrigerator until ready to serve.
- Adjust the food coloring to achieve the desired shades for the themed cake.
Nutrition
- Serving Size: 1 slice (1/12 of cake)
- Calories: 560
- Sugar: 45g
- Sodium: 320mg
- Fat: 32g
- Saturated Fat: 19g
- Unsaturated Fat: 10g
- Trans Fat: 0g
- Carbohydrates: 64g
- Fiber: 1g
- Protein: 5g
- Cholesterol: 120mg
Keywords: Harry Potter, Layer Cake, Wizarding World, Dessert, Celebration, Party, Magical, Vibrant Colors, Flavors

