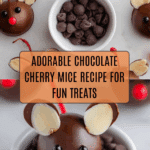
Chocolate Cherry Mice Recipe
Introduction
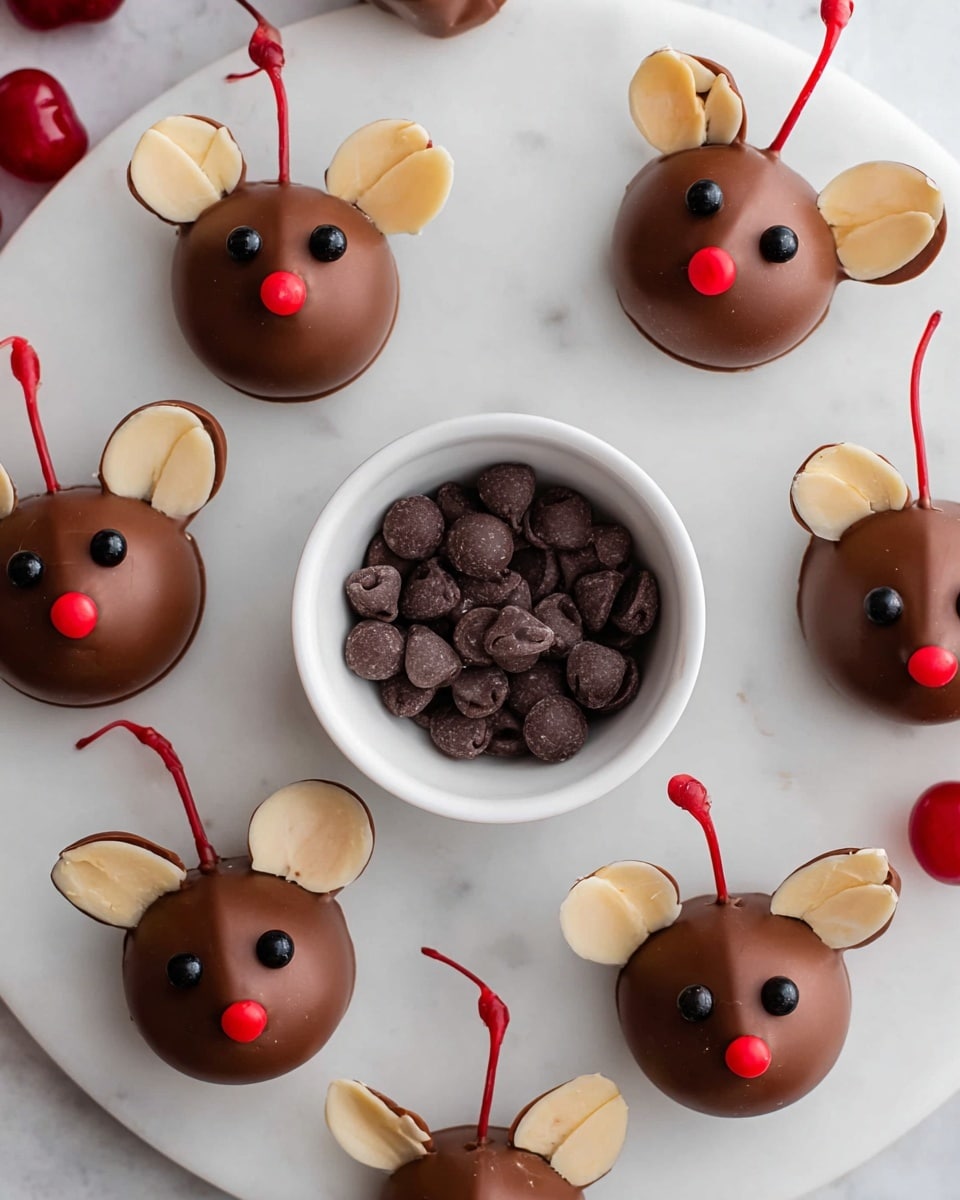
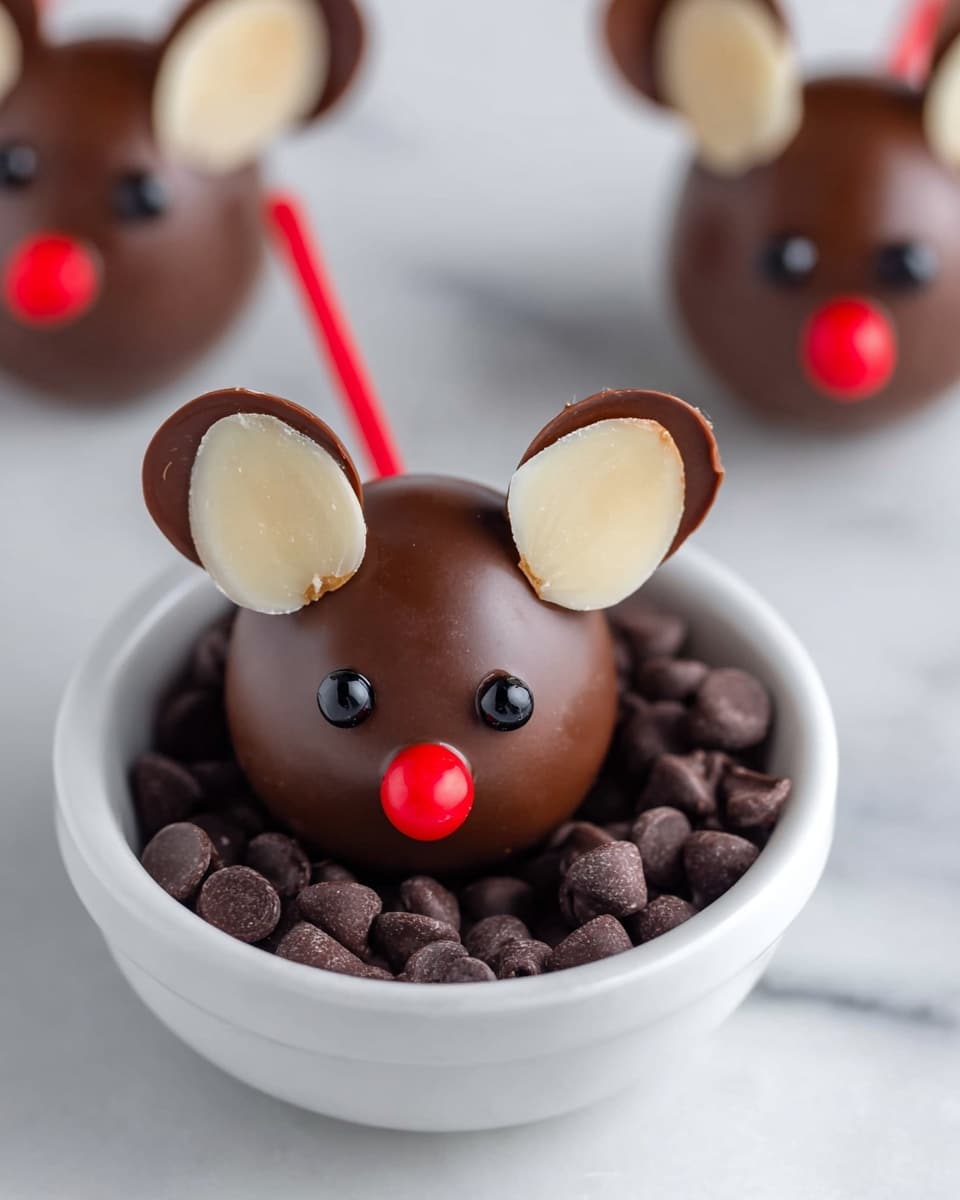
Chocolate Cherry Mice are a whimsical and delightful treat that combines sweet cherries, smooth chocolate, and crunchy almonds. Perfect for parties or fun snacks, these charming little mice are as enjoyable to make as they are to eat.
Ingredients
- 1 cup milk chocolate chips
- 1 teaspoon shortening
- 20 maraschino cherries with stems
- 20 Hershey’s kisses
- Sliced almonds (extra for matching sizes and breakage)
- Black icing writer
- Small red candies (such as dragees or cinnamon candies)
Instructions
- Step 1: Place the milk chocolate chips and shortening in a small microwave-safe bowl.
- Step 2: Heat the mixture in 30-second increments, stirring between each, until the chocolate is mostly melted.
- Step 3: Stop heating and stir until the mixture is fully melted and smooth.
- Step 4: Spread a sheet of parchment paper on your work surface.
- Step 5: Hold a maraschino cherry by its stem, removing any excess juice with a paper towel. Dip the cherry into the chocolate to coat well, then place it on the parchment. Adjust positioning to shape the “tail.”
- Step 6: Lean a Hershey’s kiss flat side down onto the chocolate-coated cherry to form the mouse’s head.
- Step 7: Repeat for about half the cherries to allow the chocolate to set slightly before adding ears and features.
- Step 8: Select similarly sized slivered almonds for ears. Break off the narrow tips and wedge them between the Hershey’s kiss and the cherry.
- Step 9: Using the black icing writer, dot two small eyes onto the mouse’s head through the small hole in the tip.
- Step 10: With a toothpick, dab a bit of melted chocolate onto the pointed tip of the Hershey’s kiss. Press a small red candy onto the dab to create a nose.
- Step 11: Allow the chocolate to fully set and harden, then gently peel each mouse from the parchment paper to serve and enjoy.
Tips & Variations
- Make sure to dry cherries thoroughly to help the chocolate adhere better and prevent slipping.
- Use semi-sweet chocolate chips if you prefer a less sweet flavor.
- Try mini chocolate chips or white chocolate for different looks and tastes.
- If almond slices break, have extras on hand so each mouse has matching ears.
Storage
Store your Chocolate Cherry Mice in an airtight container in a cool place or refrigerator for up to 3 days. When ready to serve, allow them to reach room temperature for best texture. Avoid storing in a warm environment to prevent chocolate melting.
How to Serve
Serve this delicious recipe with your favorite sides.
FAQs
Can I use fresh cherries instead of maraschino cherries?
Fresh cherries may work, but maraschino cherries are sweeter and less watery, making them better suited for this recipe.
What if I don’t have a black icing writer?
You can use a toothpick dipped in melted dark chocolate to create the eyes or substitute with small edible black decorations.
PrintChocolate Cherry Mice Recipe

Delightfully fun and festive, these Chocolate Cherry Mice are a charming no-bake treat perfect for parties or holiday gatherings. Combining luscious milk chocolate, sweet maraschino cherries, and crunchy almond ears, each bite-sized mouse is both adorable and delicious, with a red candy nose and icing-detailed eyes adding personality to this whimsical dessert.
- Prep Time: 15 minutes
- Cook Time: 5 minutes (melting chocolate only)
- Total Time: 20 minutes
- Yield: 20 chocolate cherry mice 1x
- Category: Dessert
- Method: No-Cook
- Cuisine: American
- Diet: Vegetarian
Ingredients
Chocolate Coating
- 1 cup milk chocolate chips
- 1 teaspoon shortening
Mice Components
- 20 maraschino cherries with stems
- 20 Hershey’s kisses
- Sliced almonds (enough for matching sizes and some extra)
Decorations
- Black icing writer
- Small red candies (such as dragees or cinnamon candies)
Instructions
- Melt the Chocolate: Place the milk chocolate chips and shortening in a microwave-safe bowl. Heat in 30-second increments, stirring well between each, until the chocolate chips are mostly melted. Then stop heating and keep stirring until the mixture becomes smooth and fully melted.
- Prepare Work Surface: Spread a sheet of parchment paper on your work area to place the assembled mice on as they set.
- Dip the Cherries: Hold a maraschino cherry by its stem, making sure to remove excess juice by dabbing it on a paper towel. Dip the cherry fully into the melted chocolate to coat well, then place on the parchment paper, adjusting the position slightly to create a ‘tail’ effect for the mouse.
- Add the Mouse Head: Lean the flat side of a Hershey’s kiss onto the chocolate-coated cherry to form the head of the mouse.
- Repeat Initial Assembly: Continue dipping and assembling about half of the cherries with kisses. This allows the chocolate to set slightly before adding delicate details.
- Attach Almond Ears: Select sliced almonds of similar sizes to serve as ears. Break off the narrower tips of the almonds to shape them, then wedge the ‘ears’ between the Hershey’s kiss and cherry on each mouse.
- Add Eyes: Using the black icing writer with a fine tip, carefully dot two eyes onto the head of each mouse.
- Attach Red Nose: With a toothpick, dab a small amount of melted chocolate onto the tip of the Hershey’s kiss to act as ‘glue,’ then place a small red candy on top to create the mouse’s nose.
- Set and Serve: Allow the chocolate to harden completely. Once set, gently peel the mice off the parchment paper and serve as a delightful treat.
Notes
- Ensure the cherries are well-drained and dried to help the chocolate adhere properly.
- Work in batches to prevent the chocolate from hardening before assembly.
- If chocolate thickens during assembly, gently rewarm it in the microwave in short increments.
- Sliced almonds can break easily; handle with care when selecting and attaching ears.
- Store finished mice in a cool place to prevent melting; refrigeration is optional but may cause condensation.
Keywords: chocolate cherry mice, no-bake treats, holiday dessert, cherry chocolate recipe, party snacks, fun desserts, easy chocolate treats

