Chocolate Cake Pops Recipe
Introduction
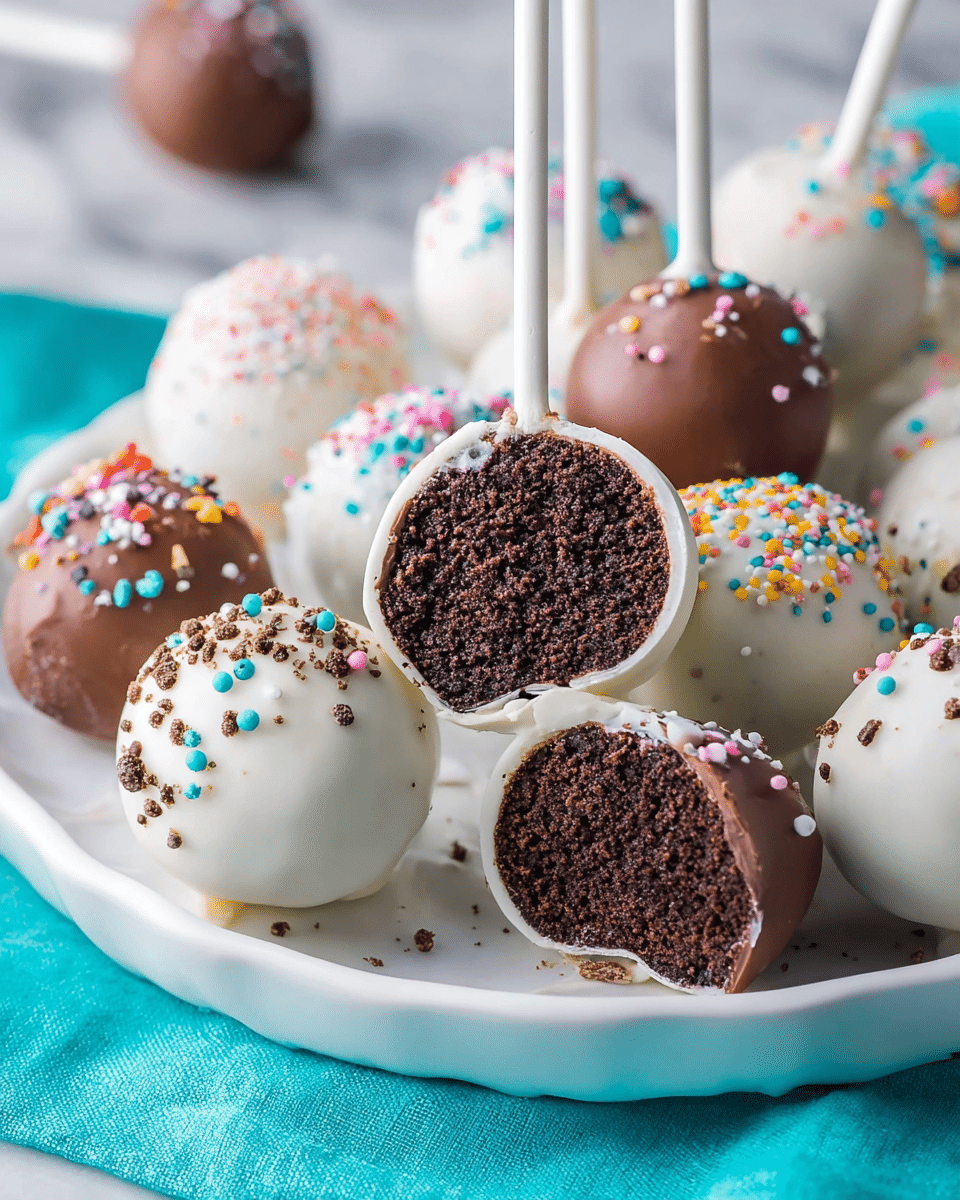
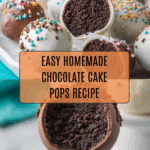
Chocolate cake pops are a fun and delicious treat, perfect for parties or a sweet snack. These bite-sized delights combine moist chocolate cake with creamy frosting, all coated in a smooth chocolate shell. Get ready to impress with this easy-to-make recipe!
Ingredients
- 1 cup all-purpose flour
- 1 cup granulated sugar
- ⅓ cup natural cocoa powder
- ¾ teaspoon baking soda
- ½ teaspoon salt
- ½ cup unsalted butter (melted)
- 1 large egg + 1 large egg yolk (room temperature preferred)
- ½ cup buttermilk
- 1 teaspoon vanilla extract
- ¼ cup very hot water (must be steaming hot!)
- ½ cup unsalted butter (softened)
- 1 teaspoon vanilla extract
- ⅛ teaspoon salt
- 1 ½ cups powdered sugar
- ⅓ cup natural cocoa powder
- 2 tablespoons heavy cream
- 15 oz chocolate or white chocolate melting wafers or almond bark
- Sprinkles or Oreo cookie crumbs for decorating (optional)
Instructions
- Step 1: Preheat oven to 350°F (175°C) and lightly grease one 8-inch round cake pan with baking spray. Set aside.
- Step 2: In a large bowl, whisk together flour, sugar, cocoa powder, baking soda, and salt until combined.
- Step 3: Add melted butter to the dry ingredients and stir until combined.
- Step 4: Add the egg and egg yolk, stirring well. Scrape the sides and bottom of the bowl periodically to mix thoroughly.
- Step 5: Using a mixer on low speed, add vanilla extract and then buttermilk, stirring until combined.
- Step 6: Add the hot water and stir until the batter is smooth and well combined. The batter will be thin, which is normal.
- Step 7: Pour the batter into the prepared pan and bake for 30–35 minutes. Test doneness with a toothpick; it should come out with moist crumbs.
- Step 8: Let the cake cool for 15 minutes in the pan, then invert onto a cooling rack to cool completely.
- Step 9: Meanwhile, prepare the frosting by beating softened butter, vanilla extract, and salt until smooth and creamy.
- Step 10: Gradually add powdered sugar and cocoa powder, mixing until fully combined.
- Step 11: Slowly stir in heavy cream until the frosting is smooth. Beat on medium/high speed for 30 seconds to lighten.
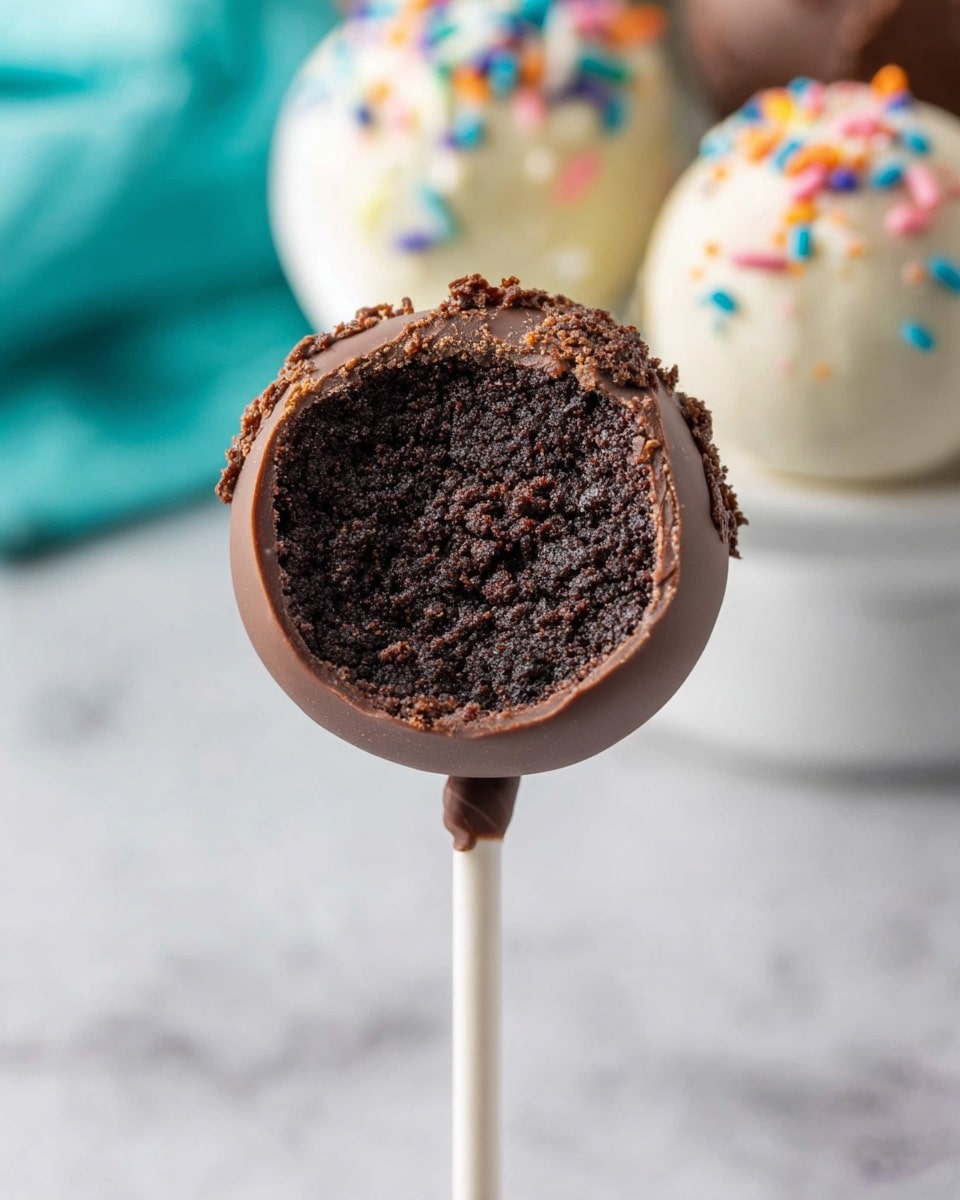
- Step 12: Once the cake is completely cooled, crumble it into a large bowl. Break into pebble-sized pieces without mashing.
- Step 13: Add frosting to the crumbled cake and mix with a mixer on low speed until the mixture holds together when pinched.
- Step 14: Scoop about 1½ tablespoons of the mixture and roll into smooth balls. Place on a wax-paper lined baking sheet without touching.
- Step 15: Freeze the cake balls for 30 minutes to firm up before dipping.
- Step 16: Melt chocolate wafers according to package instructions and have any decorations ready.
- Step 17: Prepare a stand by flipping two cardboard egg cartons upside down and piercing holes in the center of each cup for cake pop sticks.
- Step 18: Dip one end of a cake pop stick in melted chocolate, then insert halfway into a cake ball.
- Step 19: Turn the cake pop upside down and dip completely into melted chocolate. Let excess drip off before placing the stick into the stand.
- Step 20: Immediately add sprinkles or cookie crumbs if desired, then repeat with the remaining pops.
- Step 21: Allow the chocolate coating to harden fully before serving or storing.
Tips & Variations
- Use high-quality cocoa powder for a richer chocolate flavor.
- For a lighter cake, substitute half the all-purpose flour with cake flour.
- Try white chocolate coating and add colorful sprinkles for a festive look.
- Refrigerate cake balls overnight to make rolling easier and more uniform.
- Use crushed cookies or chopped nuts on top for added texture and flavor.
Storage
Store cake pops in an airtight container in the refrigerator for up to 5 days. Allow them to come to room temperature before serving for the best flavor. You can also freeze the cake pops for up to 2 months; thaw in the refrigerator before enjoying.
How to Serve
Serve this delicious recipe with your favorite sides.
FAQs
Can I make the cake pops ahead of time?
Yes, cake pops can be made a day or two in advance and stored in the refrigerator. For longer storage, freeze them and thaw before serving.
What can I use if I don’t have buttermilk?
You can substitute buttermilk by mixing ½ cup of milk with 1 teaspoon of lemon juice or white vinegar. Let it sit for 5 minutes before using.
PrintChocolate Cake Pops Recipe

Delicious and easy-to-make Chocolate Cake Pops featuring a moist cocoa-infused cake combined with a creamy chocolate frosting, dipped in melted chocolate and optionally decorated with sprinkles or cookie crumbs. Perfect for parties, celebrations, or a fun homemade treat.
- Prep Time: 25 minutes
- Cook Time: 35 minutes
- Total Time: 1 hour 30 minutes
- Yield: Approximately 24 cake pops 1x
- Category: Dessert
- Method: Baking
- Cuisine: American
Ingredients
Cake
- 1 cup all-purpose flour
- 1 cup granulated sugar
- ⅓ cup natural cocoa powder
- ¾ teaspoon baking soda
- ½ teaspoon salt
- ½ cup unsalted butter (melted)
- 1 large egg + 1 large egg yolk (room temperature preferred)
- ½ cup buttermilk
- 1 teaspoon vanilla extract
- ¼ cup very hot water (must be steaming hot!)
Frosting
- ½ cup unsalted butter (softened)
- 1 teaspoon vanilla extract
- ⅛ teaspoon salt
- 1 ½ cups powdered sugar
- ⅓ cup natural cocoa powder
- 2 Tablespoons heavy cream
Decoration
- 15 oz chocolate or white chocolate melting wafers or almond bark
- Sprinkles or Oreo cookie crumbs for decorating (optional)
Instructions
- Prepare Cake Batter. Preheat your oven to 350°F (175°C) and lightly grease an 8-inch round cake pan. In a large bowl, whisk together the flour, sugar, cocoa powder, baking soda, and salt until evenly combined. Add the melted butter and mix well.
- Add Wet Ingredients. Stir in the egg and egg yolk thoroughly, scraping the sides and bottom of the bowl as needed. Using a mixer on low speed, add vanilla extract followed by the buttermilk, mixing until combined.
- Incorporate Hot Water. Gradually add the very hot water while stirring continuously until the batter is smooth and thin. This consistency is expected for this cake.
- Bake the Cake. Pour the batter into the prepared pan and bake for 30–35 minutes at 350°F, or until a toothpick inserted in the center comes out with moist crumbs. Let the cake cool in the pan for 15 minutes before inverting onto a wire rack to cool completely.
- Prepare the Frosting. In a clean bowl, beat the softened butter, vanilla extract, and salt until creamy. Gradually add the powdered sugar followed by cocoa powder, mixing until fully combined. Slowly stir in the heavy cream and then beat on medium-high speed for 30 seconds to achieve a smooth, creamy frosting.
- Crumble the Cake. Once cooled, crumble the cake into pebble-sized pieces in a large bowl without mashing it.
- Combine Cake and Frosting. Add the frosting to the crumbled cake and mix on low speed until mostly combined. The mixture should be smooth and hold together when pinched between your fingers.
- Form Cake Balls. Using a 1½ tablespoon scoop, portion the mixture and roll each into a smooth ball. Place on a wax-paper lined baking sheet, ensuring cake pops do not touch. Freeze for 30 minutes.
- Melt Chocolate. While chilling, melt the chocolate or melting wafers according to package instructions, using a cup or mug for easy dipping. Prepare any sprinkles or decorations.
- Prepare Sticks and Holders. Flip two cardboard egg cartons upside down and use a skewer to pierce holes in the center of the cups to hold the cake pop sticks snugly.
- Assemble Cake Pops. Remove cake balls from the freezer. Dip one end of a cake pop stick into melted chocolate, then insert halfway into a cake ball. This helps secure the stick.
- Dip Cake Pops. Turn the cake pop upside down and dip it gently into the melted chocolate, covering all sides. Allow excess chocolate to drip off, then insert the stick into the prepared holder. Immediately add sprinkles or cookie crumbs if desired.
- Set and Serve. Repeat dipping for all cake pops. Let the chocolate harden completely before removing from holders and enjoying. Store cake pops in an airtight container at room temperature or refrigerated.
Notes
- Ensure the hot water is very hot to help thin the cake batter properly.
- Do not mash the cake when crumbling; keep pieces as small pebble-sized crumbs.
- Chilling cake balls before dipping helps maintain shape and makes dipping easier.
- Use good quality melting wafers or chocolate for better coating and taste.
- Store cake pops in a cool, dry place to prevent the chocolate coating from melting.
Keywords: chocolate cake pops, cake pops, chocolate dessert, party treats, homemade cake pops